
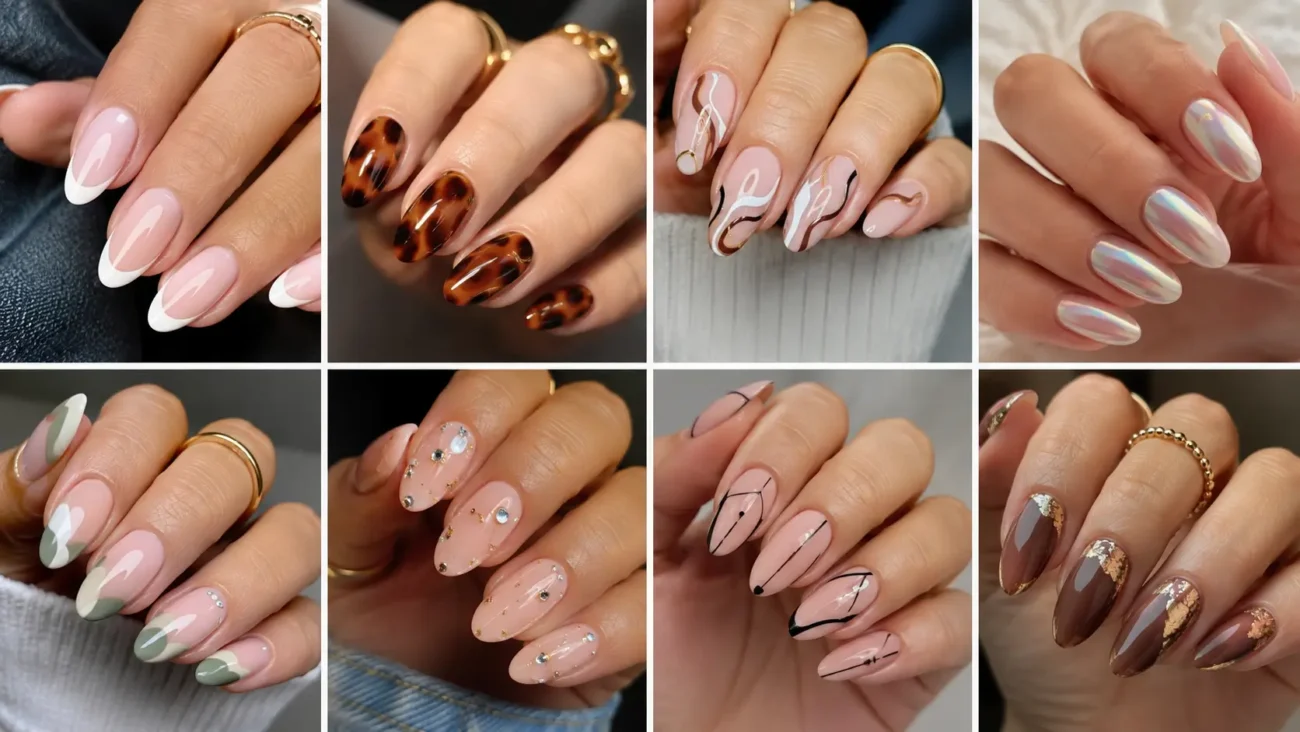
A beautiful manicure can change the way an entire outfit feels, especially when the design looks considered rather than crowded. The most exciting nail designs balance confident color with thoughtful placement, allowing every shade, curve, and open space to serve a purpose.
Instead of relying on familiar patterns, these ideas explore vertical movement, tonal framing, glossy color drenching, translucent openings, and controlled diffusion. Each concept can be adjusted for different nail lengths and personal styles without losing its visual identity. Some looks feel polished enough for work and formal events, while others bring a stronger editorial mood to simple clothing.
The key is choosing one clear design language and carrying it across the manicure with small variations. The following ideas offer fresh ways to create nails that look modern, photograph beautifully, and still feel wearable in everyday life.
Precision Vertical Ribbon Nail Designs
Vertical ribbon details bring structure to a manicure without making the nails look overly decorated. The direction of the lines naturally guides the eye from the cuticle toward the tip, giving the design a long and graceful appearance. This concept works especially well when the ribbons are slim, clean, and slightly different from nail to nail.
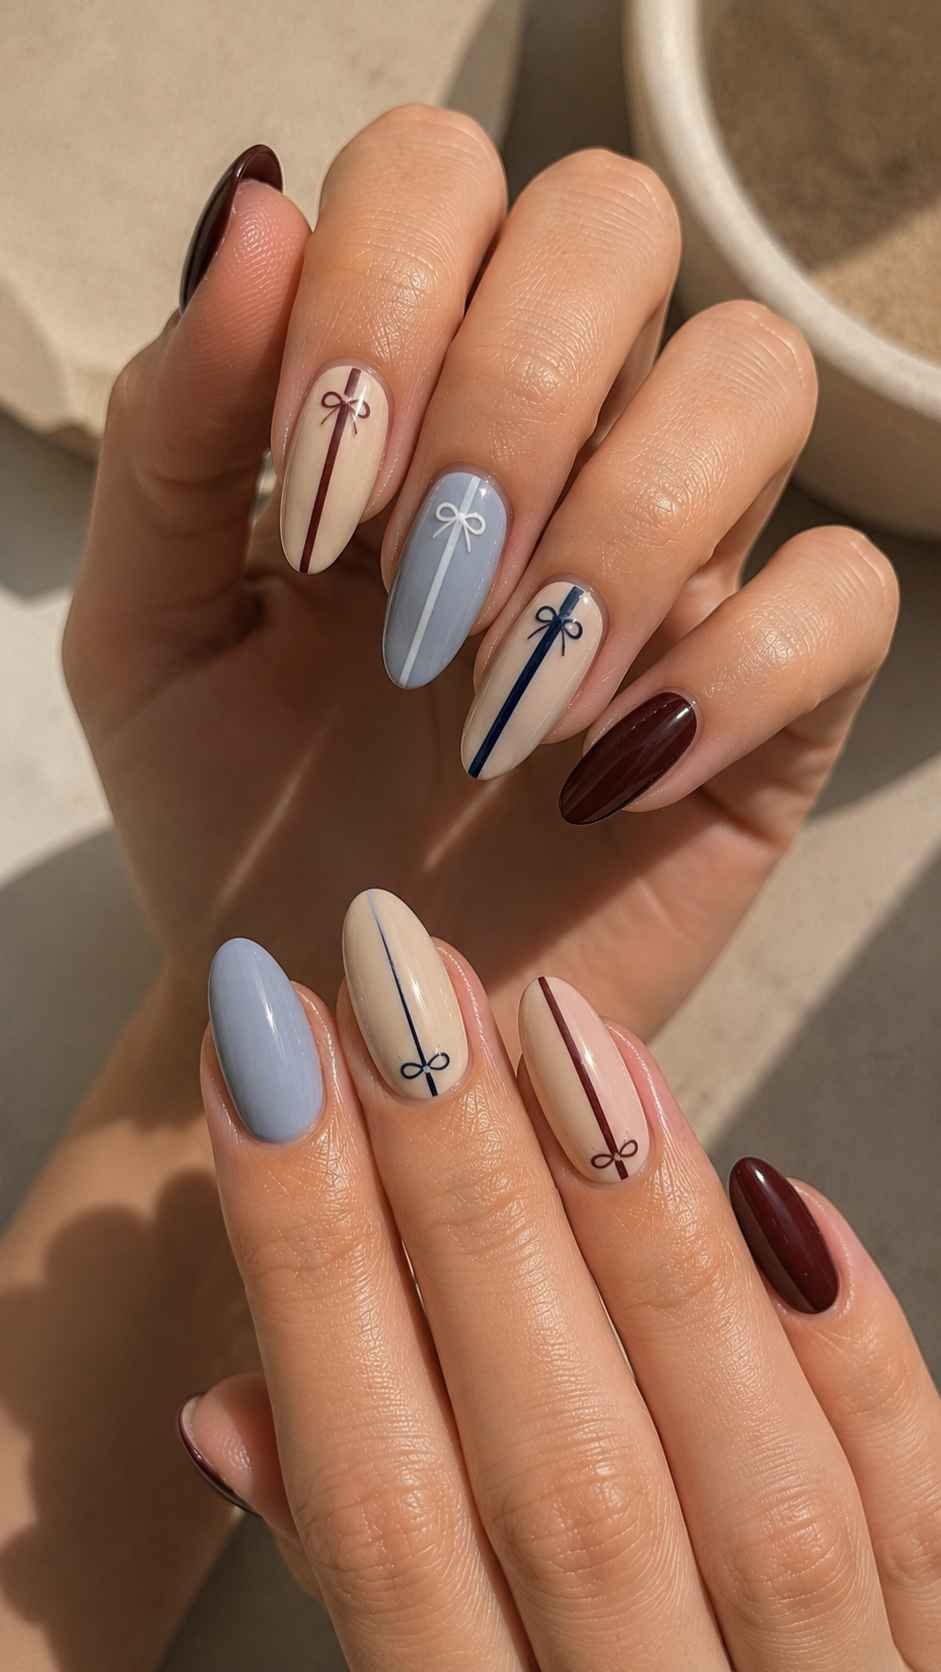 A combination of cream, sky blue, berry, or black can create a sharp graphic result, while softer related shades produce a quieter effect. The design should feel deliberate, so spacing matters as much as color. Leaving enough background visible allows every ribbon to stand apart and prevents the manicure from becoming visually heavy.
Place One Ribbon Through the Center
A single vertical ribbon through the middle of each nail creates a clear and elegant starting point. Choose a smooth base color, then add one narrow stripe that runs from near the cuticle toward the upper edge. The stripe can remain perfectly straight or bend slightly as it travels upward.
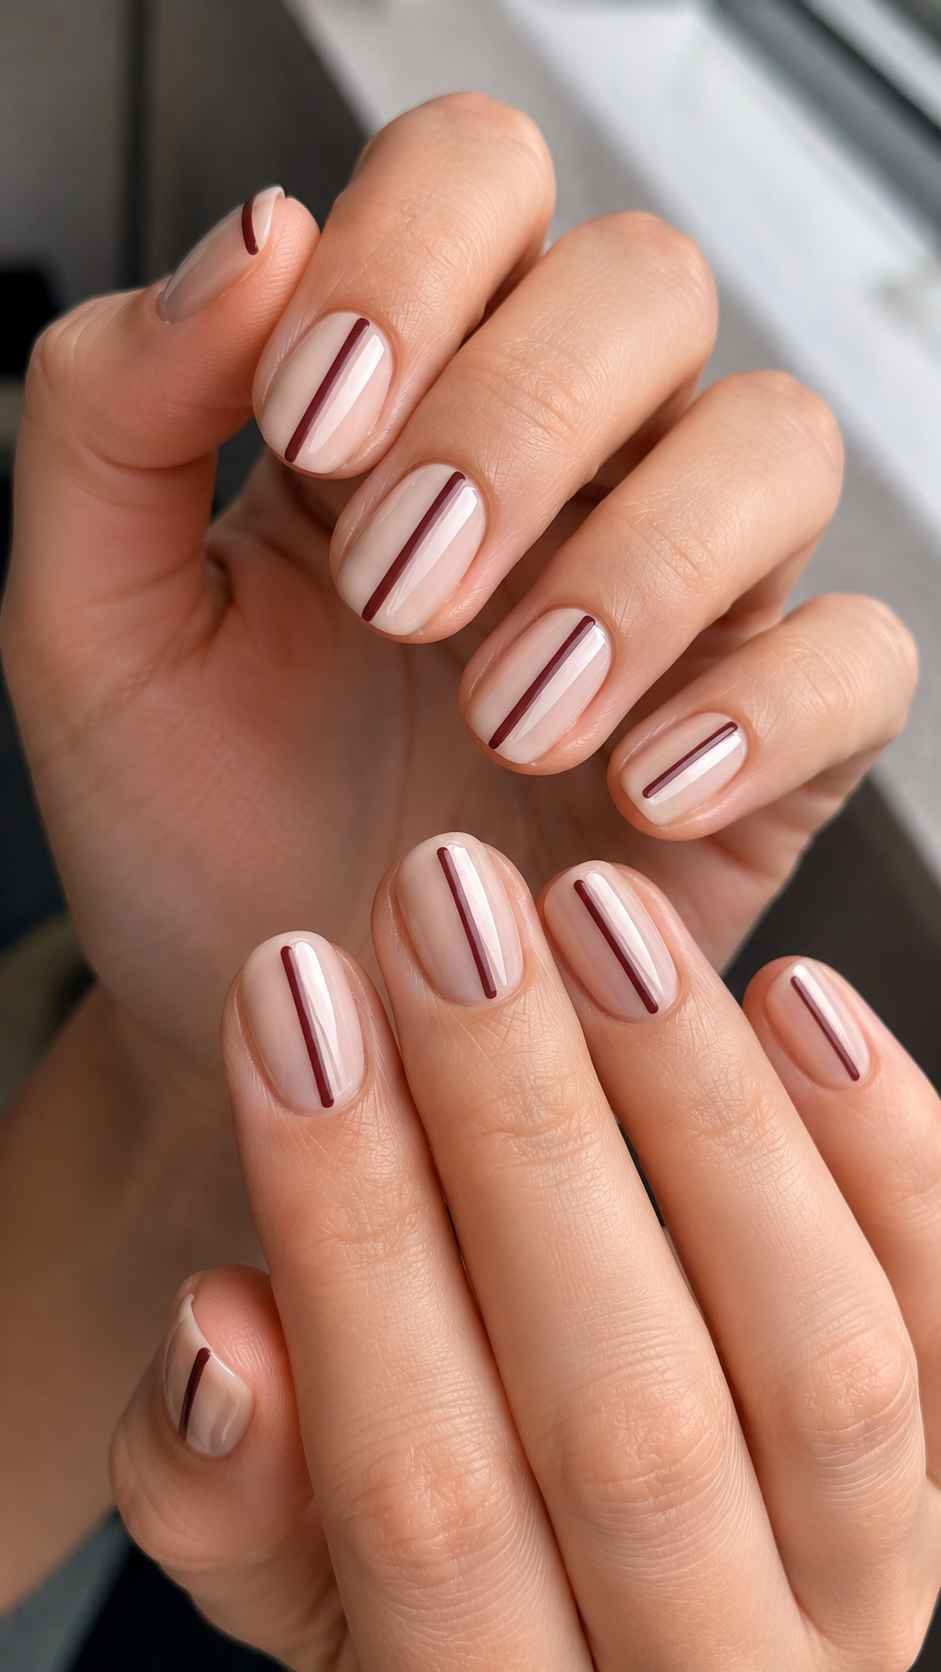
Use the same placement across most nails, then shift the ribbon toward one side on two fingers for gentle variety. This approach feels clean, memorable, and easy to coordinate with clothing that already includes strong colors or patterns.
Create an Offset Double Track
Two slim ribbons placed close together can make the design feel more dimensional without adding texture. Position the pair slightly to the left or right rather than directly in the center. One line can be darker and the other lighter, creating the impression of a shadow or reflected edge.
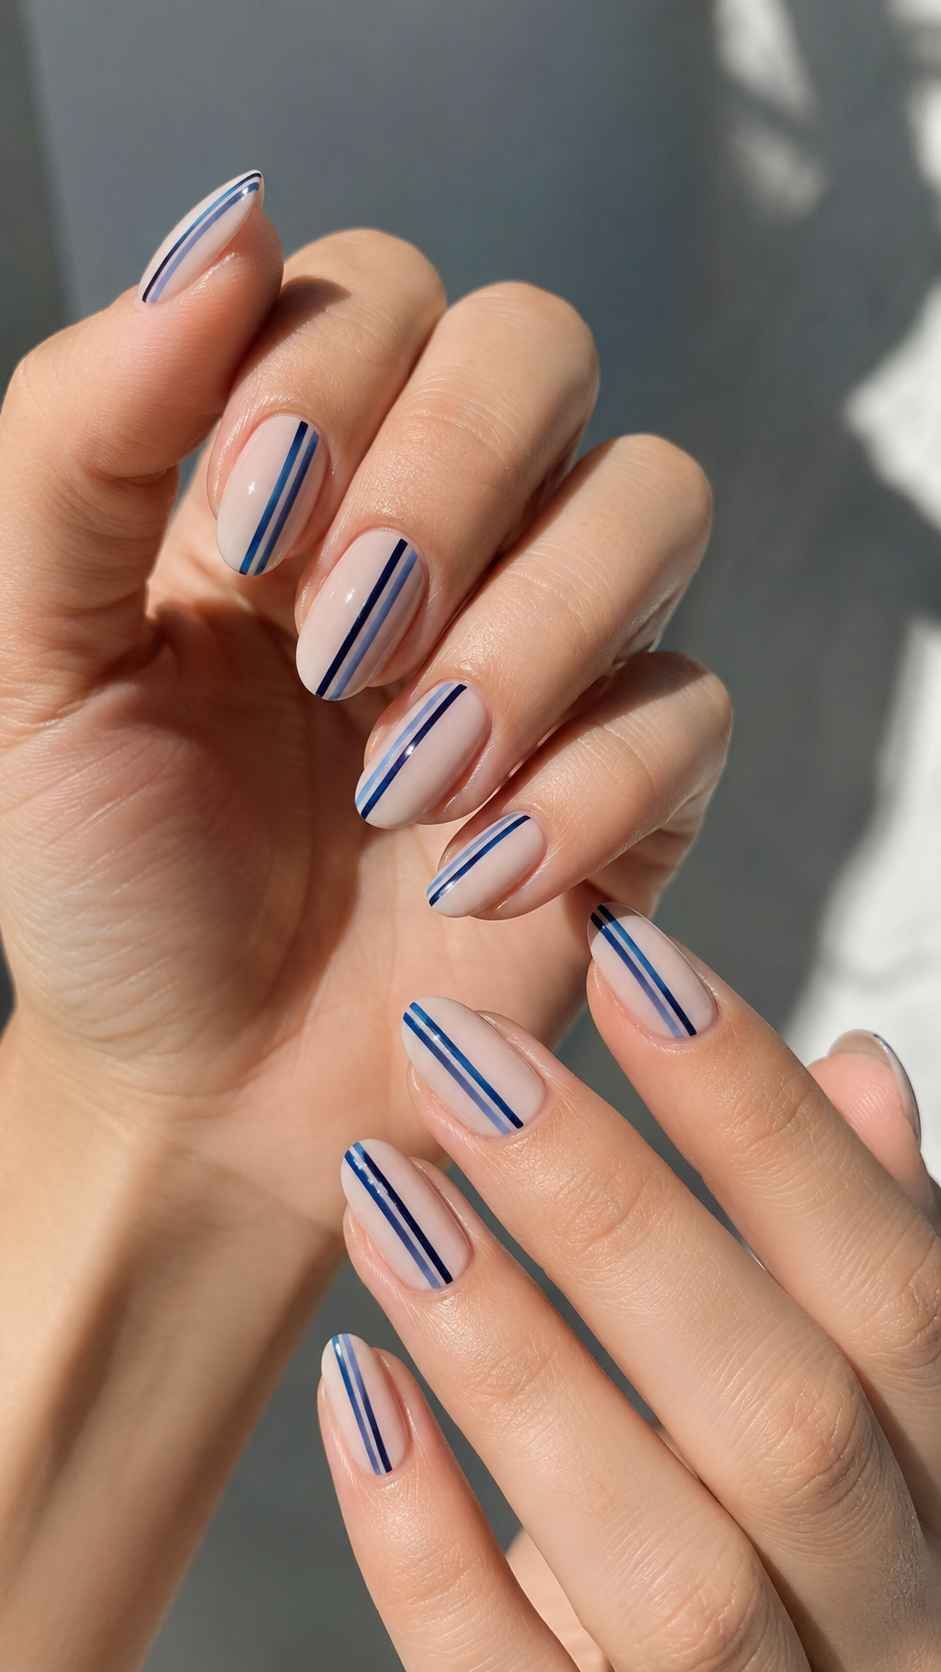
Keep the space between them narrow and consistent so the effect appears intentional. A pale background with deep navy and bright blue tracks looks crisp, while pink and red tracks create a warmer and more expressive manicure.
Divide the Nail With a Color Column
A wider vertical column offers a bolder interpretation of the ribbon idea. Paint one side of the nail in a strong shade while leaving the remaining area in a contrasting color. The dividing edge should remain straight and precise from bottom to top.
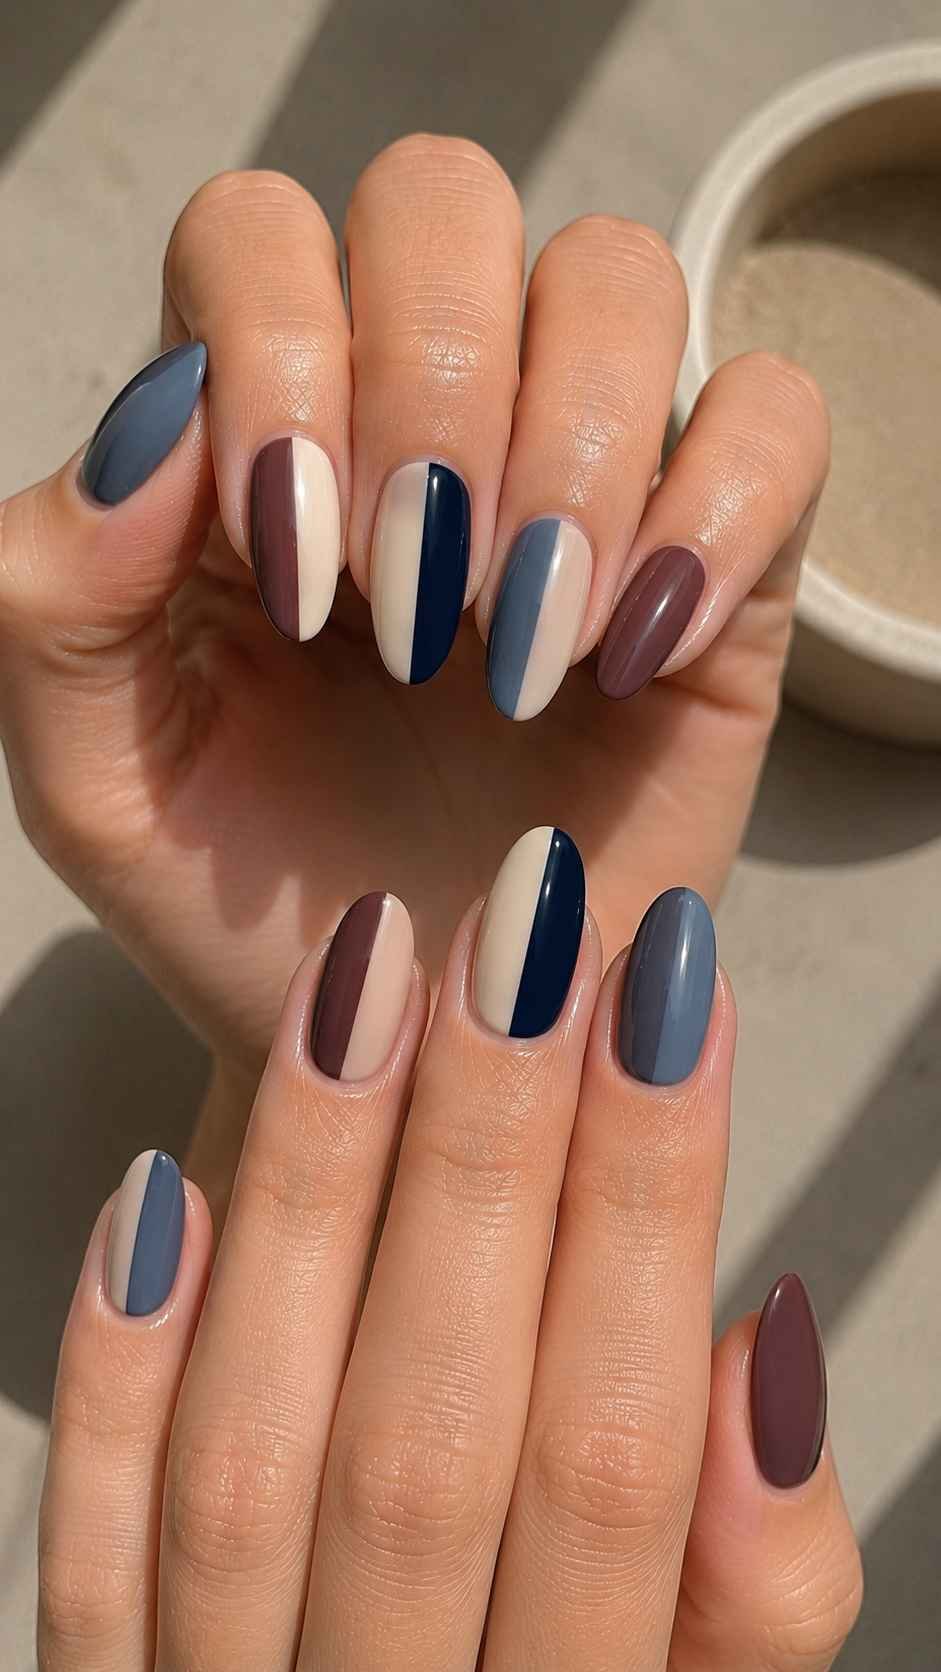
Alternate the column width across the manicure so some nails feel narrow and others more dramatic. This creates rhythm without repeating the exact same layout. A glossy finish helps the colors appear smooth and connected, even when the contrast between them is strong.
Mochi Pink Color Drench Nail Designs
Mochi pink brings a creamy candy quality to nail designs without feeling overly pale or powdery. Its glossy and slightly juicy appearance makes it useful as both a complete base and a central color story. Rather than decorating it with familiar motifs, build the manicure through layers of pink that shift from light rose to deeper raspberry.
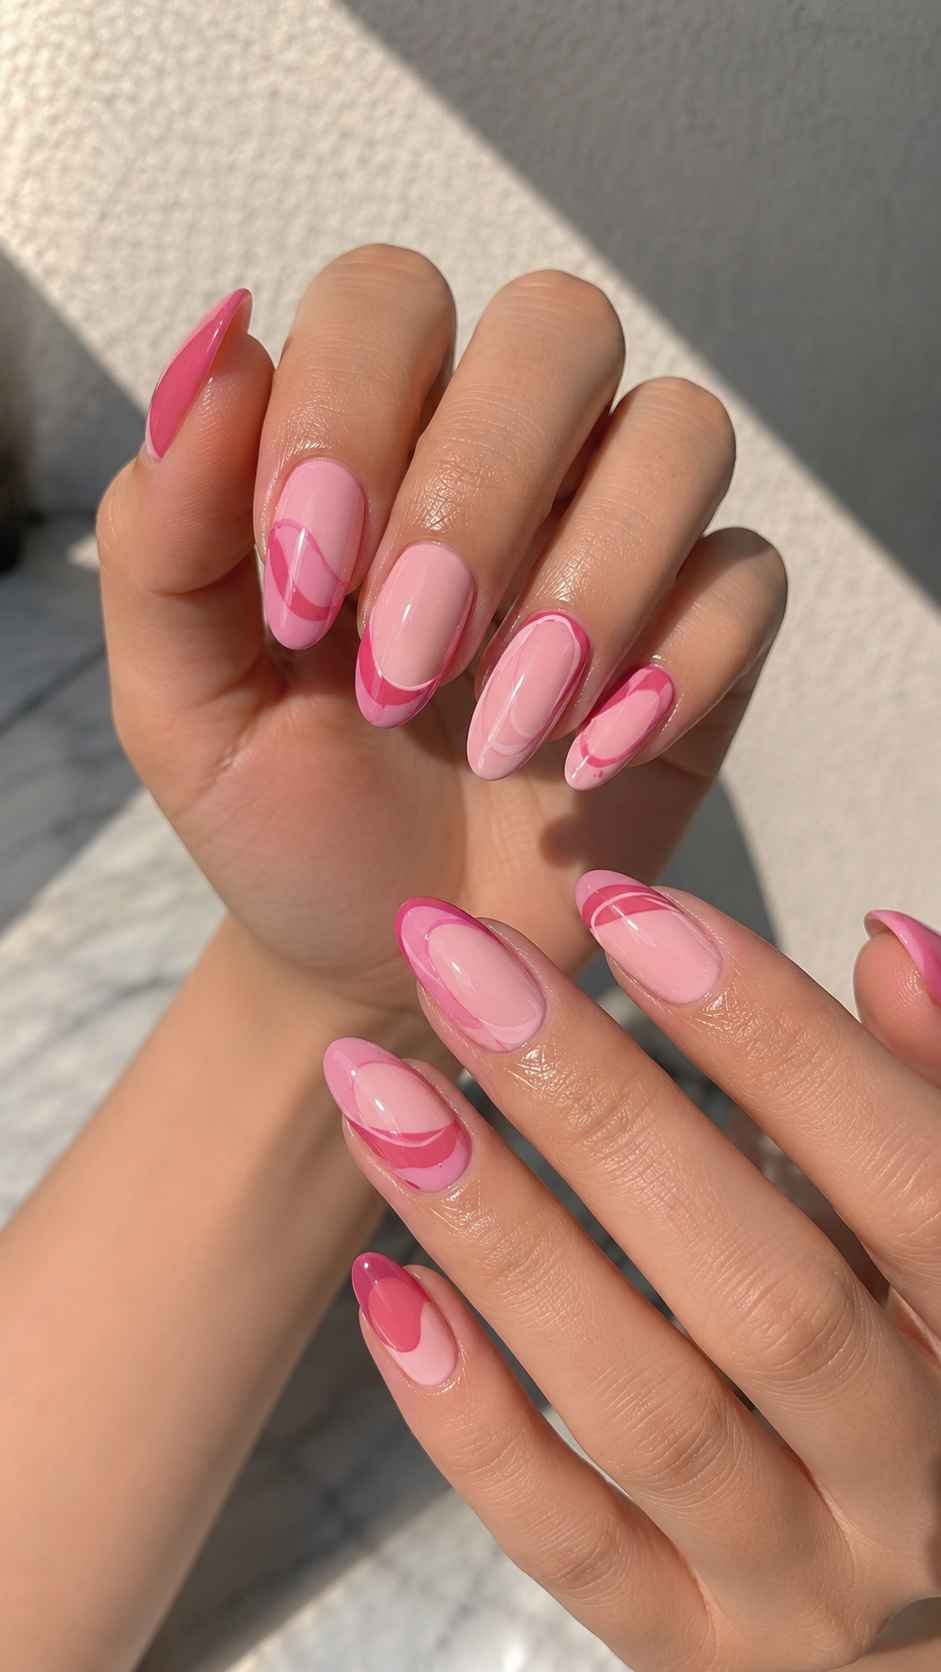
The result can feel cheerful, neat, and surprisingly sophisticated. Tone changes should be noticeable but related, allowing the nails to look coordinated from a distance. By using panels, borders, and curved sections, the manicure gains visual movement while keeping the soft pink identity clear.
Layer Rose Panels Across the Nail
Paint a mochi pink base, then add a darker rose panel across one side of each nail. The panel can begin near the cuticle on one finger and closer to the upper edge on another, creating a varied sequence.
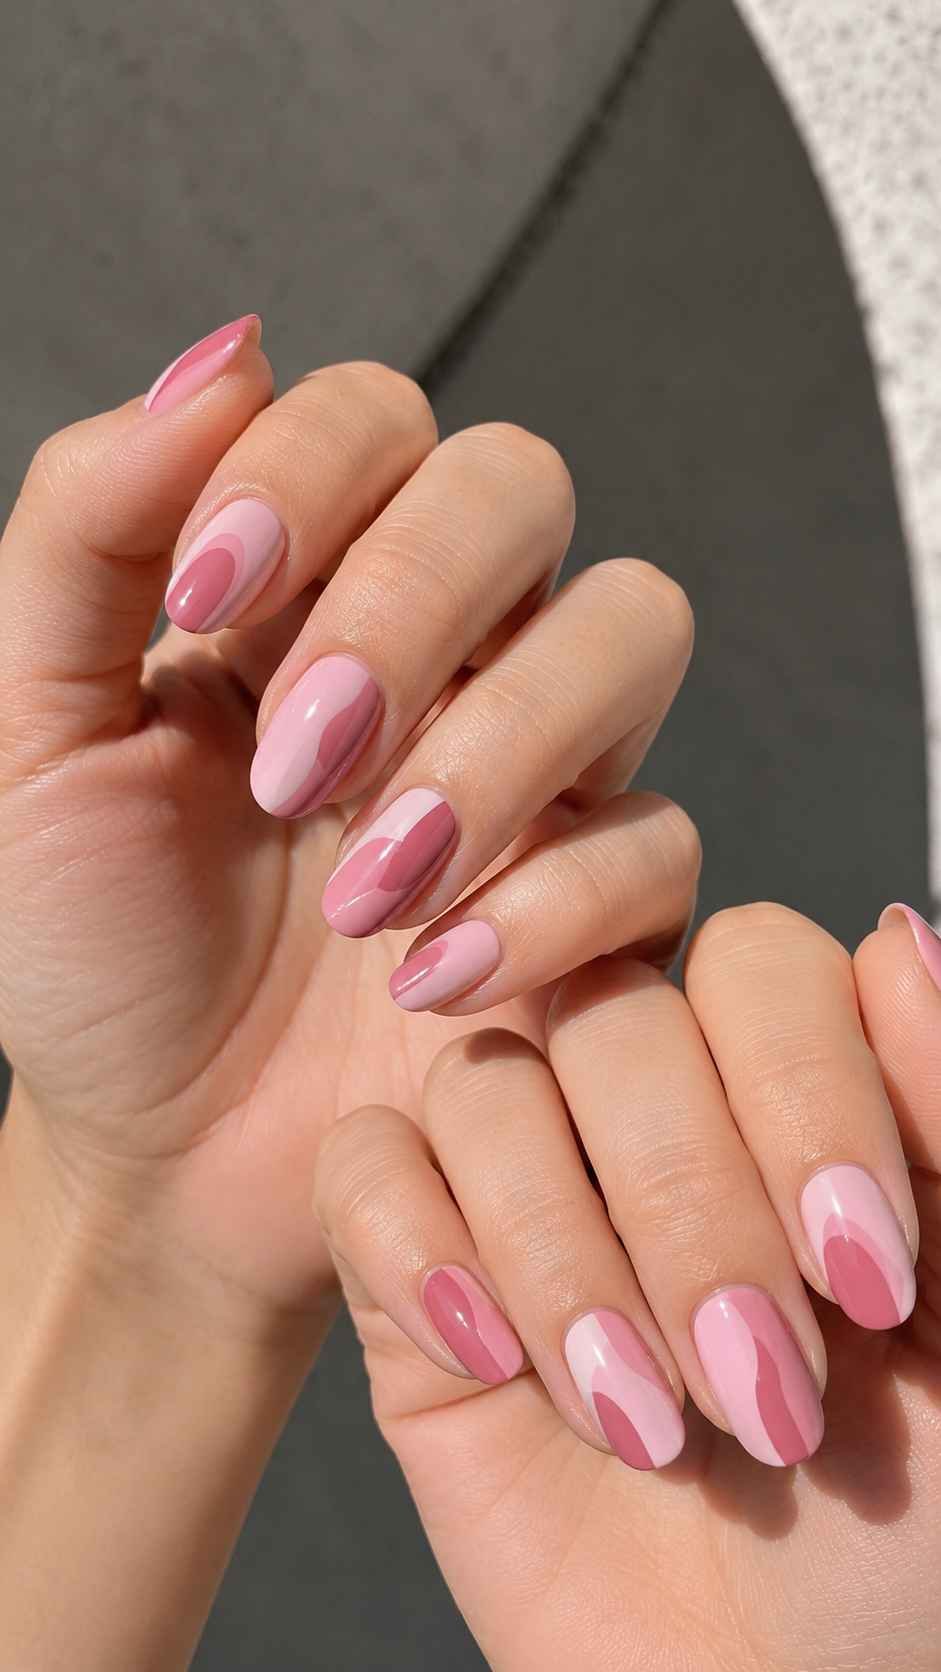
Keep the edges smooth and slightly curved so the design feels gentle rather than strict. A third shade can appear on one or two nails as a narrow inner panel. This layered approach gives the pink palette more depth and makes a simple color family look carefully designed.
Add Candy Pink Contour Bands
Contour bands follow the outer shape of the nail while leaving the center in a lighter pink. Begin with a creamy base, then paint a slim band along one side and around the upper curve. The band does not need to surround the whole nail.
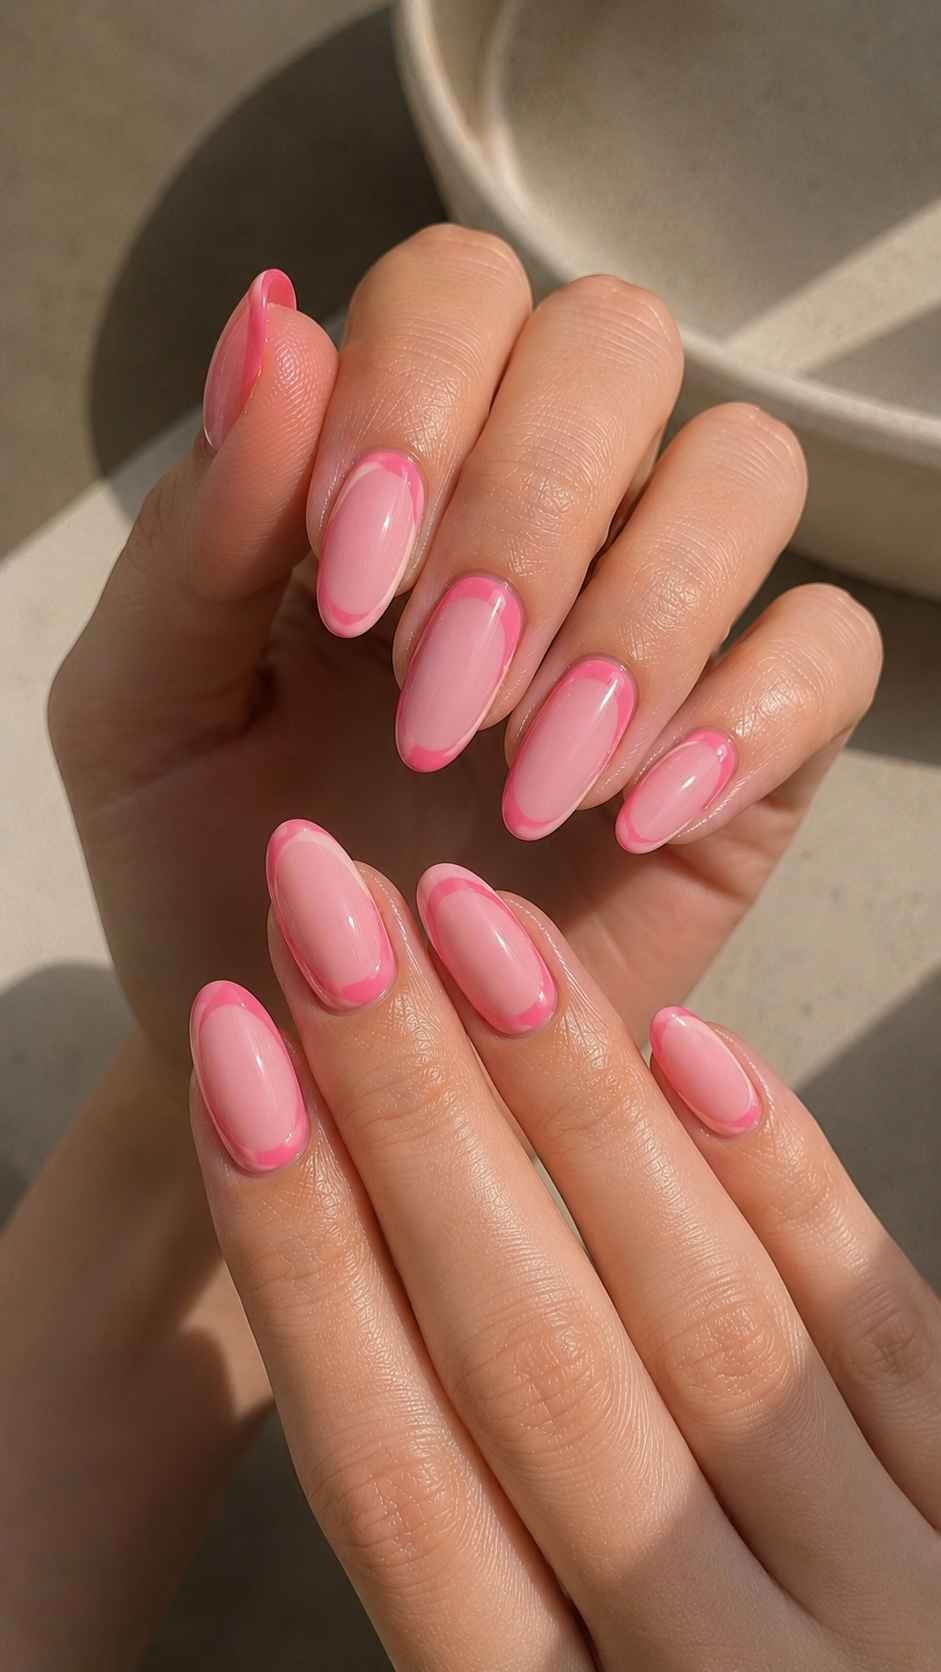
Stopping it before it reaches the opposite side creates a more modern and open appearance. Use a brighter candy pink for the contour and a calm rose for the center. The contrast will frame the nail while keeping the overall manicure soft and cohesive.
Introduce Berry Corner Panels
A deep berry shade can give mochi pink nail designs a stronger fashion mood. Place the berry color in one lower corner or upper corner, using a smooth diagonal or rounded edge. Keep the panel compact so the pink remains dominant.
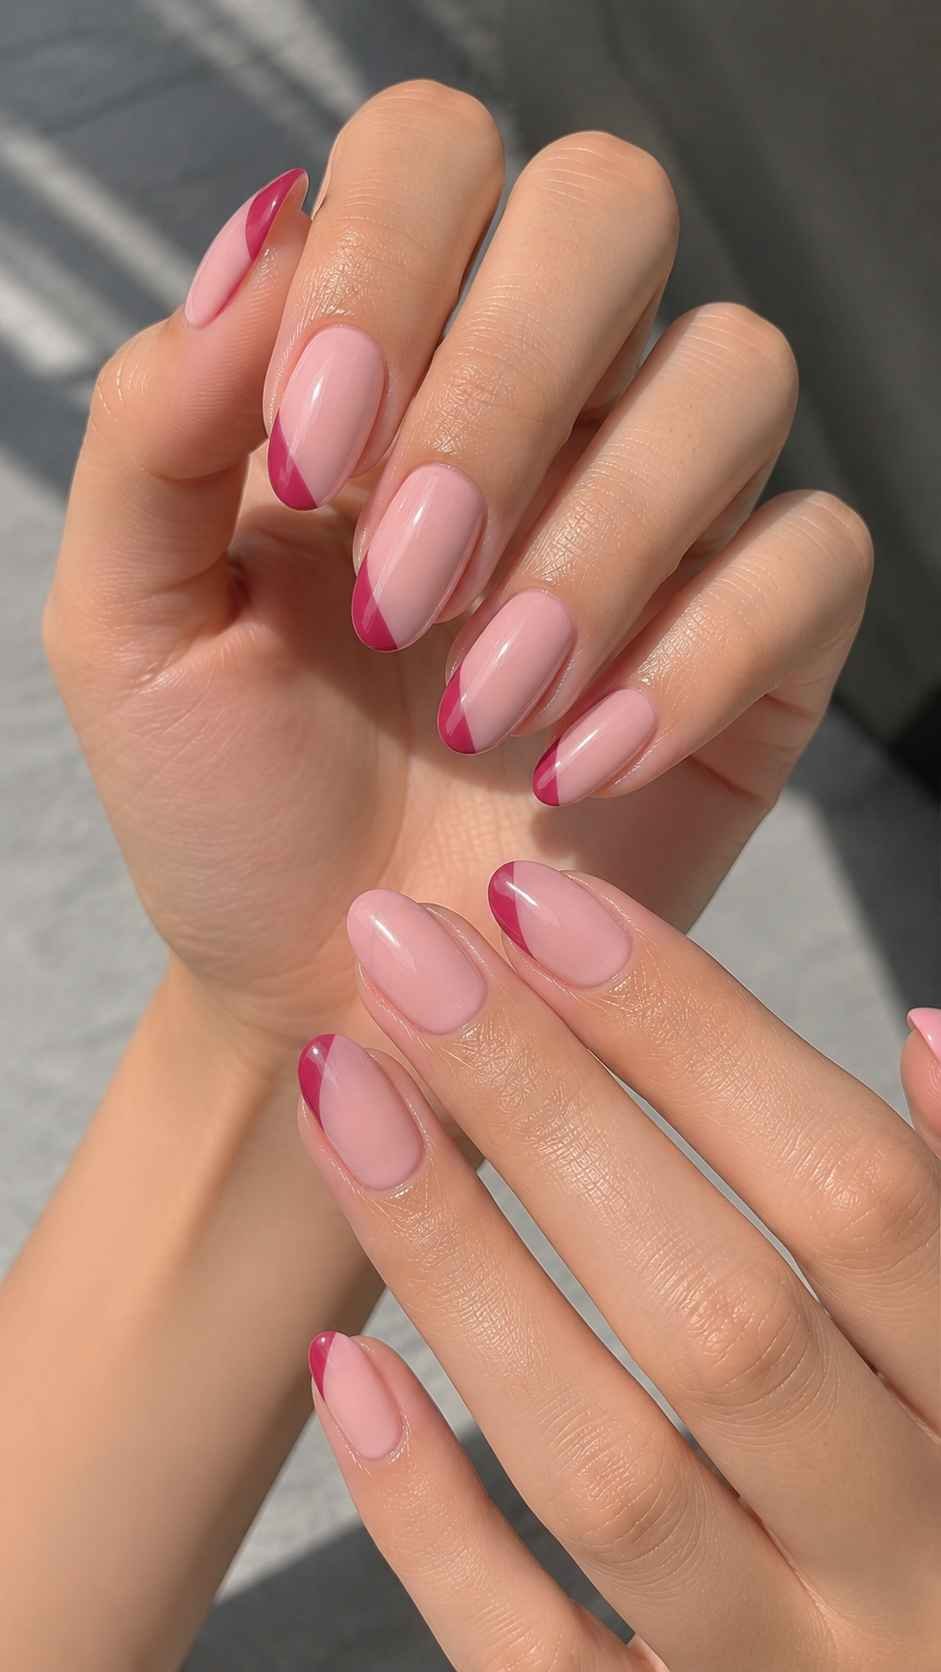
Repeat the berry detail in different corners across the hand to create a balanced but nonuniform layout. This small addition makes the manicure feel richer and works particularly well with black, cream, charcoal, or burgundy outfits.
Sky Blue Shadow Frame Nail Designs
Sky blue feels fresh when it is used as a framing color instead of covering every nail in the same way. A shadow frame places blue around selected edges, leaving another shade visible through the center. This creates the impression that each nail contains a small window or layered surface. The look can be airy with white and pale grey, or more dramatic with navy and ink blue. Keeping the frame width controlled is important because a frame that becomes too thick can hide the central color. The finished manicure should feel open, crisp, and architectural rather than overly decorative.
Trace a Slim Blue Perimeter
Start with a pale base and trace a thin sky blue line around most of the outer edge. Leave a small break near the cuticle or along one side so the border does not form a complete closed shape.
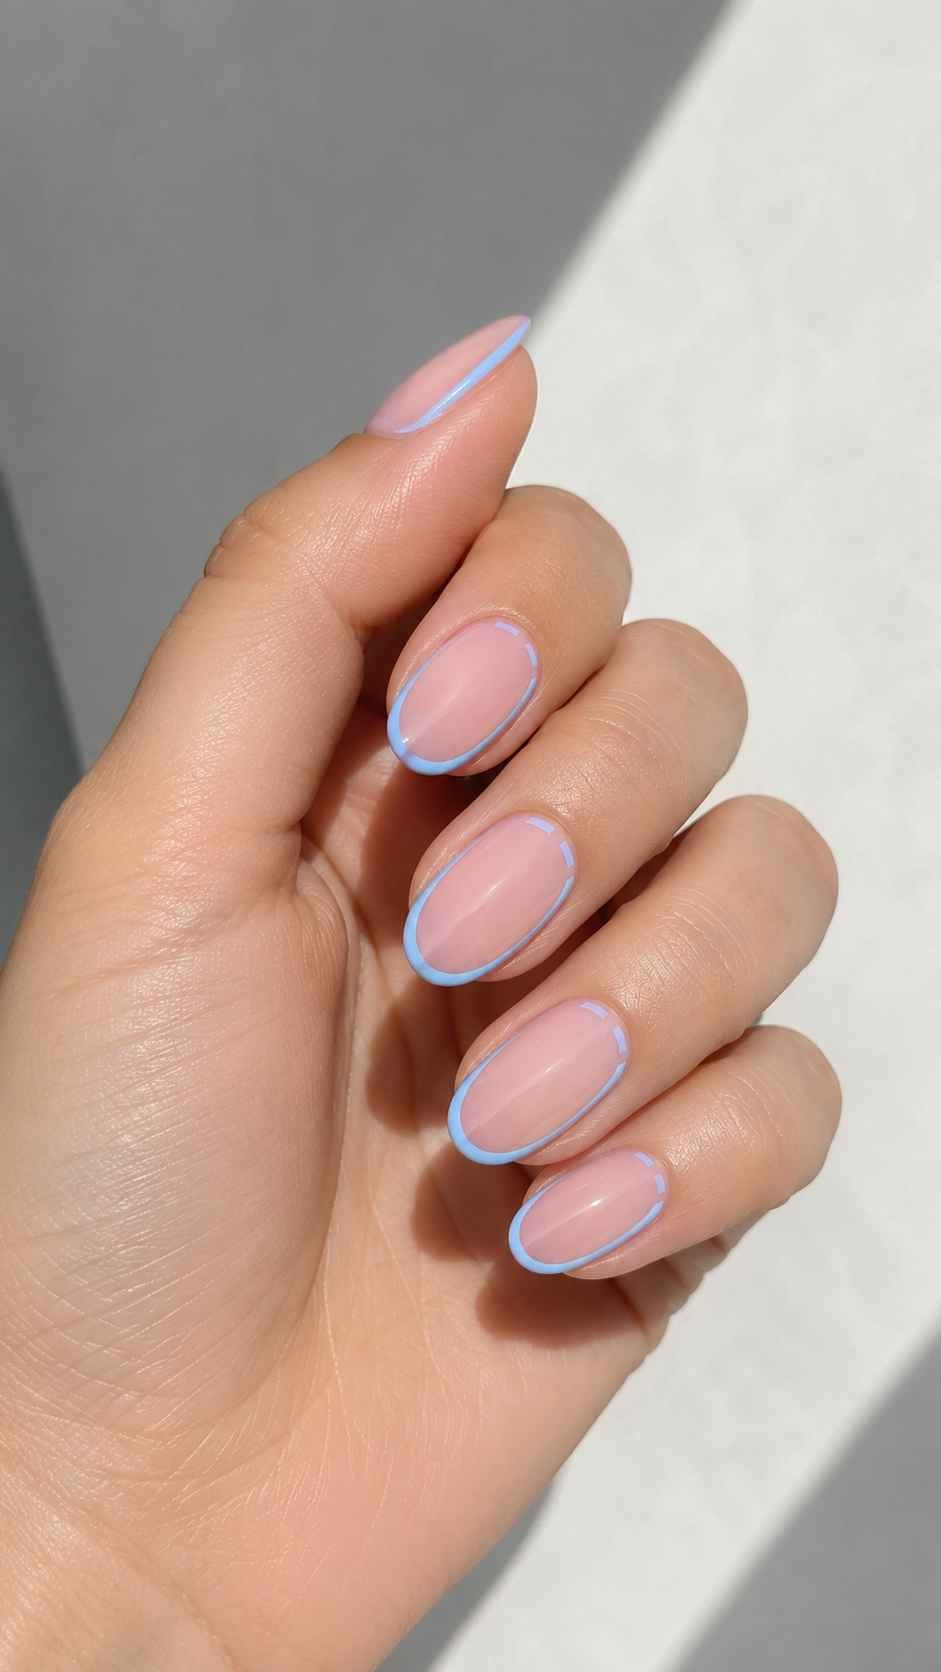
This open gap gives the design a lighter appearance. On another nail, place the gap near the top to keep the manicure varied. The thin border highlights the nail shape while allowing the base color to remain visible and calm.
Build a Blue Window Panel
Create a centered rectangular or softly rounded panel in a light neutral shade, then surround it with sky blue. The panel should not touch the edges, making it appear suspended inside the nail.
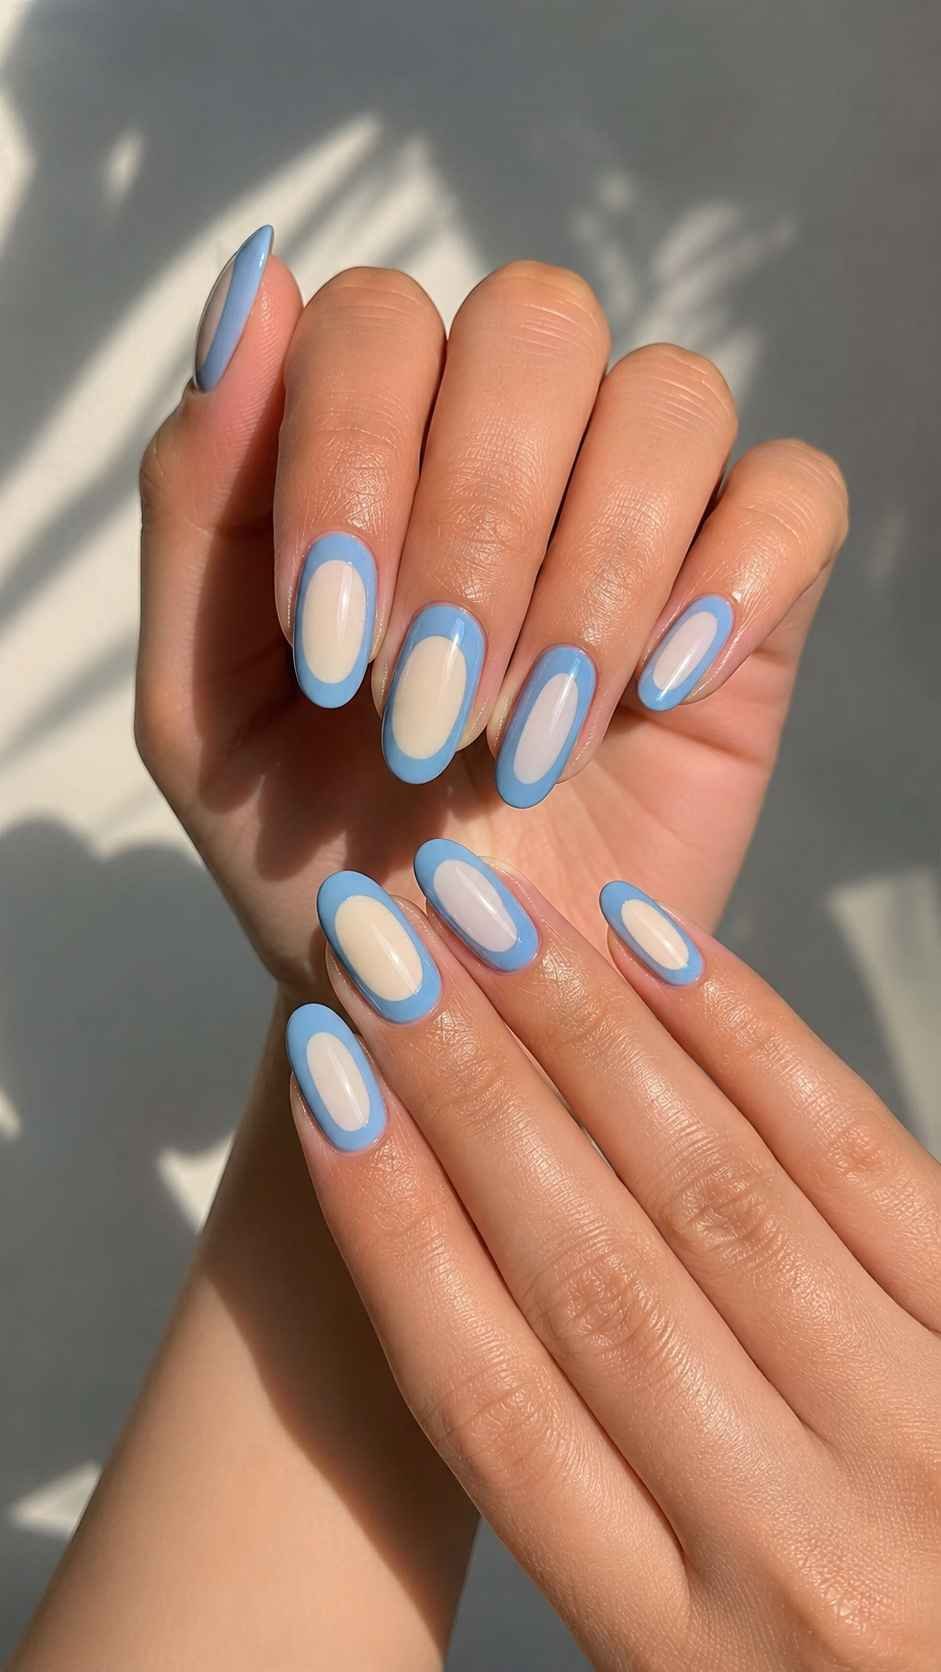
Change the panel proportions across the manicure, using a narrow tall shape on one finger and a wider shape on another. The repeated window idea connects the set, while the shifting proportions keep it from feeling copied across every nail.
Add a Tonal Side Shadow
Paint most of the nail in sky blue, then place a deeper blue strip along one side to create a shadow effect. The darker section can be straight, curved, or slightly tapered toward the tip. Add a very slim pale blue line between the two shades for extra separation.
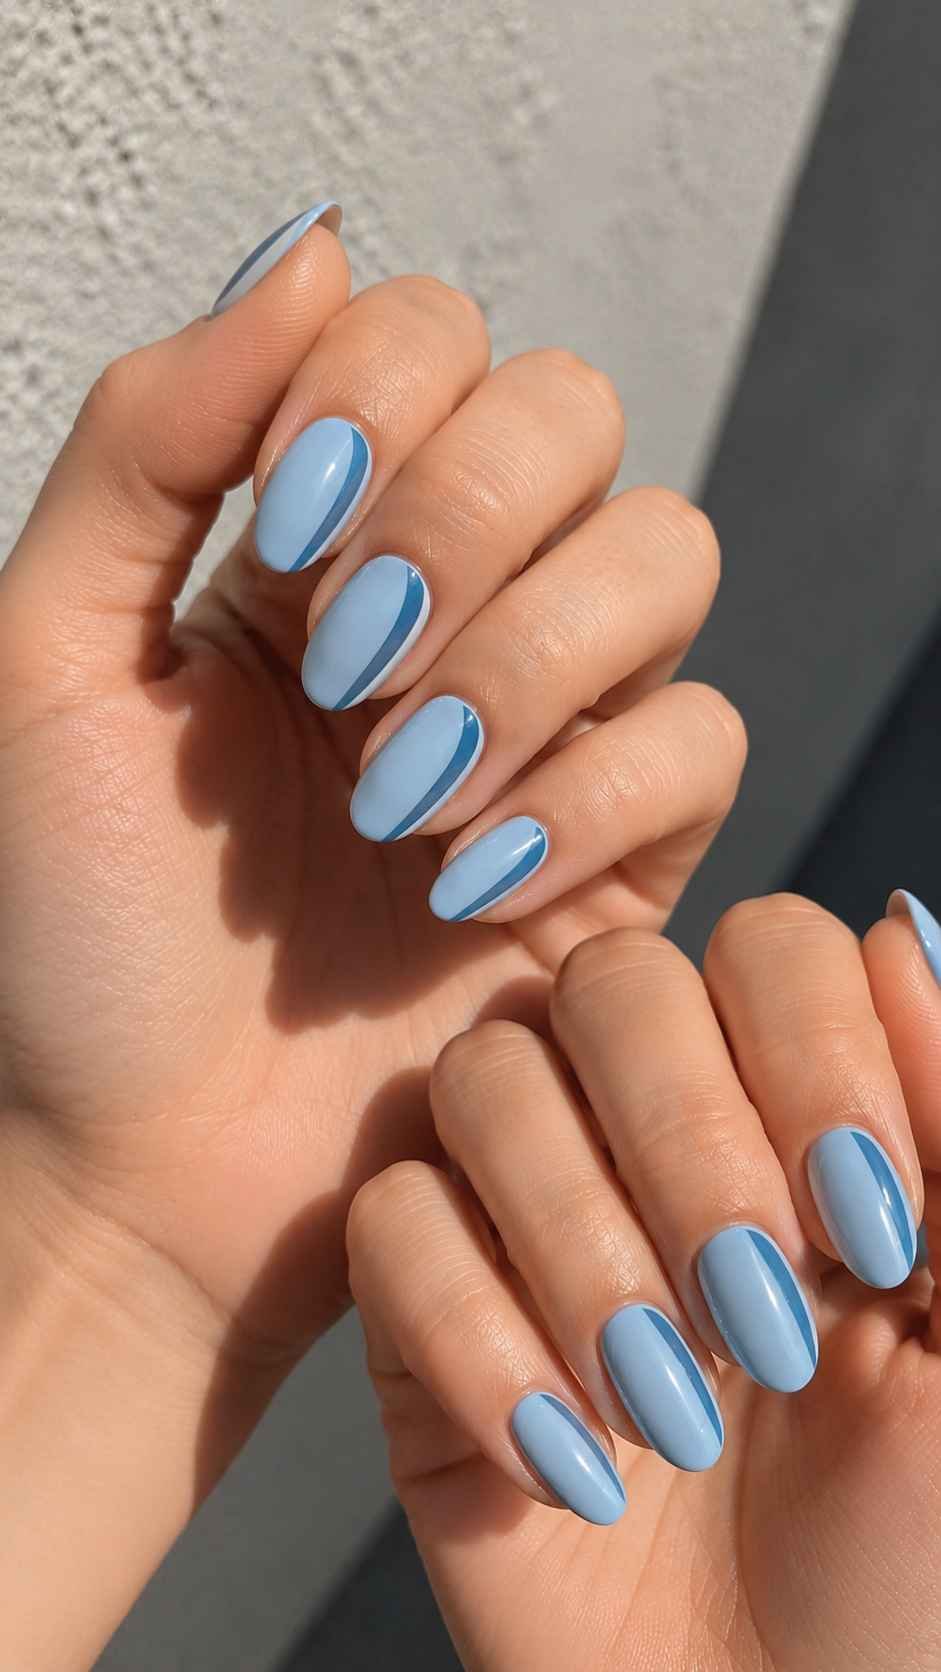
This tonal method is subtle from a distance but becomes more interesting when viewed closely. It gives solid color more structure without introducing unrelated decoration.
Cloud White Cutout Nail Designs
Cloud white offers a softer alternative to stark white and works beautifully when combined with clear or lightly tinted openings. The idea is not to leave the manicure unfinished, but to use visible space as part of the composition. White sections can float, overlap, or form pathways across the nail while the natural looking base remains visible.
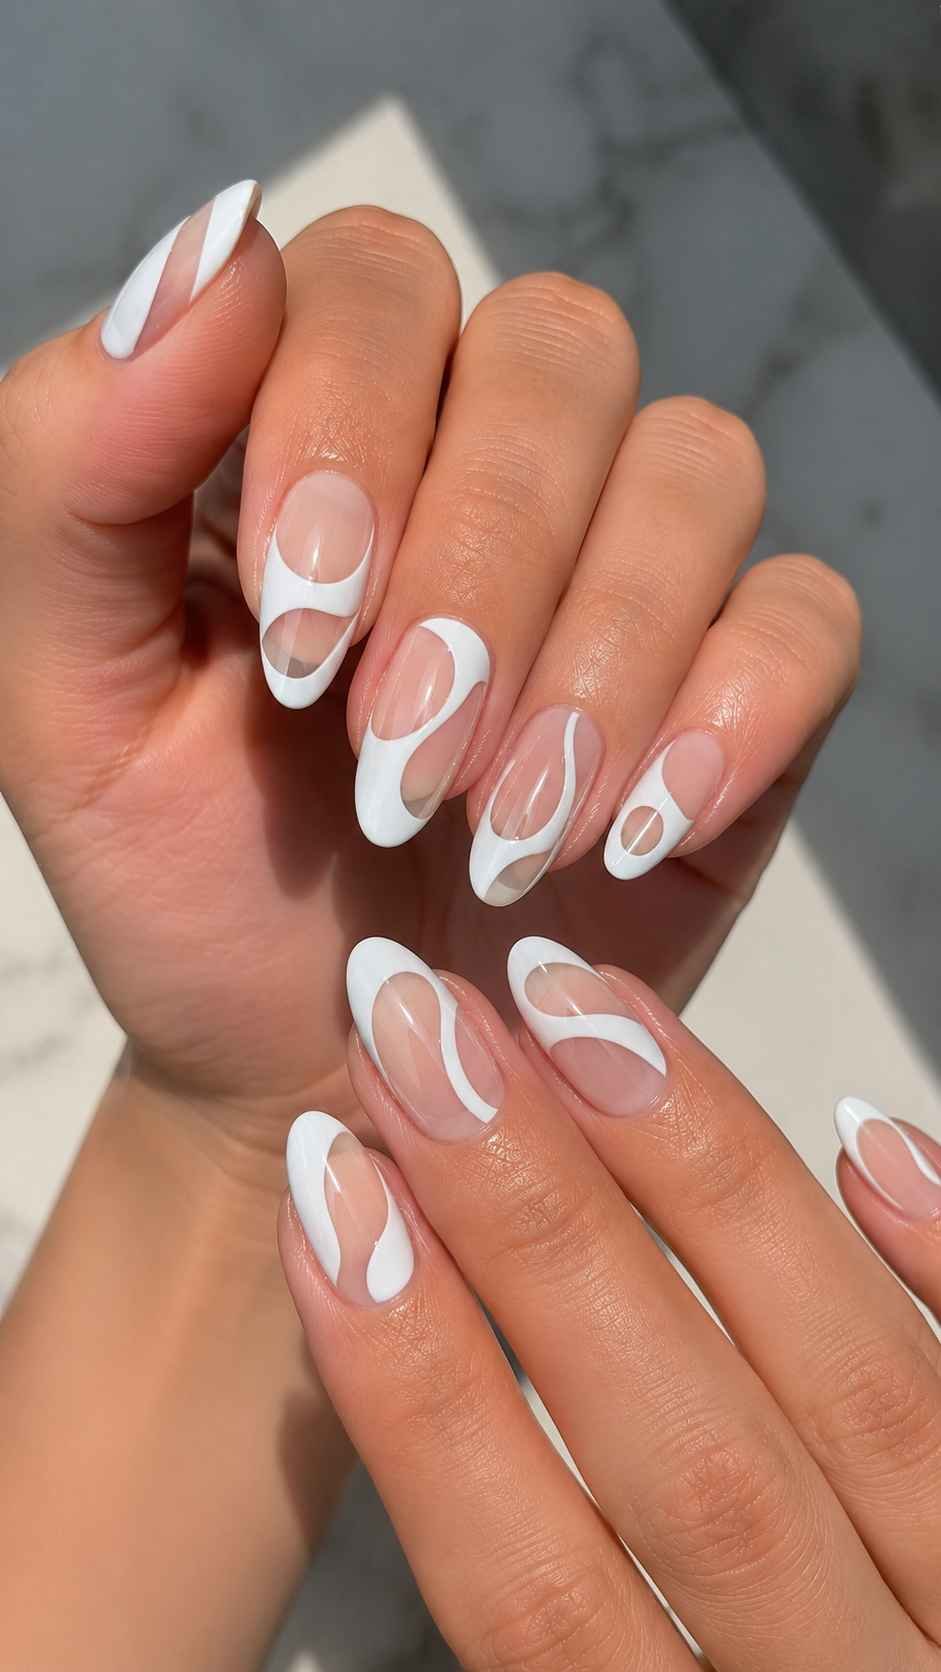
The finish should be smooth and softly glossy so the contrast does not appear harsh. These nail designs are especially useful when you want something bright and polished that still feels light on the hands.
Float White Panels Over a Clear Base
Apply a clear or barely tinted base, then paint an opaque white panel that sits away from the edges. The panel can be rectangular, oval, or gently curved, but it should look intentional and balanced. Place it higher on some nails and lower on others. A thin empty margin around the panel creates the floating effect. This layout feels modern and allows the natural nail tone to become part of the design rather than something that must be completely covered.
Shape a Soft Ivory Passage
Use cloud white across most of the nail, then leave one narrow passage of translucent base running through the center or along one side. The opening can remain straight or gently curve as it moves upward. Keep the width consistent so the passage reads clearly.
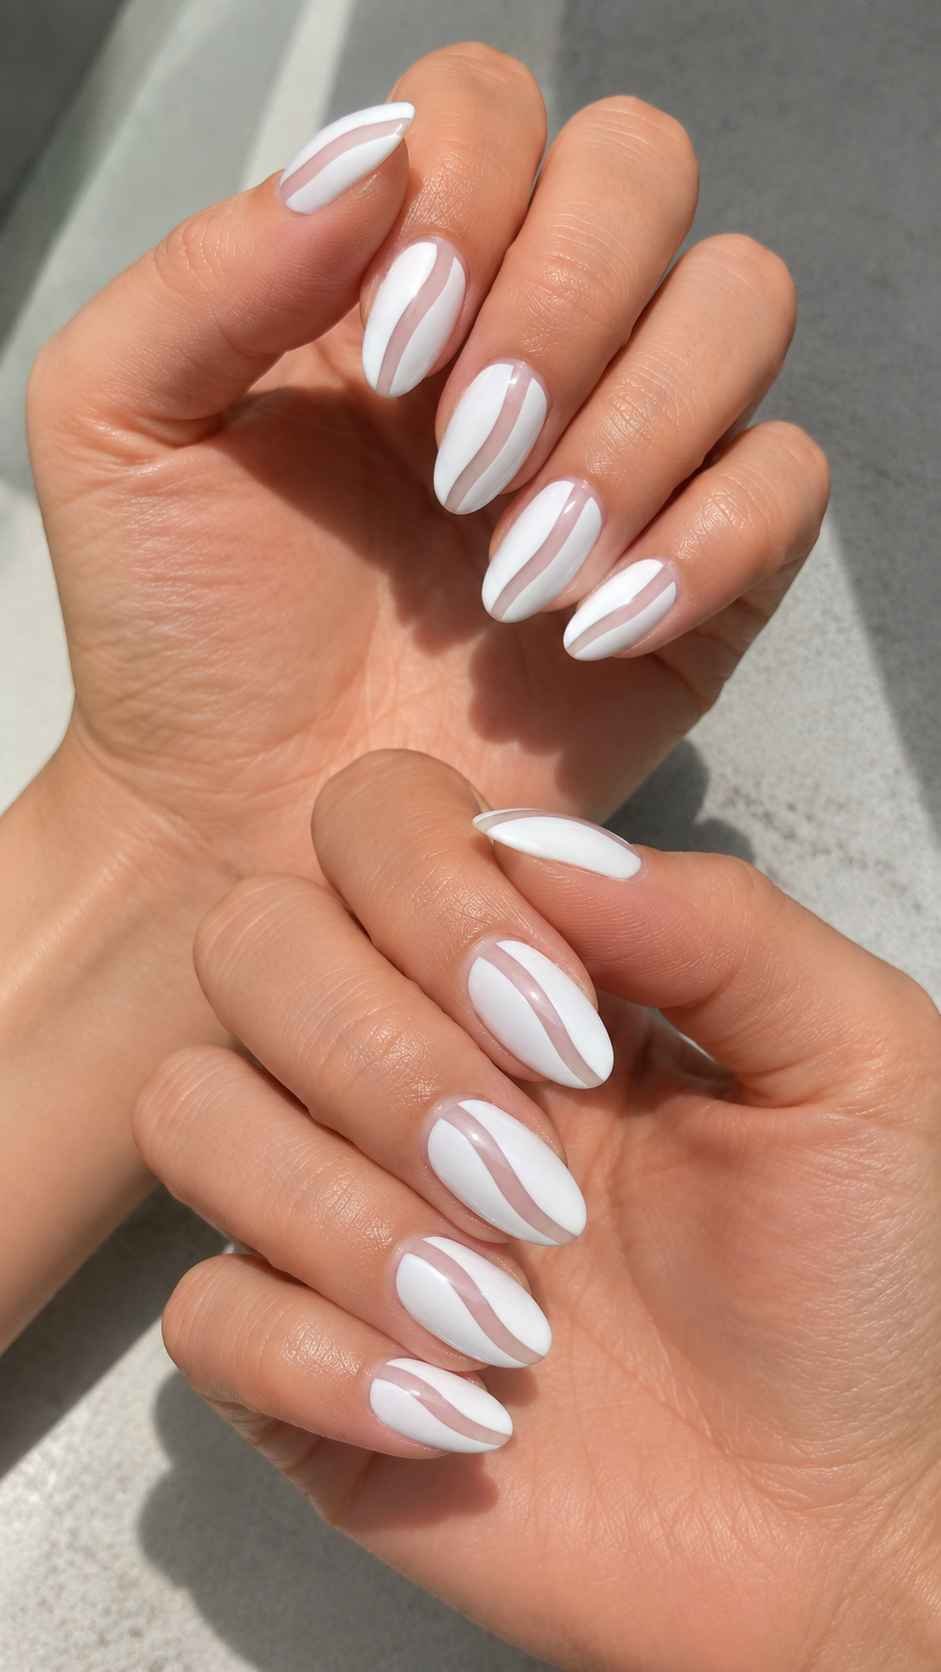
This idea gives white nails unexpected depth and makes them look more designed without relying on added imagery. A high gloss finish keeps the transition between white and translucent polish smooth.
Stack White Arches With Open Space
Paint two or three rounded white arches across the nail, leaving a slim translucent space between each one. The arches should sit within the nail rather than only at the outer edge. Vary their size so the lower curve is broader and the upper curve is smaller.
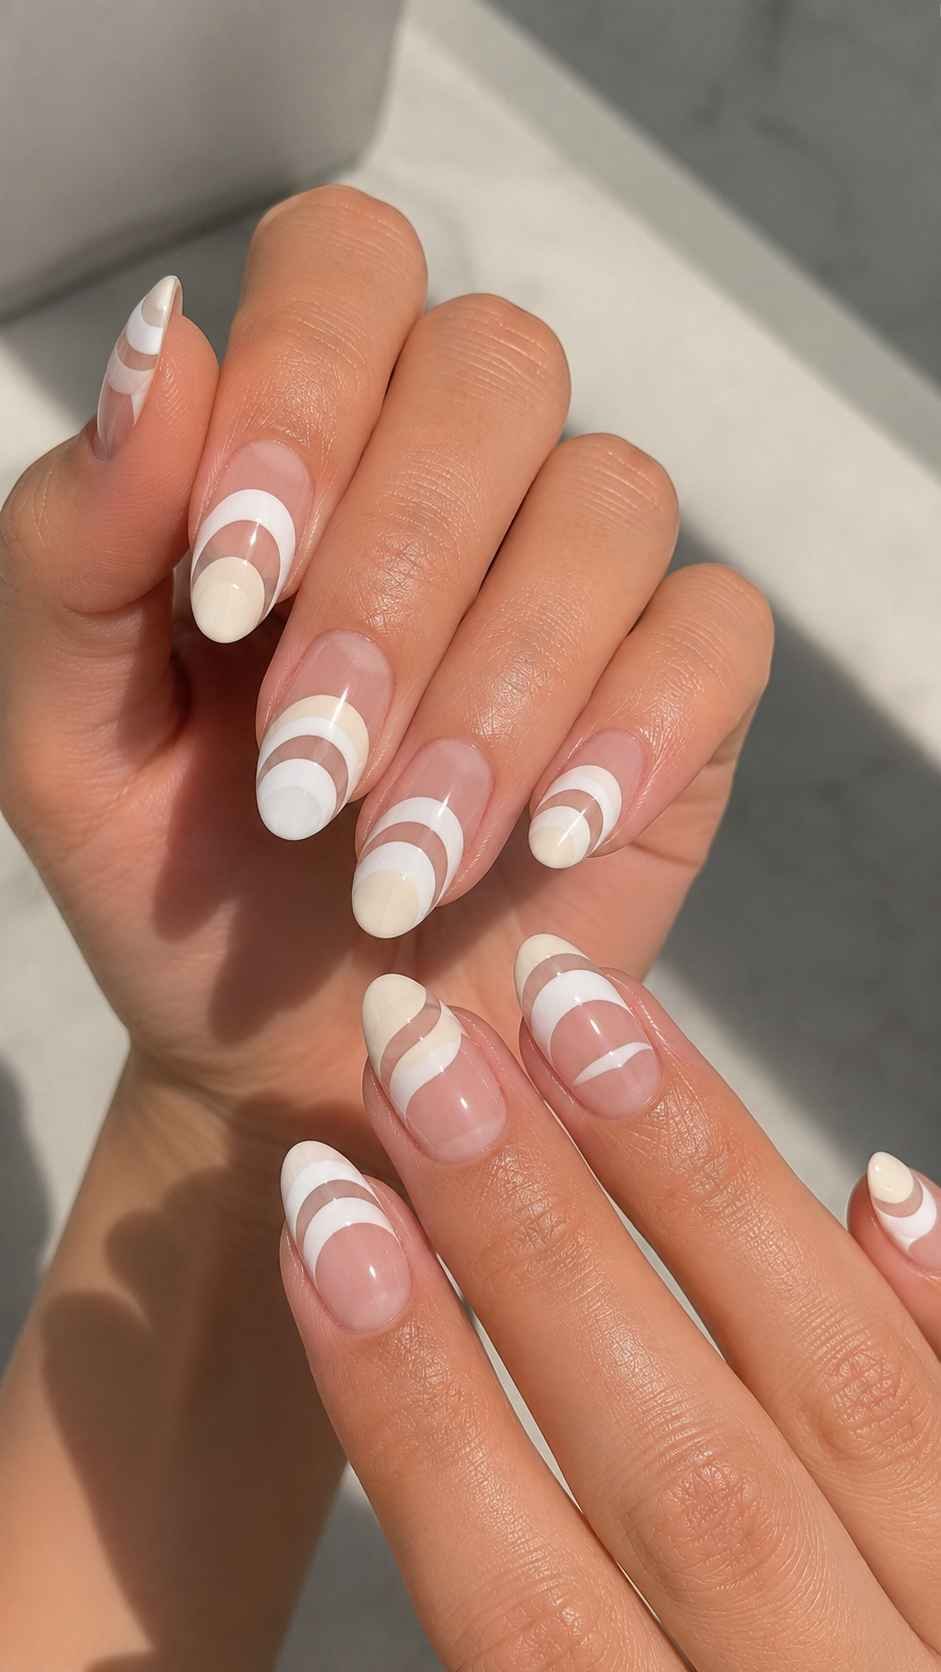
The result resembles layered paper or overlapping forms. Using a warm ivory on one arch and cloud white on another adds depth while keeping the palette refined.
Marigold Graphic Nail Designs
Marigold has enough warmth to make a manicure noticeable, yet it can still look polished when the shapes remain controlled. Instead of applying it as a plain full coat, use the shade to form directional segments, loops, and sweeping panels.
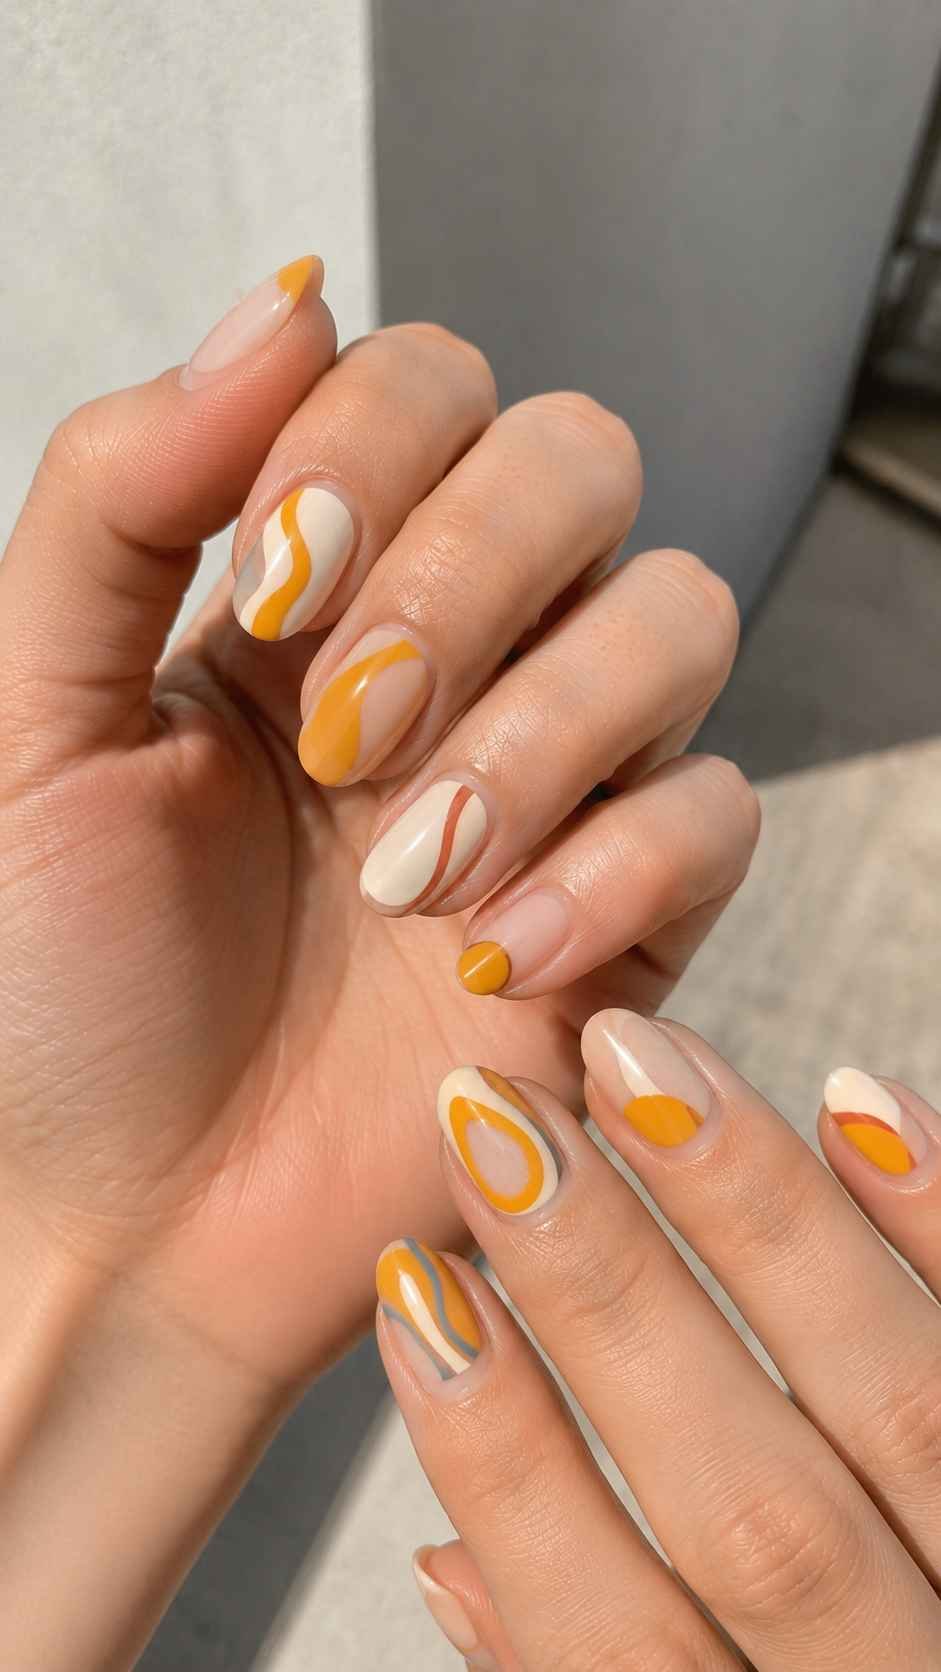
Pairing marigold with cream, coral, muted blue, or rich brown gives the color greater range. The manicure can feel sunny without becoming childish, especially when each shape is clean and the background remains simple. A strong top coat will make the orange leaning yellow appear deeper and more luminous.
Create Sunbeam Segments
Divide the nail into three or four long segments that spread outward from one lower corner. Fill one or two segments with marigold and leave the remaining sections in cream or soft coral. The lines between the segments should be crisp and slightly angled.
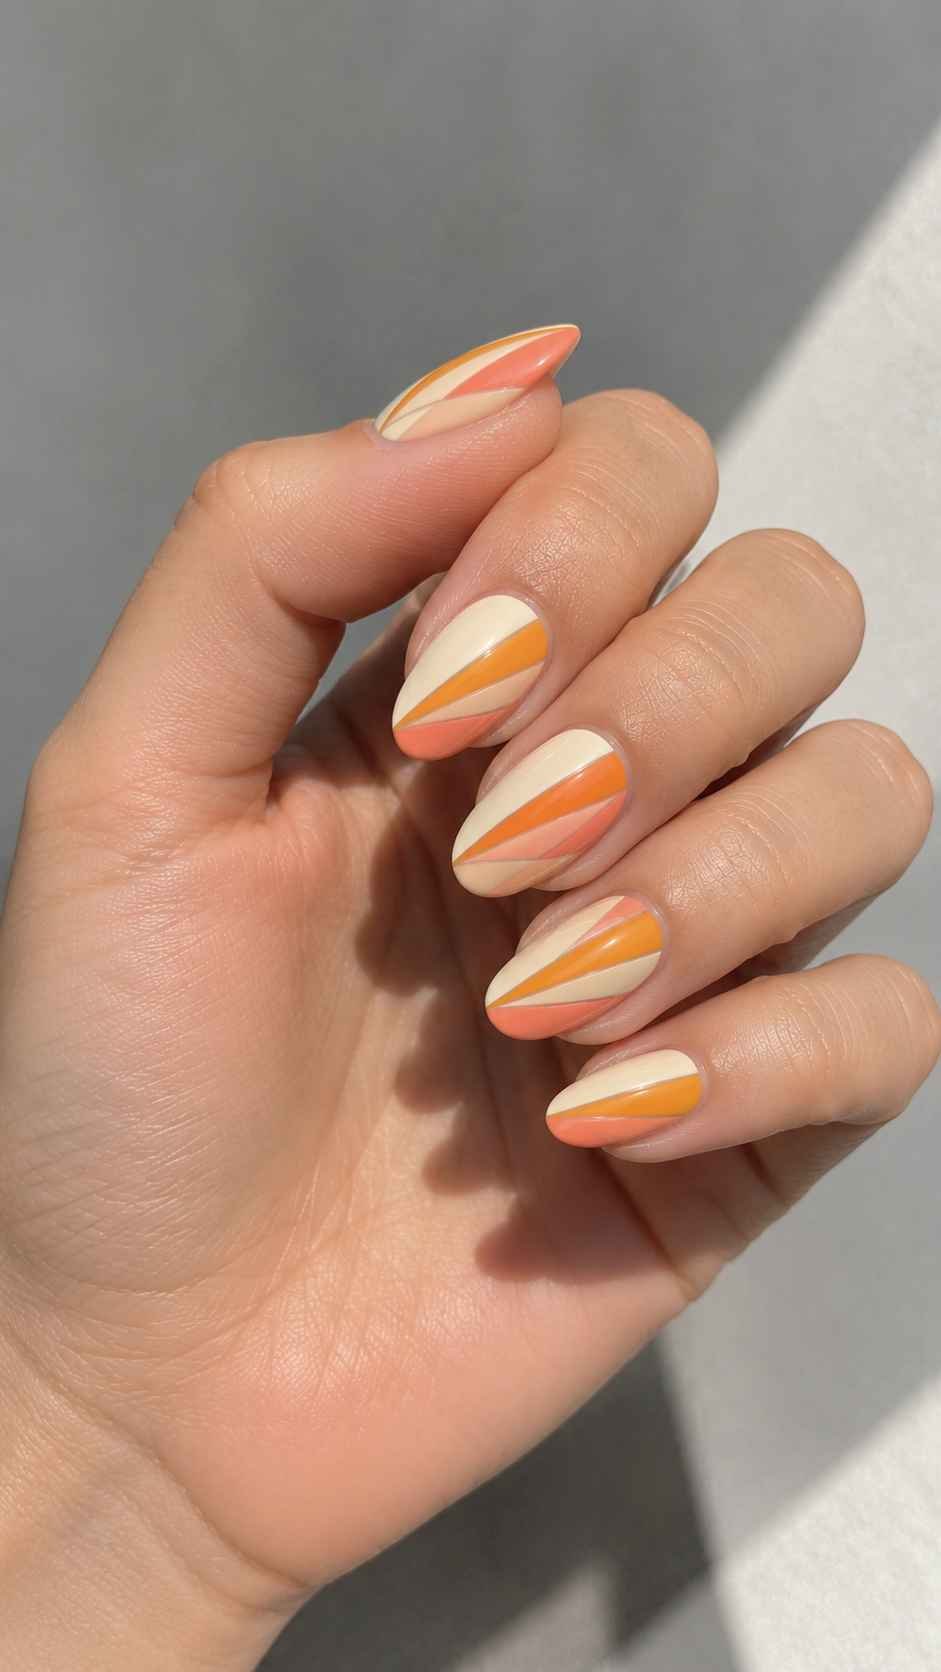
Change the starting corner on different nails so the beams appear to travel across the hand. This creates movement while keeping the design connected through repeated color and direction.
Paint a Golden Ribbon Loop
A rounded marigold loop can become the main feature of each nail. Begin the ribbon near one side, curve it across the center, then guide it upward without closing the shape completely. The open loop keeps the design light and avoids the appearance of a simple circle.
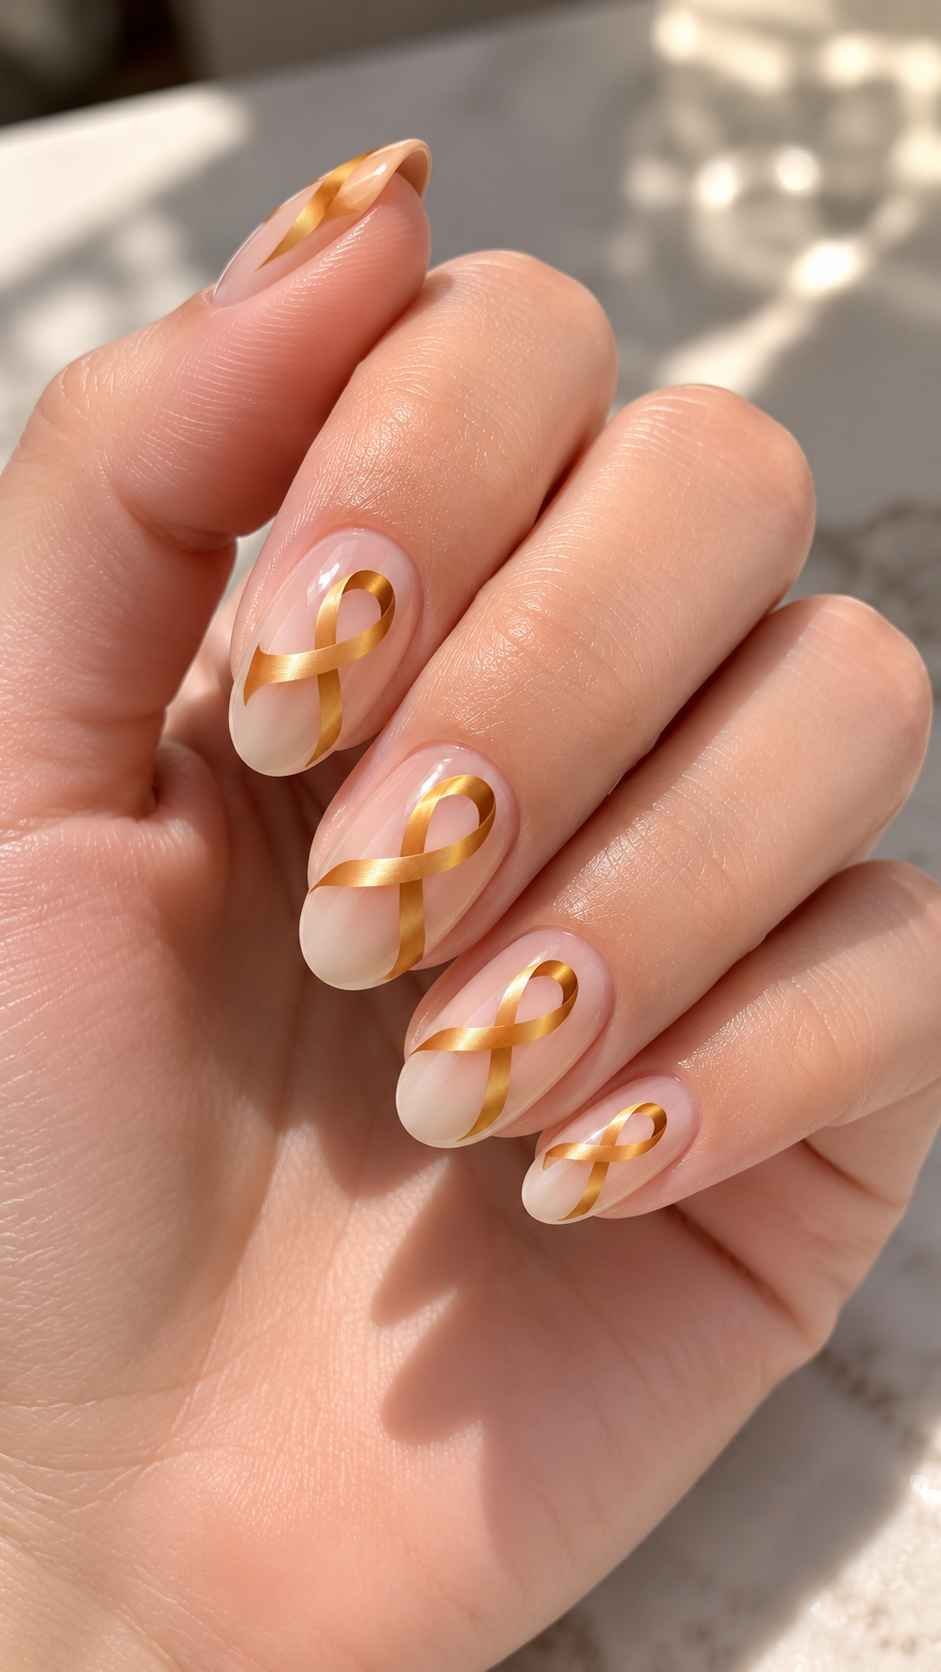
Use a pale base underneath and add a deeper amber edge to one side of the ribbon. This small shadow detail gives the loop dimension while keeping the surface flat and smooth.
Sweep Color Along One Side
Paint a broad marigold sweep that begins near the lower side of the nail and widens toward the top. The opposite side can remain cream, dusty blue, or transparent. Keep the curve graceful and avoid making the division too symmetrical.
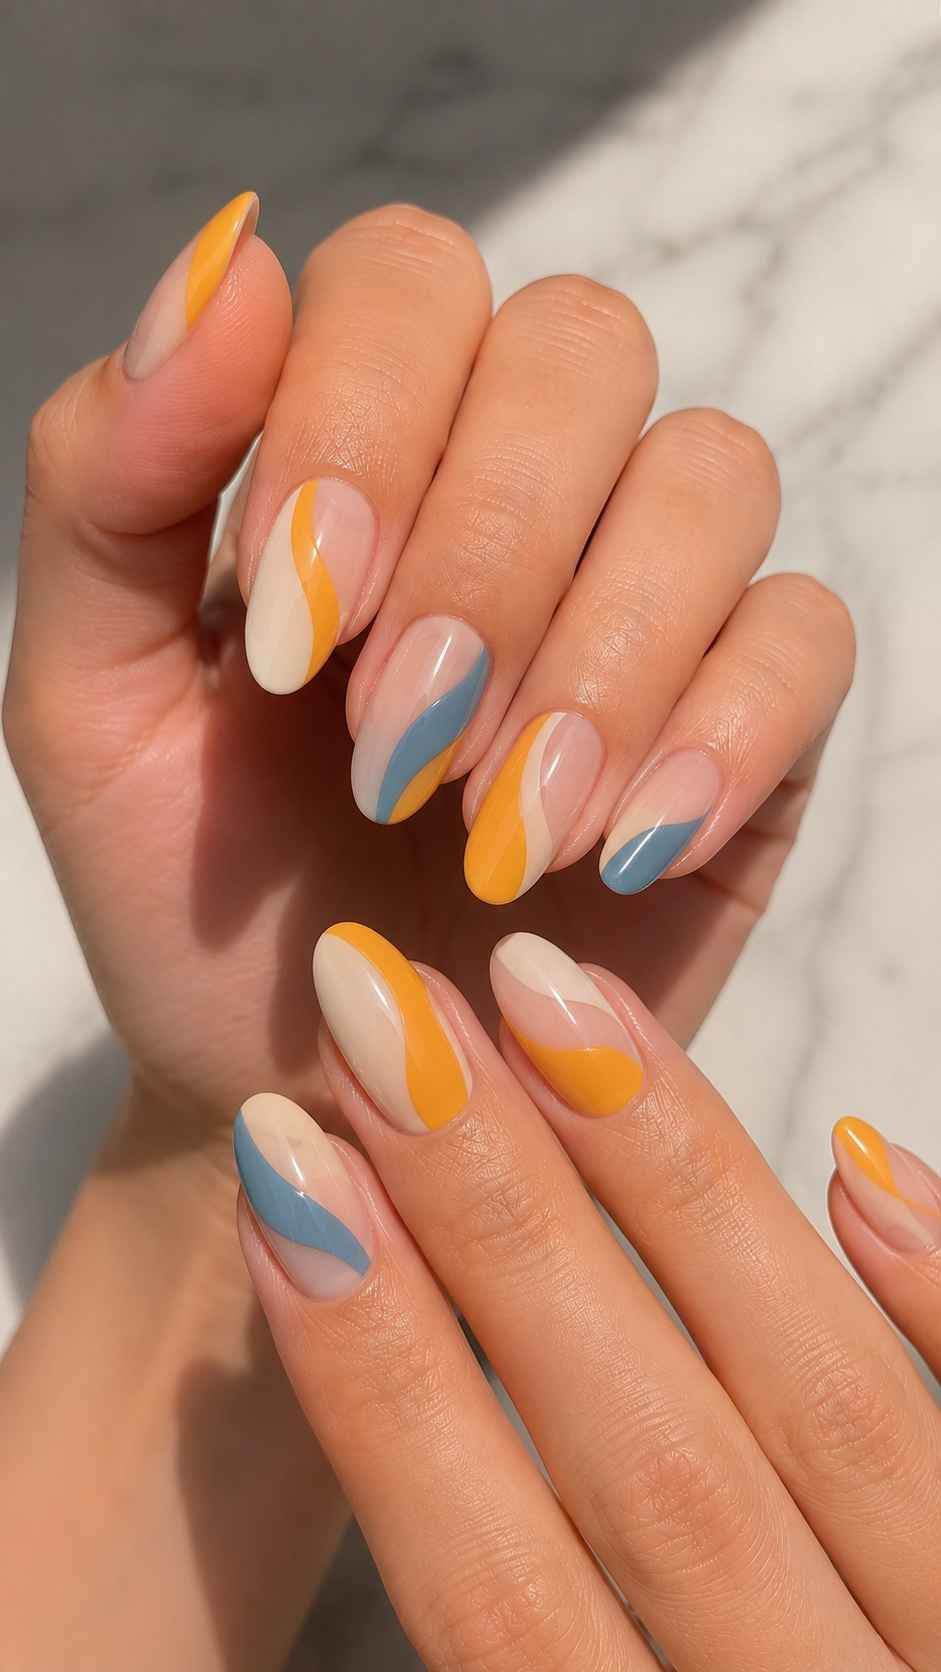
On a few nails, reverse the direction of the sweep to balance the hand. This design is bold enough to attract attention but simple enough to work with patterned dresses, plain shirts, and relaxed denim outfits.
Midnight Gloss Nail Designs
Glossy black nail designs create impact through shine, depth, and precision rather than added decoration. A deep black surface can look elegant, rebellious, or editorial depending on how it is divided. Clear seams, narrow color inlays, and layered dark tones prevent the manicure from appearing flat.
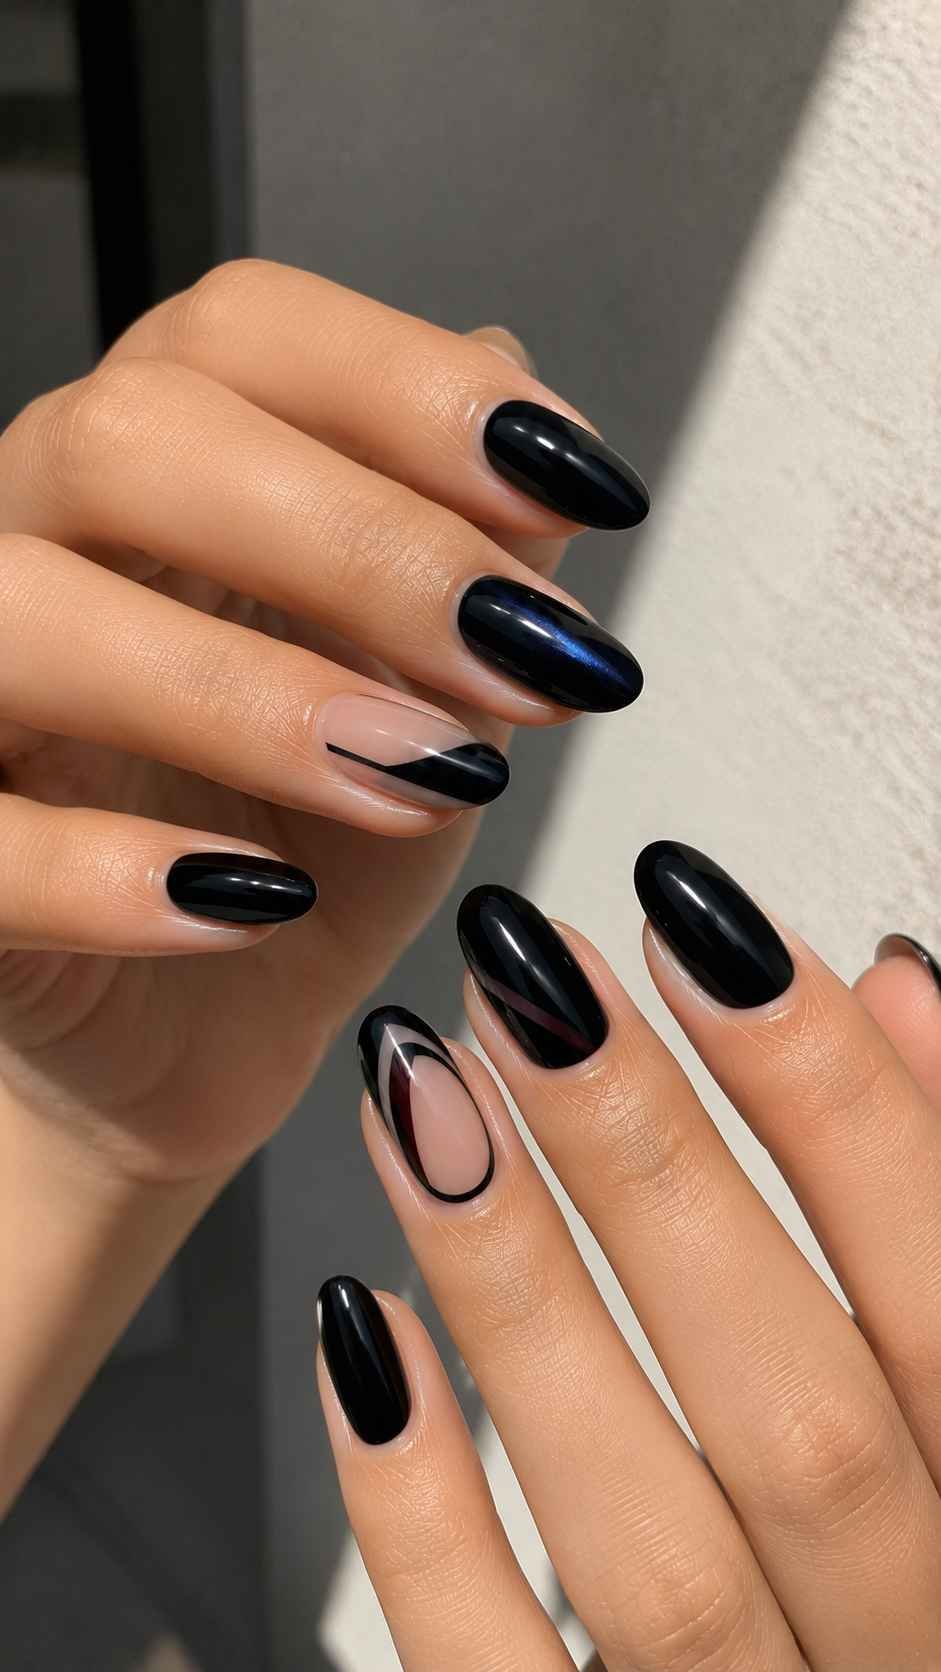
The finish must be smooth because black polish makes uneven edges more visible. Pairing it with small areas of blue, red, or clear base creates contrast without weakening the dramatic mood. These ideas work well when you want nails that feel strong but still carefully finished.
Cut Clear Seams Through Black
Paint the nail black while leaving one slim translucent seam running vertically or diagonally through the design. The opening should look sharp and deliberate, almost as though the black surface has been divided into two polished panels. Shift the seam placement across the manicure so it never looks mechanically repeated.
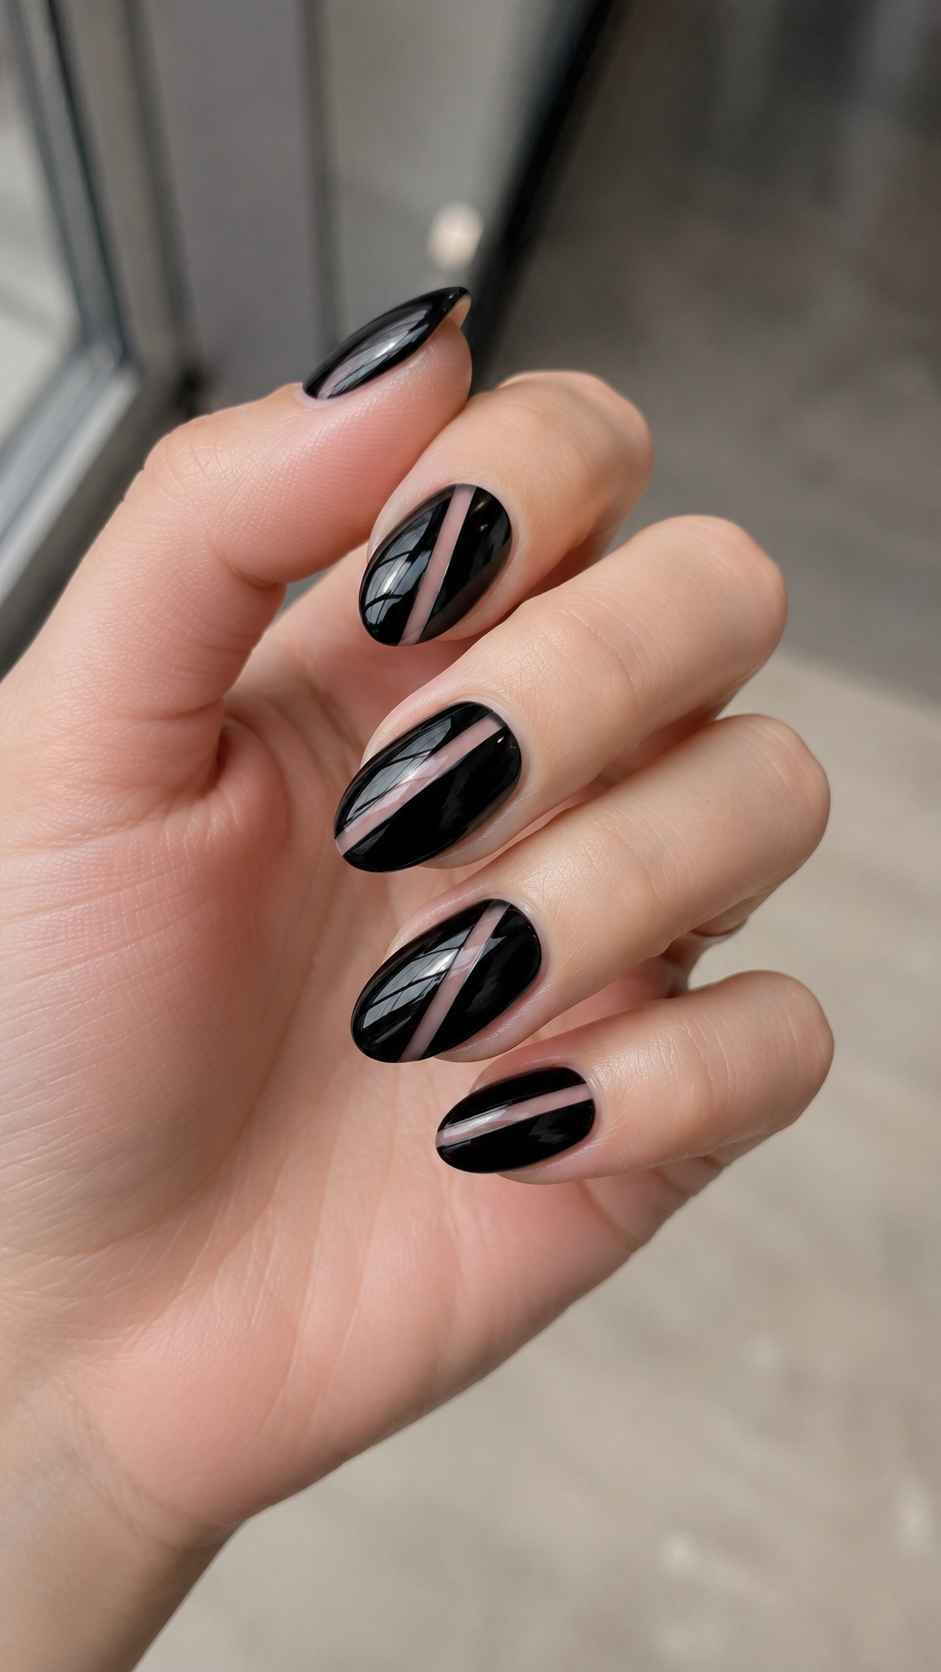
The clear line adds breathing room and catches light differently from the dark lacquer, making the design more noticeable from different angles.
Frame Black With Ink Blue
Use glossy black in the center and add a narrow ink blue border along one side and the upper curve. The two colors will look nearly identical in low light, but the blue becomes visible when the nails move.
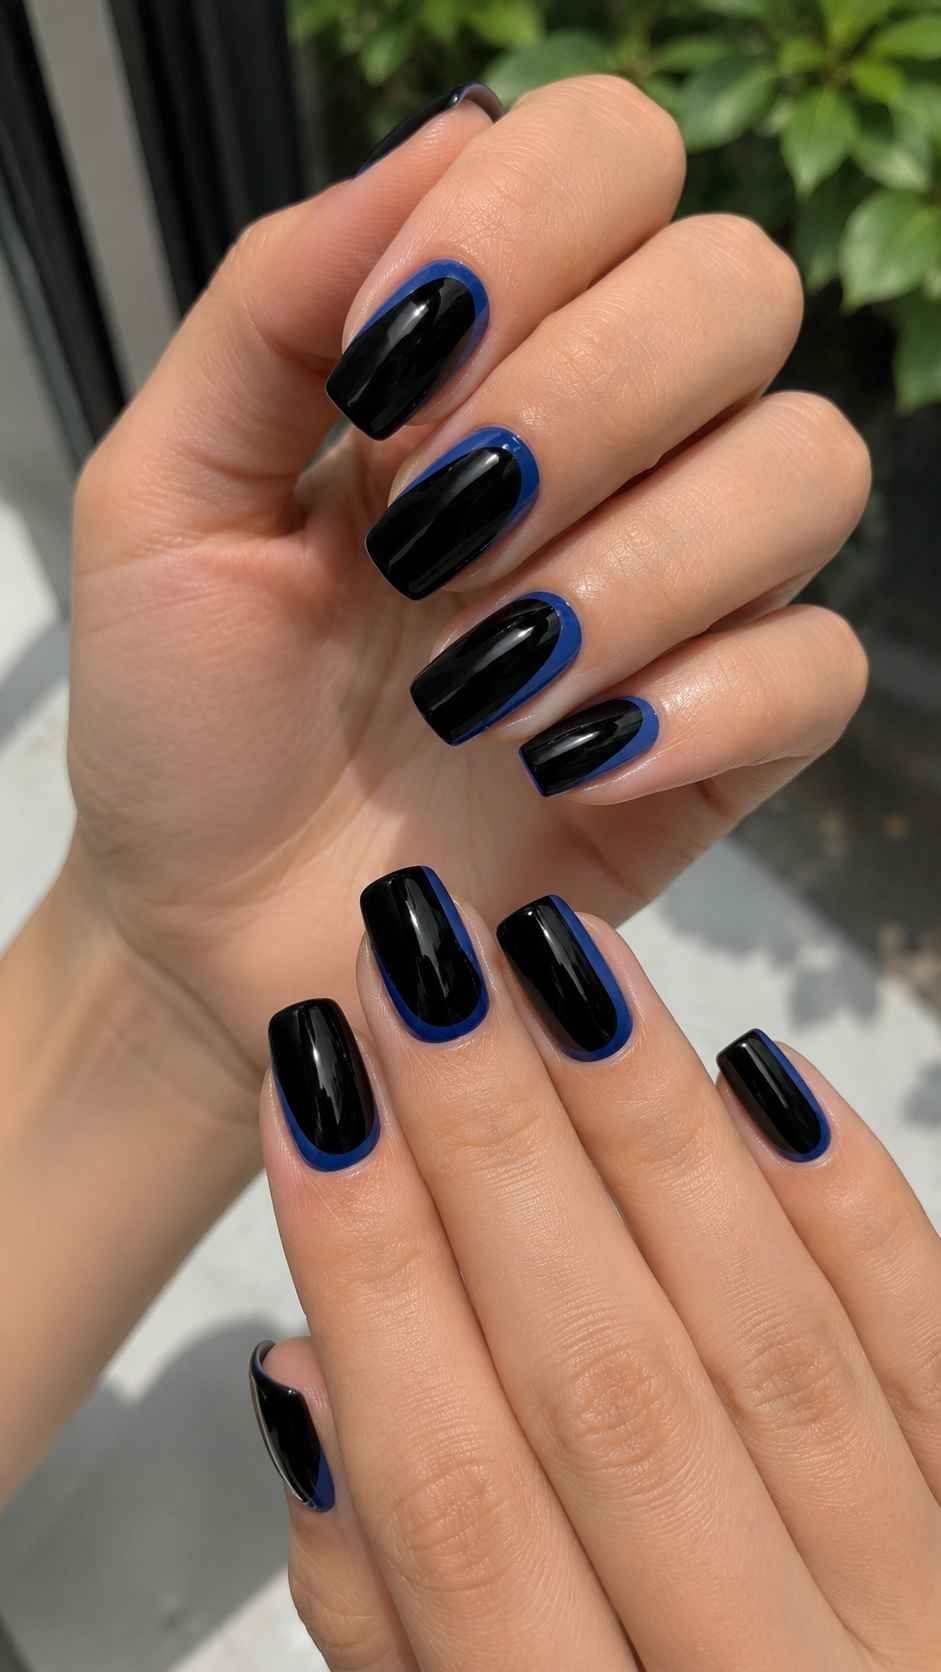
This subtle contrast gives the manicure depth without relying on shimmer. Keep the blue border thin on most nails, then widen it on one or two fingers for a stronger visual pause.
Insert a Red Linear Inlay
A narrow red line placed inside a black manicure creates a sharp and controlled accent. The red can run vertically, form a right angle, or stop halfway across the nail. Choose a rich lacquered red rather than a pale shade so it remains strong beside black.
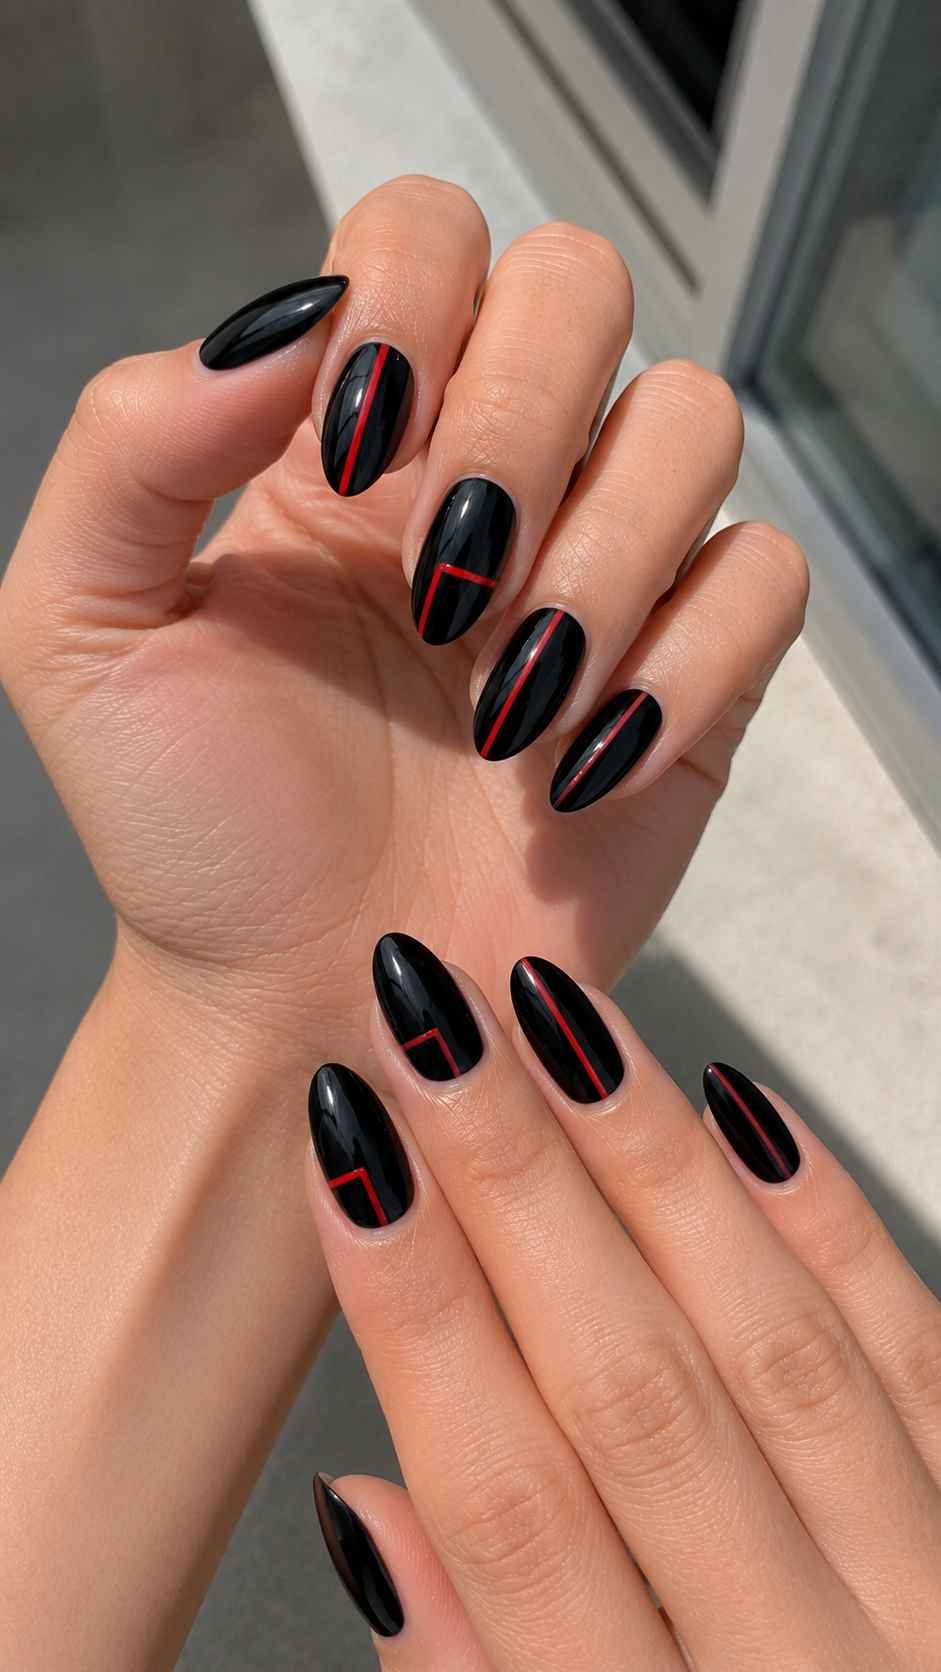
Repeat the inlay in different positions while keeping its width consistent. This approach produces a confident manicure that feels graphic, polished, and easy to pair with both neutral and colorful outfits.
Turn Your Next Manicure Into a Complete Style Moment
The best nail designs do more than fill each nail with color. They create a visual idea that connects with your clothes, accessories, mood, and daily routine. Vertical ribbons can make a look feel tailored, mochi pink layers add cheerful polish, sky blue frames bring freshness, and cloud white cutouts offer a lighter direction. Marigold graphics create warmth, midnight gloss adds drama. Choose the concept that feels closest to your personal style, then adjust the colors and placement until the manicure feels completely your own. For even more inspiration, explore related nail color ideas, manicure shapes, seasonal palettes, salon styling guides, and care routines that can help every new design look intentional from the first coat to the final shine.
