
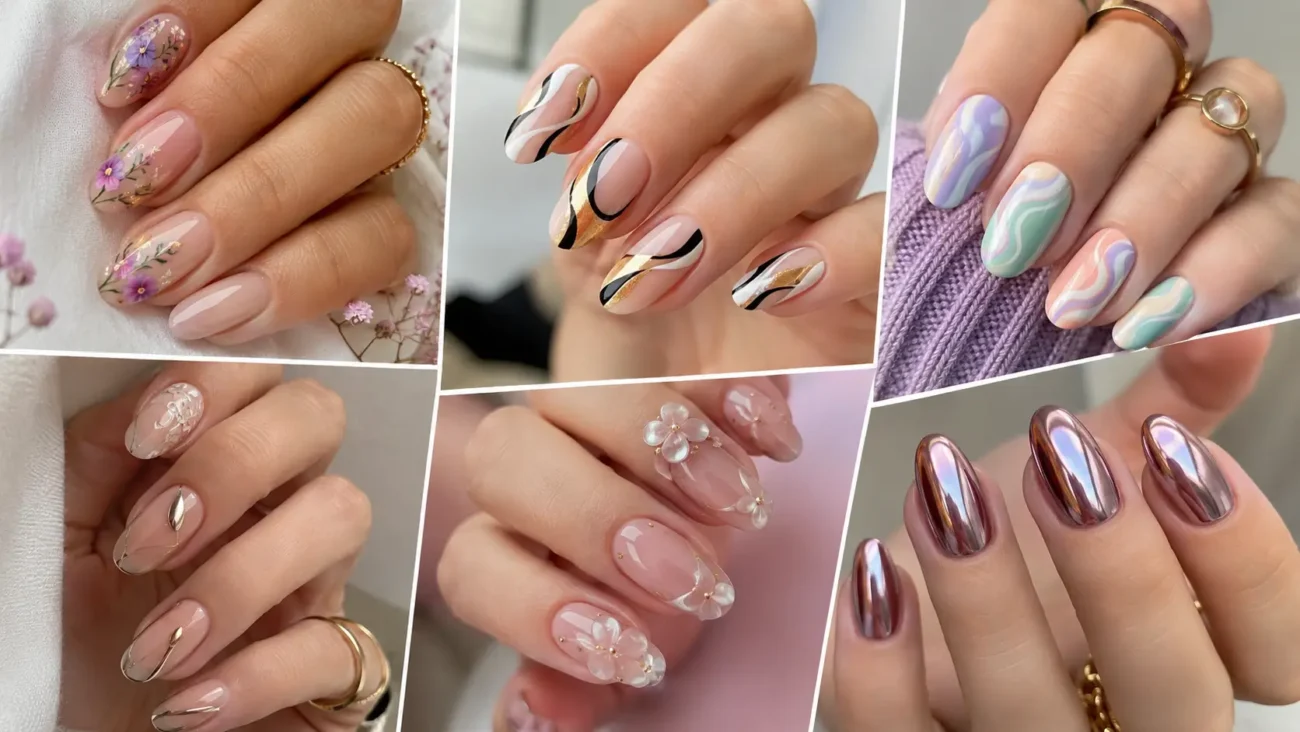
Nail art becomes far more memorable when every detail contributes to one clear visual story. Instead of filling every nail with unrelated decorations, a thoughtful manicure uses shape, texture, finish, and placement to create a connected result.
Some designs can feel soft and delicate, while others introduce sculpted surfaces, graphic layers, or tiny decorative objects that make the manicure look more expressive. The beauty of these ideas is that they can be adapted without losing their original character.
Colors can be changed to match an outfit, the amount of detail can be reduced for everyday wear, and stronger accents can be reserved for only a few nails. From transparent droplets and raised shell ridges to folded paper illusions and miniature hardware, the following nail art concepts offer distinctive ways to turn a manicure into a complete style feature.
Clear Dewdrop Relief Nail Art
Clear dewdrop relief creates dimension without covering the manicure in heavy color. Transparent gel is shaped into raised droplets that catch surrounding light and create subtle shadows across the surface. The effect can appear delicate when only a few droplets are used, or more expressive when several forms are arranged into a larger composition.
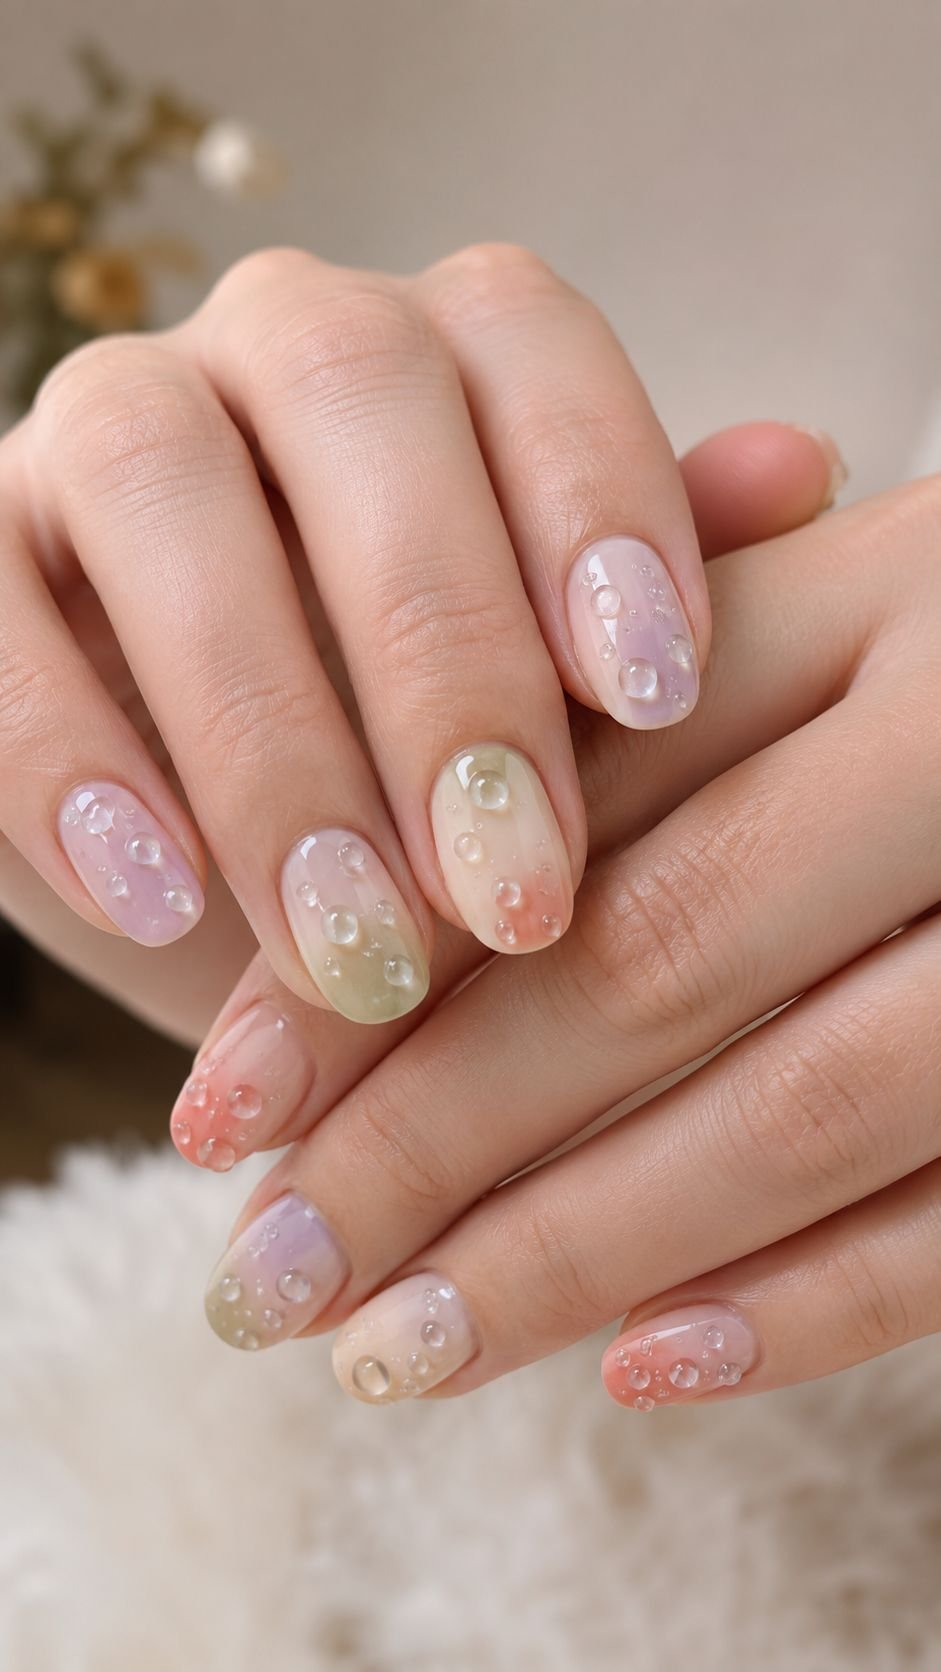
A soft cream, muted lavender, faded coral, or pale green base allows the transparent details to remain visible without making the manicure feel crowded. The droplets should vary slightly in size so the result appears naturally arranged rather than mechanically repeated. Smooth finishing is important because every raised detail needs to look rounded, polished, and carefully placed.
Arrange Droplets Along a Rain Path
Place several transparent droplets in a curved path that travels from one side of the nail toward the opposite corner. Begin with one larger droplet, then gradually reduce the size of the remaining forms. This creates movement and makes the arrangement feel as though moisture has travelled across the surface.
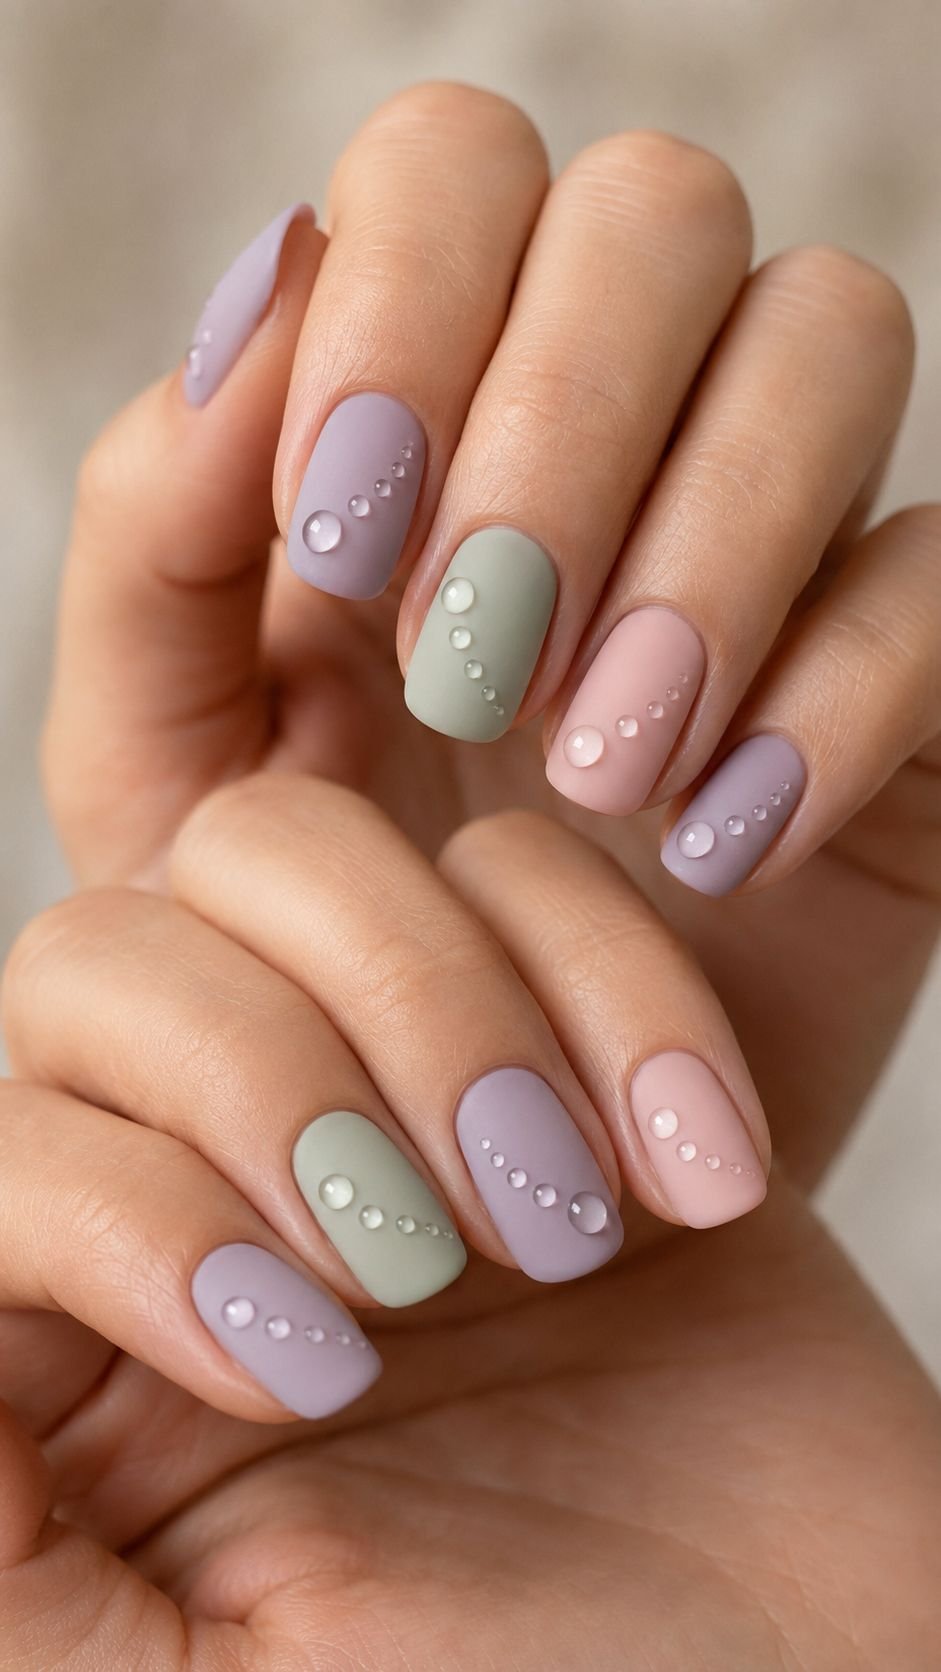
Change the direction on different nails so the complete manicure feels connected without repeating one exact layout. A matte base can make the clear droplets appear especially noticeable because the difference between the two finishes becomes more defined.
Build a Suspended Bubble Cluster
A suspended bubble cluster uses several rounded gel forms gathered near the center or upper portion of the nail. Leave a little room between the bubbles so every shape remains visible. The cluster can contain perfectly smooth domes alongside one or two stretched oval forms, giving the design a more natural rhythm.
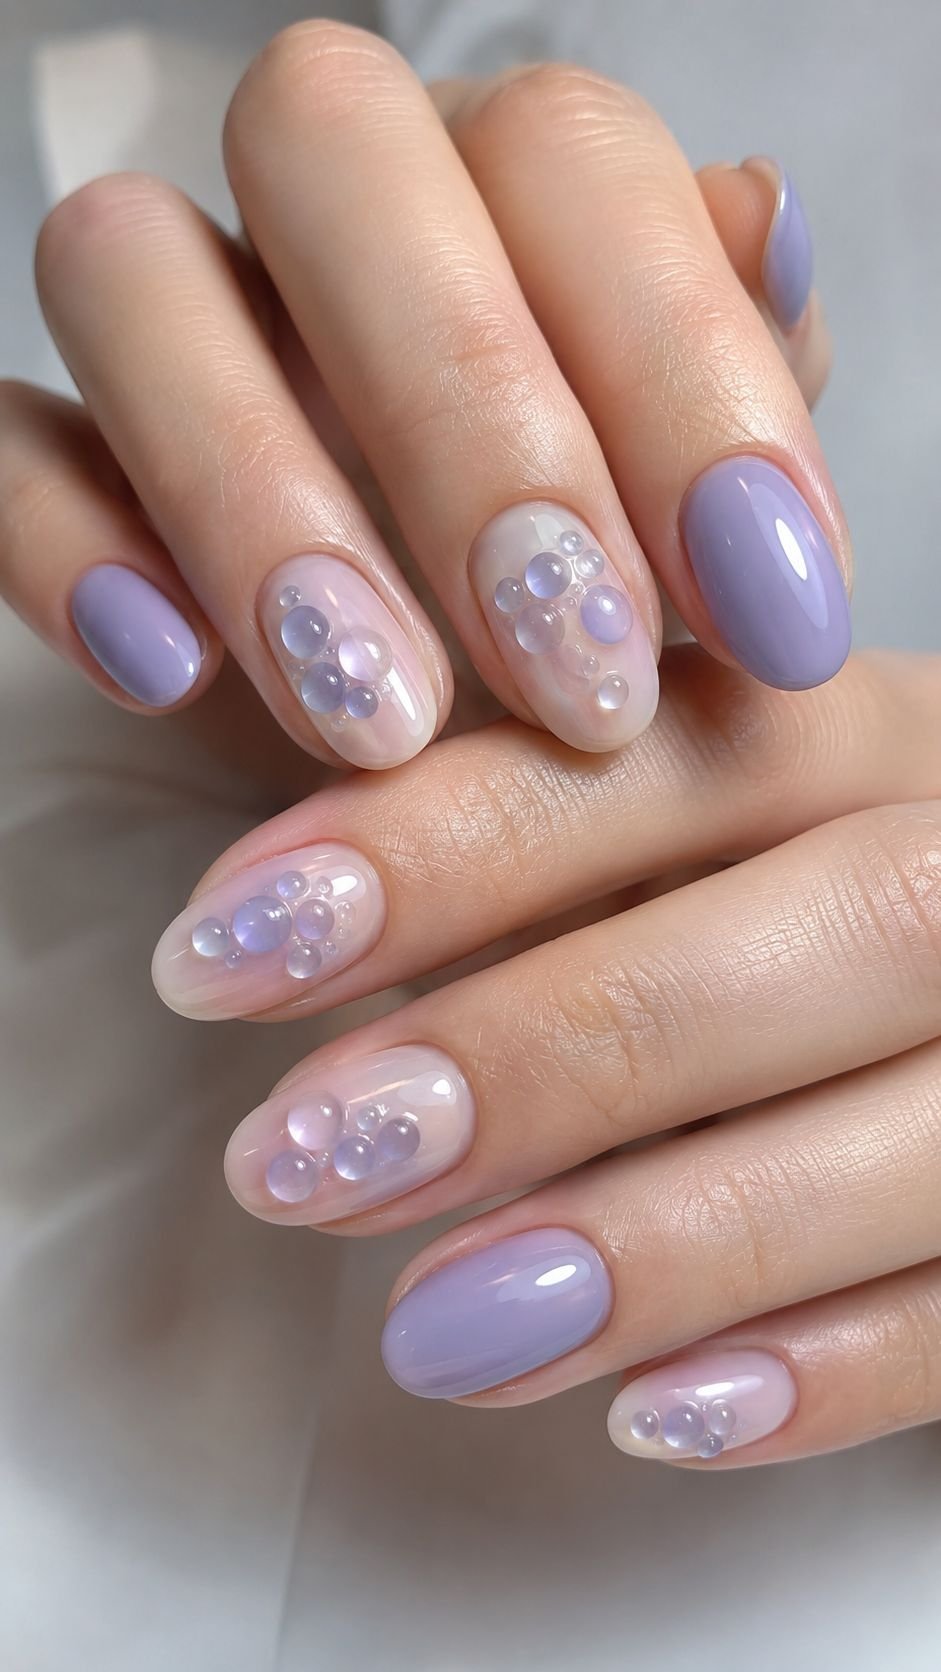 Keep the surrounding area simple and allow the raised structure to become the main attraction. A dusty blue, warm beige, or soft lilac background gives the clear bubbles enough contrast while maintaining an elegant appearance.
Create a Pooled Clear Accent
Instead of forming separate droplets, shape one larger transparent pool across a selected area of the nail. The edges should remain irregular but controlled, creating the appearance of clear liquid resting on top of the color. Place the pool near the cuticle on one nail and closer to the side on another.
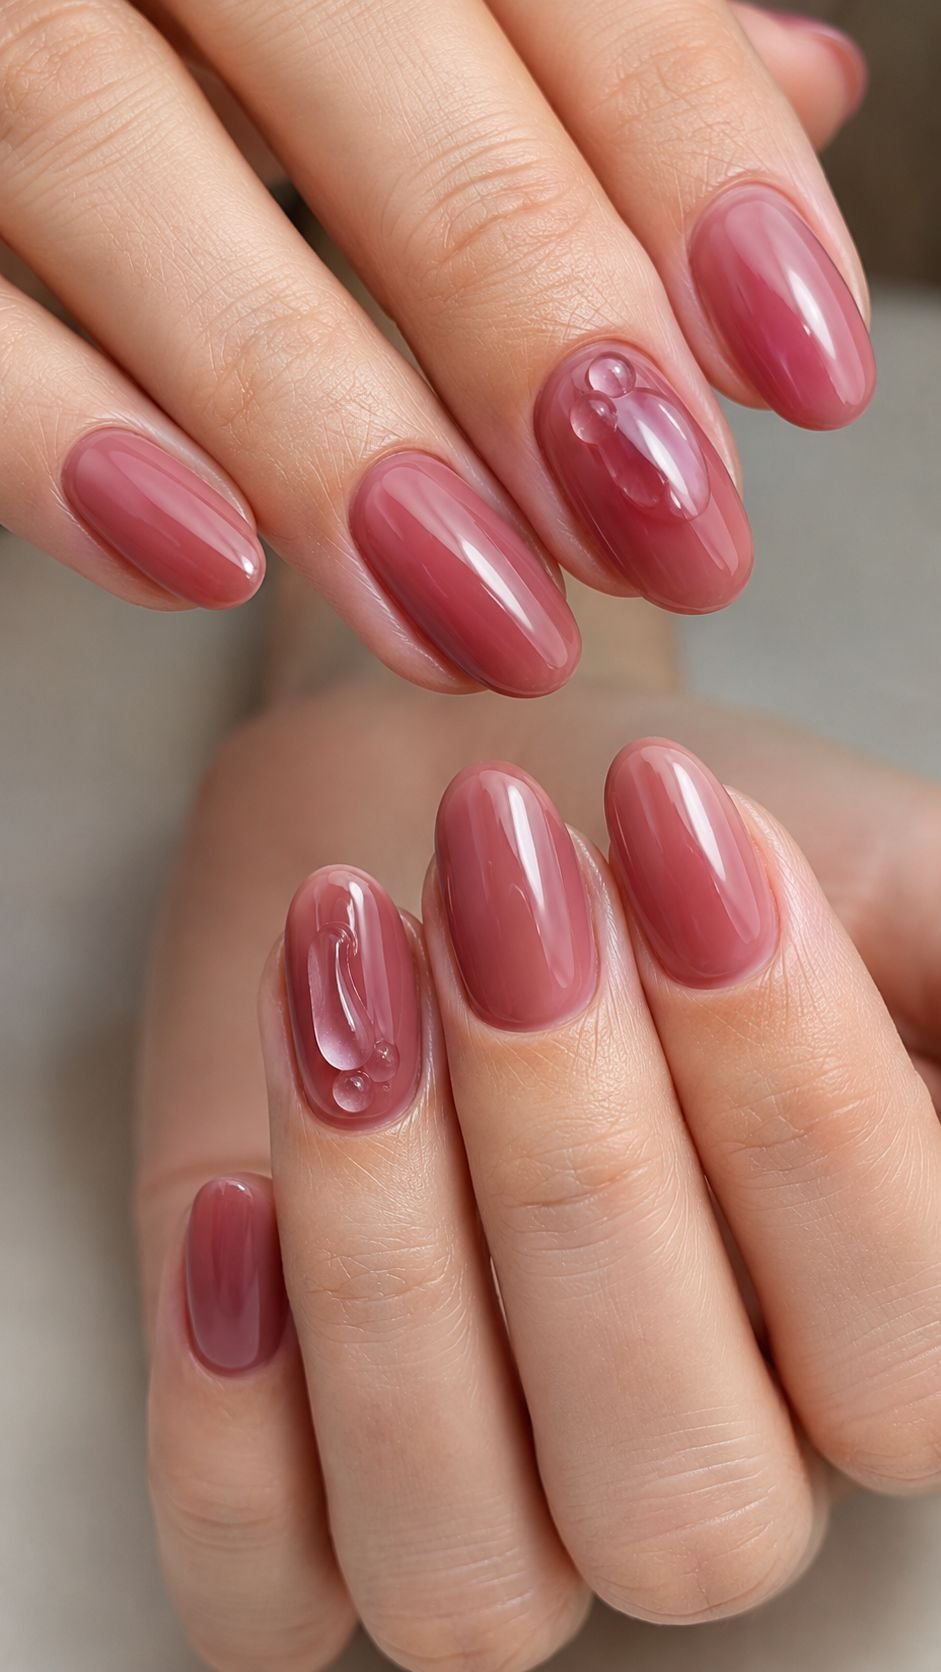
A small raised bead can be added beside it to strengthen the liquid effect. This design works beautifully when the base color is deep enough to show through the transparent layer, creating visible depth without glitter or reflective powder.
Sculpted Shell Ridge Nail Art
Sculpted shell ridge nail art uses raised curves and carefully spaced grooves to create a graceful surface. The design does not need literal beach imagery to communicate its inspiration. A few structured ridges can suggest natural shell formations while keeping the manicure refined and suitable for different seasons. Cream, soft peach, pale grey, muted aqua, or warm sand colors help the texture remain visible.
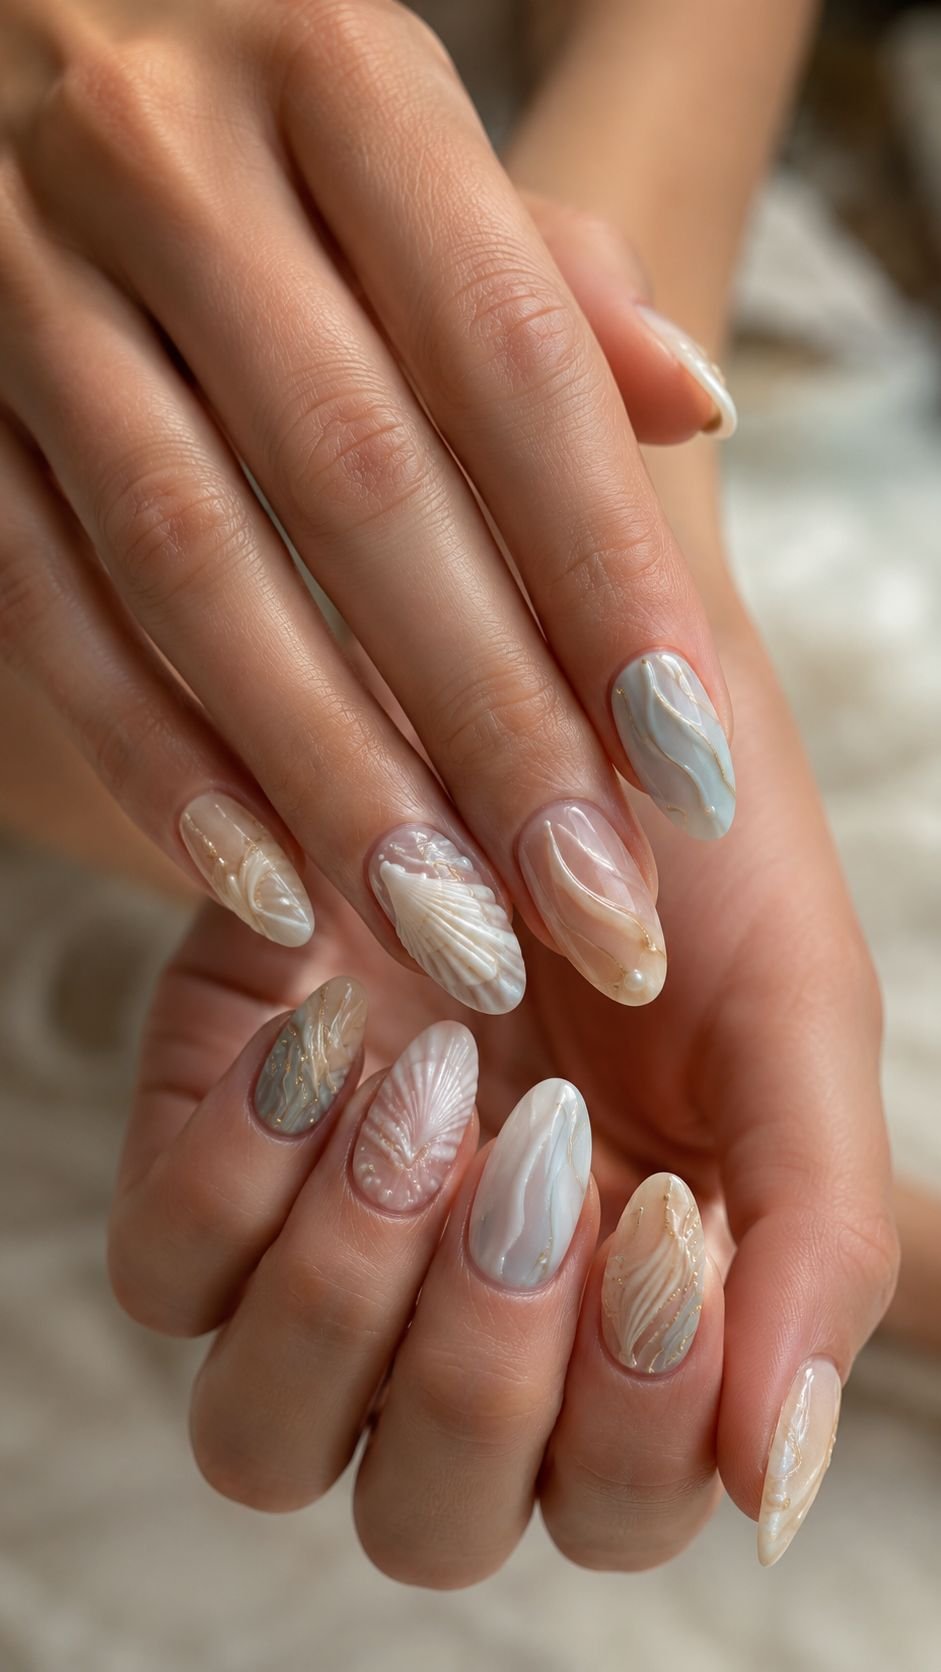
The raised elements should follow the natural length of the nail so they look balanced rather than bulky. Applying the ridges selectively also keeps the manicure comfortable, allowing some nails to carry detailed sculpture while others support the concept through simpler painted forms.
Shape Graceful Fan Ridges
Begin the fan structure near one lower corner and guide several raised ridges outward toward the top. Each ridge should widen slightly as it travels across the nail, creating a calm spreading motion. Leave narrow spaces between the forms so their shadows remain visible. The fan can cover most of one accent nail, while smaller versions appear on two nearby fingers. Choosing a slightly darker shade for the recessed areas will give the sculpture additional definition without relying on strong contrast.
Form a Single Spiral Ridge
A spiral ridge offers a smaller and more controlled version of shell texture. Start near the center with a compact curve, then guide the raised form outward in one continuous motion. The spiral should remain open enough for the base color to appear between its sections.
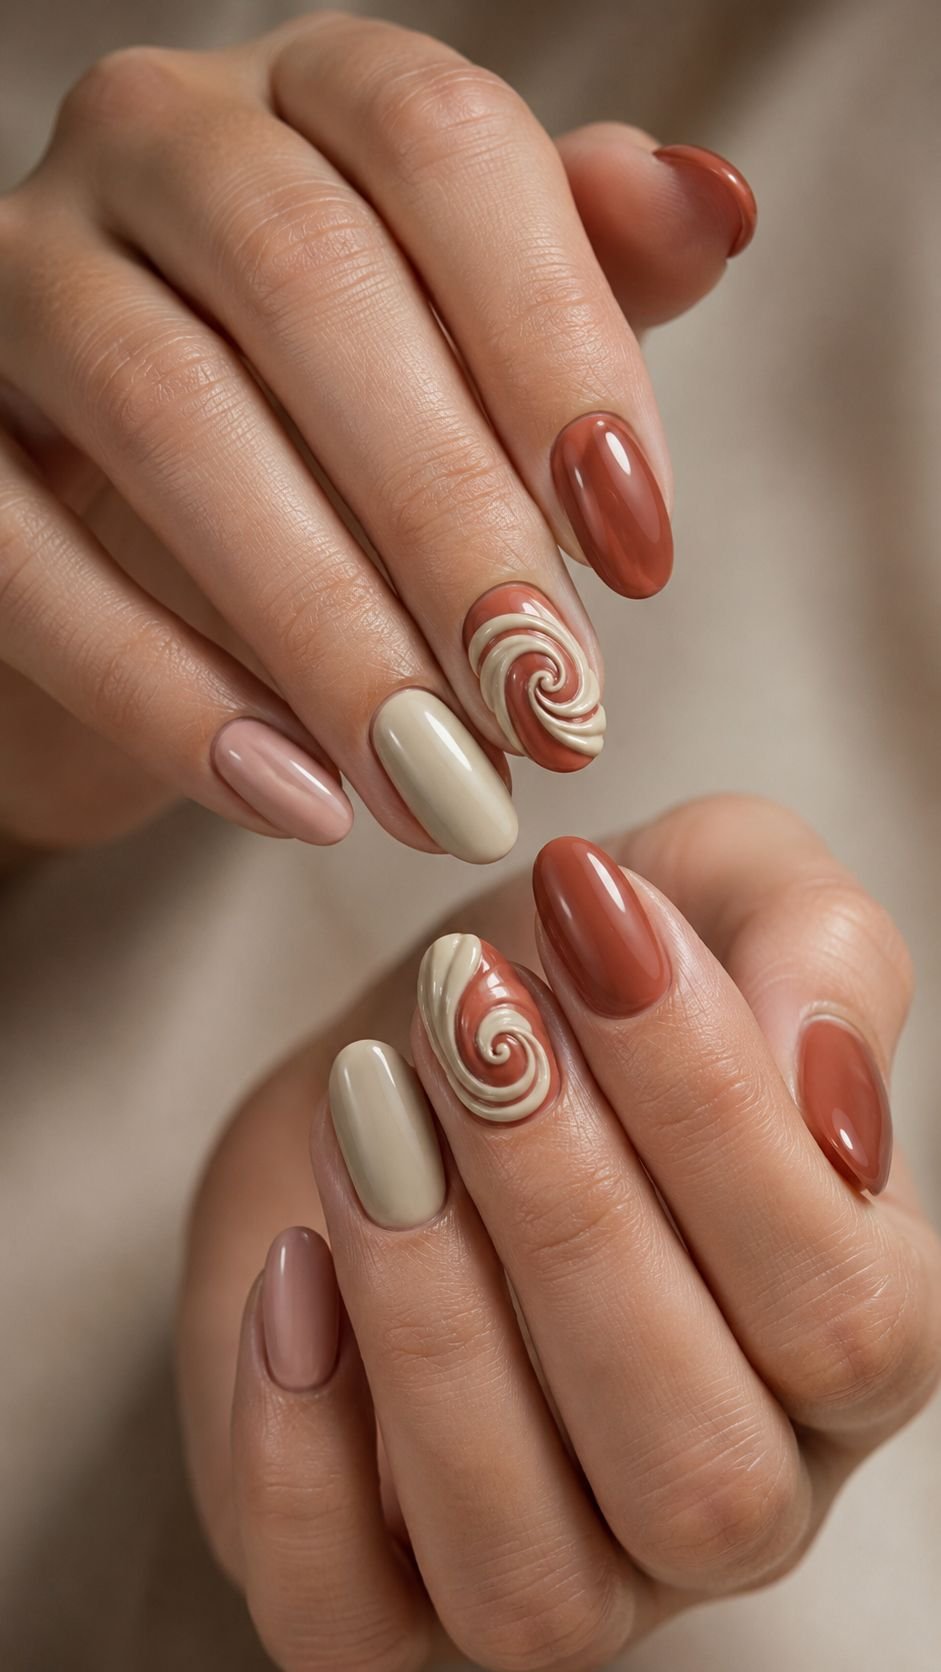
Place it slightly away from the exact center to prevent the design from looking too formal. A cream spiral over muted terracotta or a soft grey spiral over deep green can create a sophisticated combination that feels artistic rather than costume inspired.
Divide the Surface Into Shell Panels
Create two or three raised panels that resemble fragments of a larger shell formation. Each panel can contain its own short ridge pattern, while slim painted spaces separate the sections. Arrange the fragments at different angles so the nail appears pieced together rather than completely covered. Repeat only one small panel on the surrounding nails to connect the manicure. This controlled approach delivers noticeable texture while allowing the underlying polish to remain an important part of the final design.
Folded Paper Illusion Nail Art
Folded paper illusion nail art transforms flat color into shapes that appear layered, bent, or lifted from the surface. The visual effect comes from carefully placed shadows and lighter edges rather than bulky embellishment. Contrasting colors make the illusion easy to read, although related shades can create a quieter and more polished result.
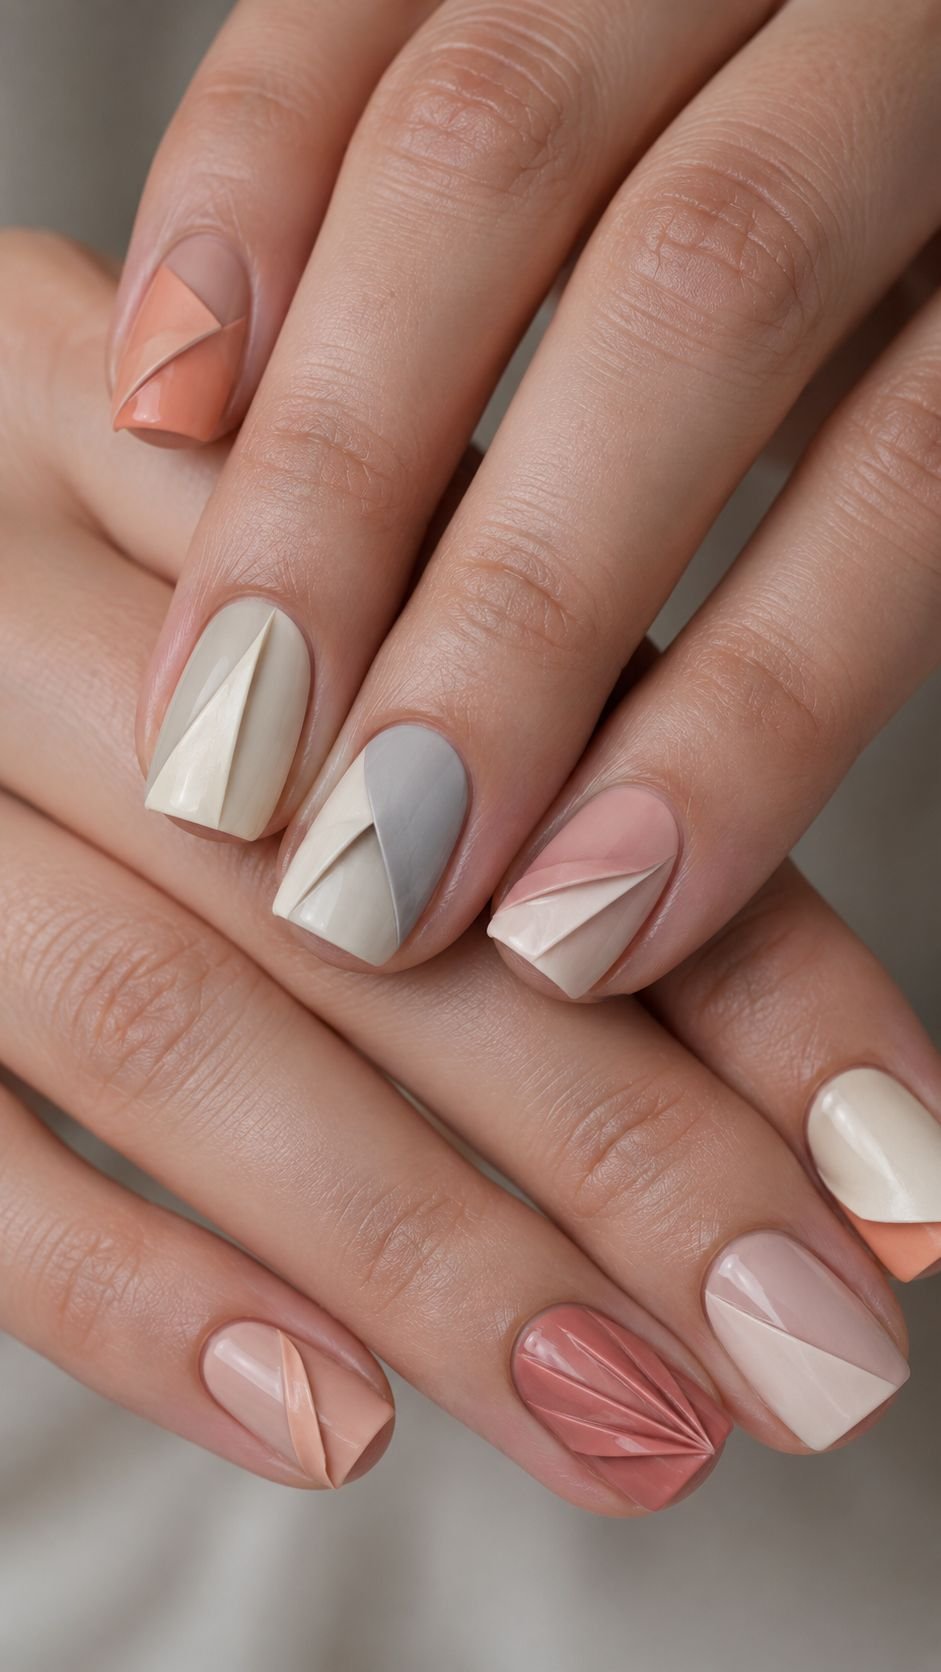
Think of muted apricot over cream, cobalt over pale grey, or plum over soft rose. Every fold should follow a clear direction so the nail does not become confusing. Repeating the paper idea through different constructions allows the complete manicure to feel coordinated while giving each finger its own composition.
Paint a Lifted Corner Illusion
Cover most of the nail with one color, then create a triangular corner that appears folded upward. Paint the triangle in a lighter shade and add a slim shadow beneath its inner edge. The shadow should gradually soften as it moves away from the fold, which helps the flat design appear dimensional.
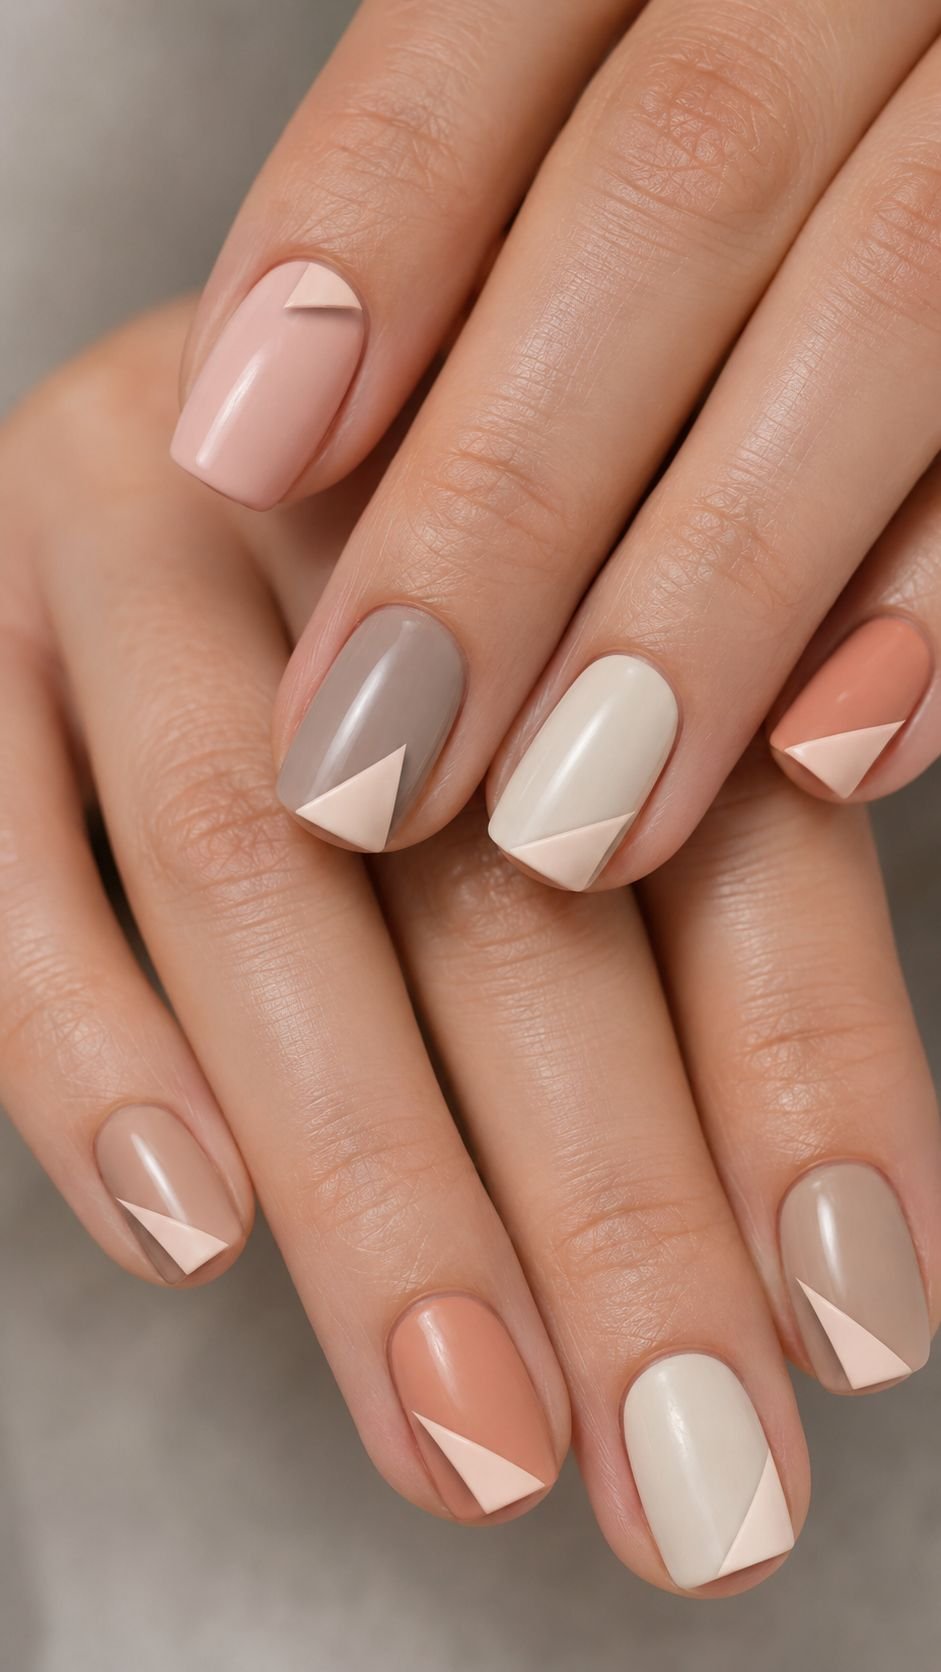
Change the folded corner from nail to nail, placing it near the top on one finger and near the lower side on another. The result feels graphic, clean, and surprisingly realistic when the edges remain precise.
Stack Overlapping Paper Tabs
Create two or three rectangular tabs that appear to sit on top of one another. Allow each tab to reveal a small portion of the color beneath it, then add a narrow shaded edge to show which layer is highest.
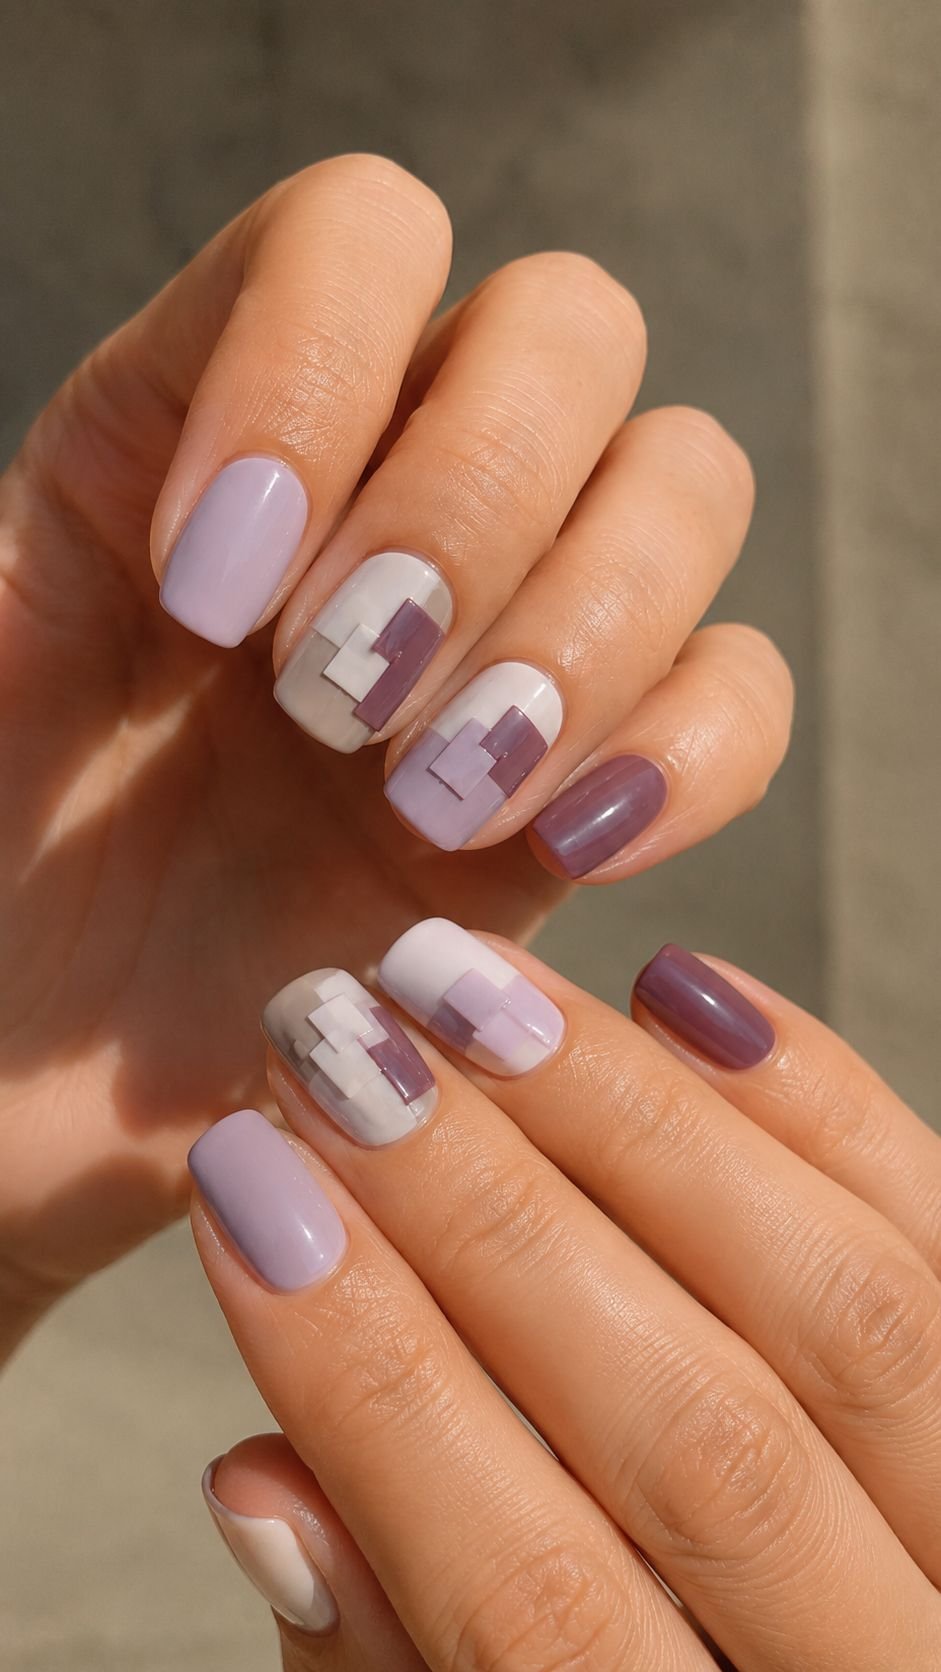
The tabs can be arranged vertically, placed at an angle, or allowed to travel across the nail. Use one strong color as the visual anchor and support it with softer surrounding shades. This structure gives the manicure a creative editorial quality without requiring complicated painted illustrations.
Wrap the Nail in an Envelope Shape
An envelope inspired layout uses angled sections that meet near the center. Begin with a calm base, then paint two side panels that fold inward. Add a third lower panel that appears to overlap both sides.
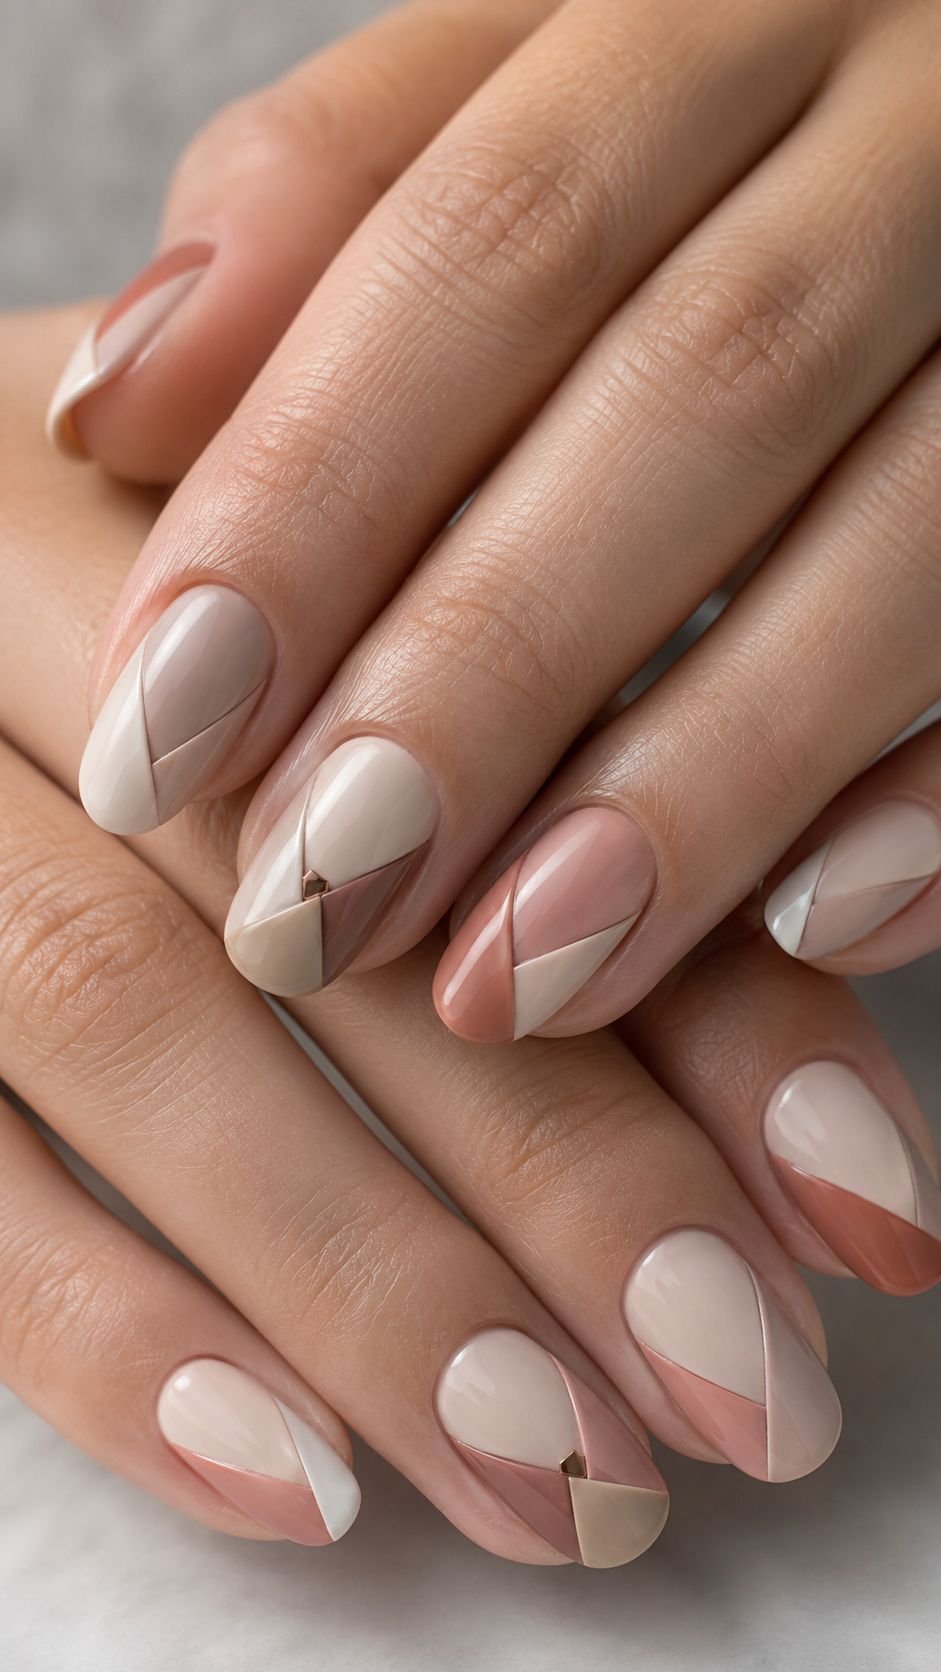
A small contrasting shape near the meeting point can suggest a closure without becoming a literal decoration. Use the full envelope construction on one or two nails and simplified folded sections on the rest. This keeps the concept recognizable while avoiding an overly themed appearance.
Matte and Gloss Imprint Nail Art
Matte and gloss imprint nail art creates patterns through differences in surface finish rather than obvious color changes. A matte base can hold a glossy mark that becomes visible whenever the hand moves through the light.
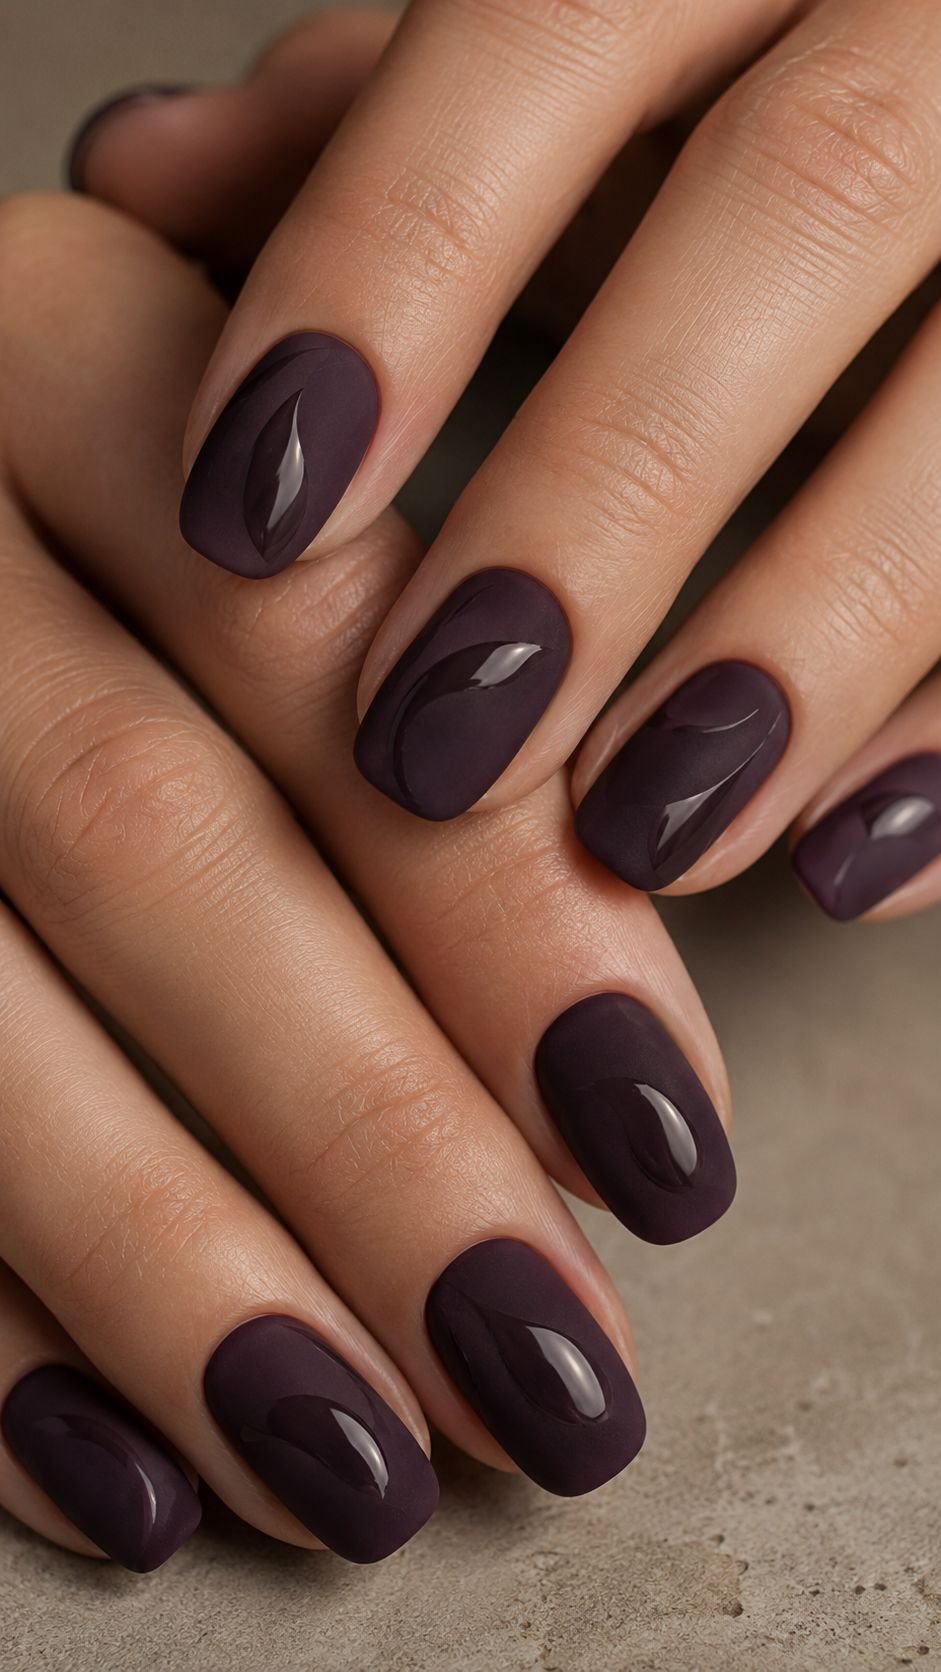
The effect feels subtle from a distance but reveals careful details at closer range. Deep plum, chocolate brown, muted navy, smoky green, and warm clay are particularly effective because their depth helps the two finishes remain distinguishable. The shapes should be large enough to catch light clearly. Using only one color also allows the pattern to feel sophisticated, even when the design itself is bold or unusual.
Press a Glossy Shadow Shape
Paint a matte base, then add an irregular glossy shape that resembles a soft shadow cast across the nail. The shape can bend around one side, widen near the middle, and narrow again toward the top. Avoid using the same shadow position on every finger.
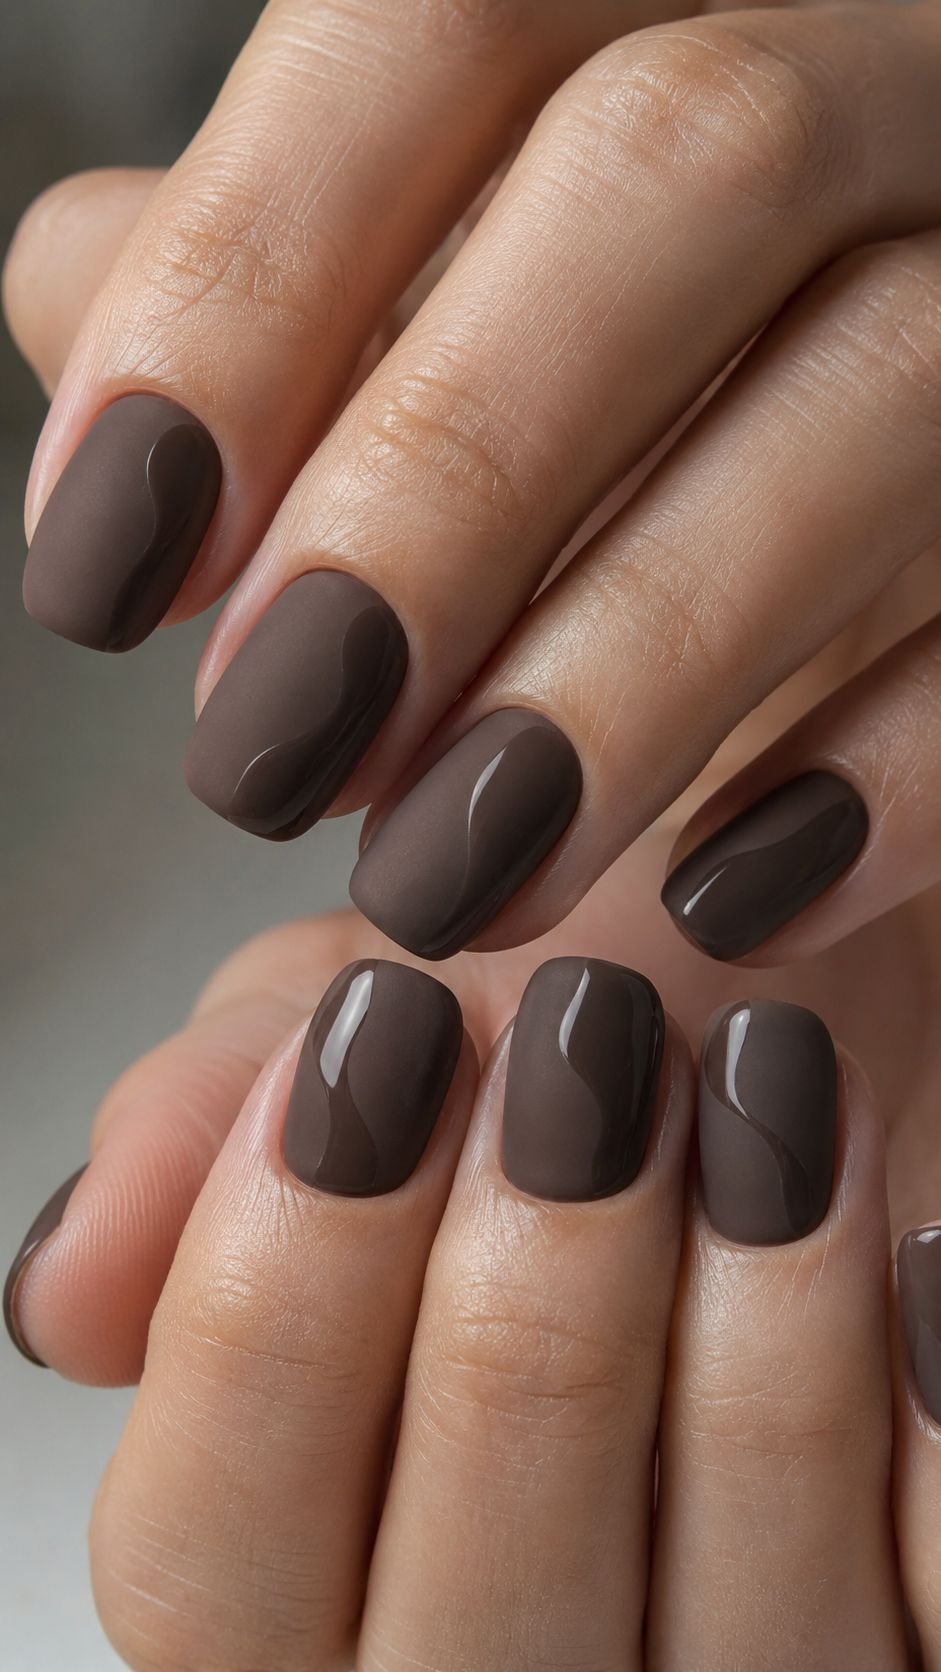
Instead, allow the glossy forms to appear as though they are moving across the entire manicure. The lack of color contrast makes the design easy to wear, while the changing reflection creates enough interest to keep it from looking plain.
Add a Wet Brush Imprint
A wet brush imprint appears as though one confident stroke has passed across the matte surface. Use clear glossy gel to paint a broad mark with visible edges and a slightly uneven ending. Some strokes can travel diagonally, while others sit closer to the lower portion of the nail.
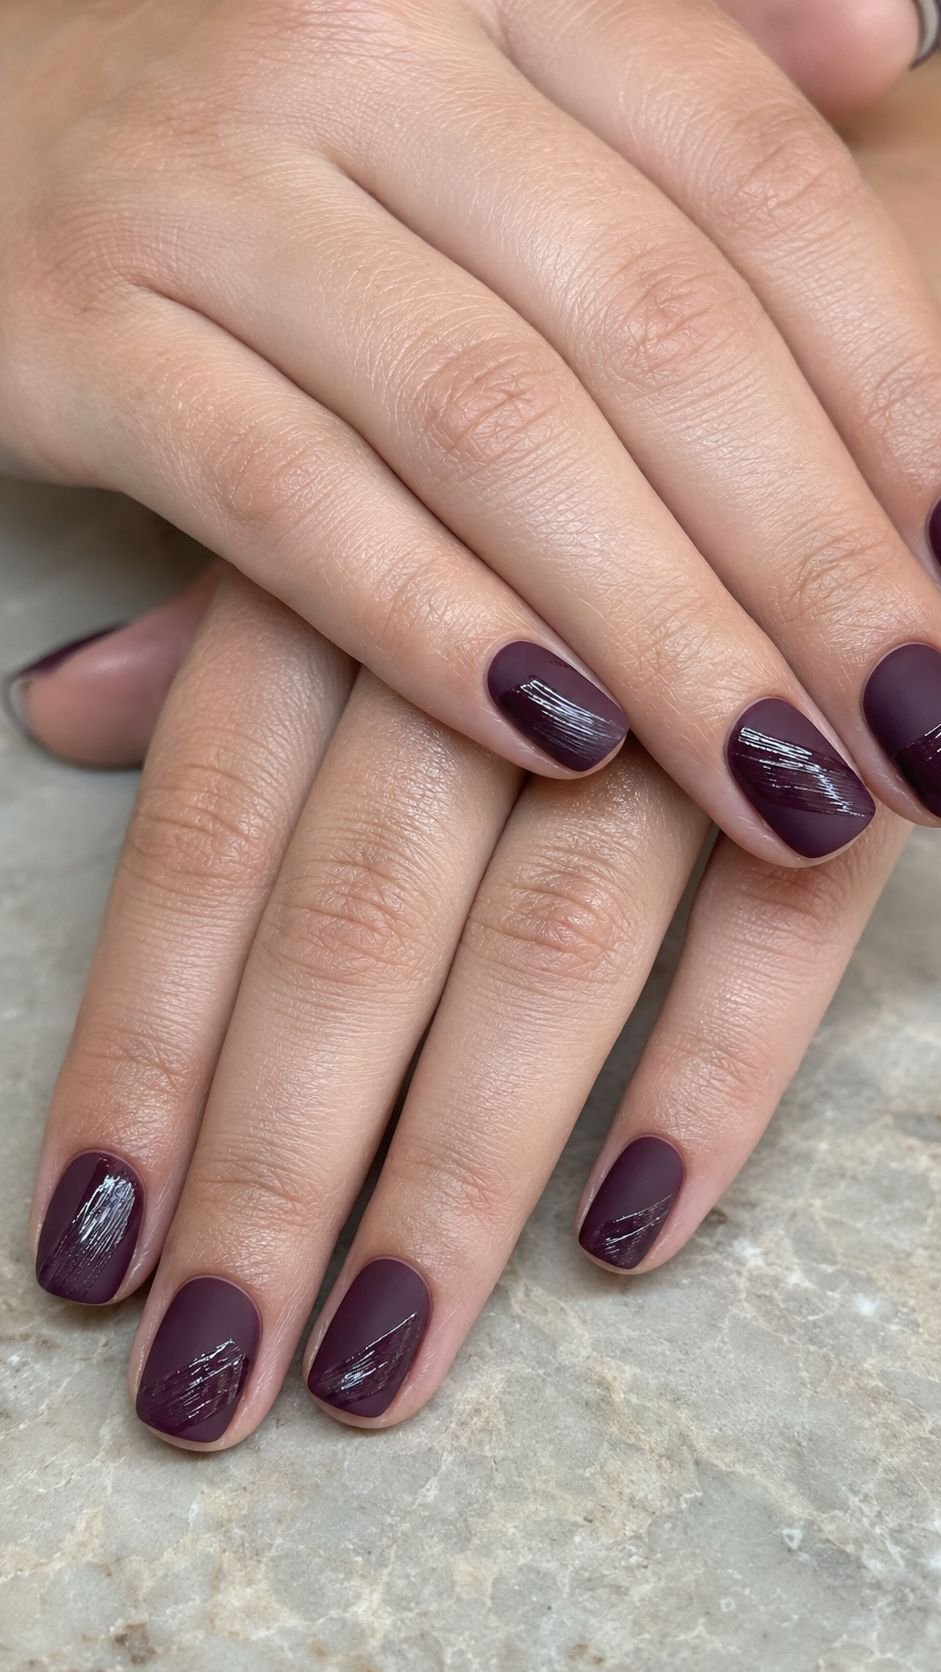
Keep the brush marks separate and avoid adding several on one finger. The simplicity allows the finish difference to remain the main feature. Dark bases produce a dramatic result, while softer colors create a more understated manicure.
Reverse the Finish on Accent Nails
Most nails can carry a matte base with glossy shapes, while one or two accent nails reverse the arrangement. Paint these nails completely glossy, then add matte sections using the same shapes found elsewhere in the manicure.
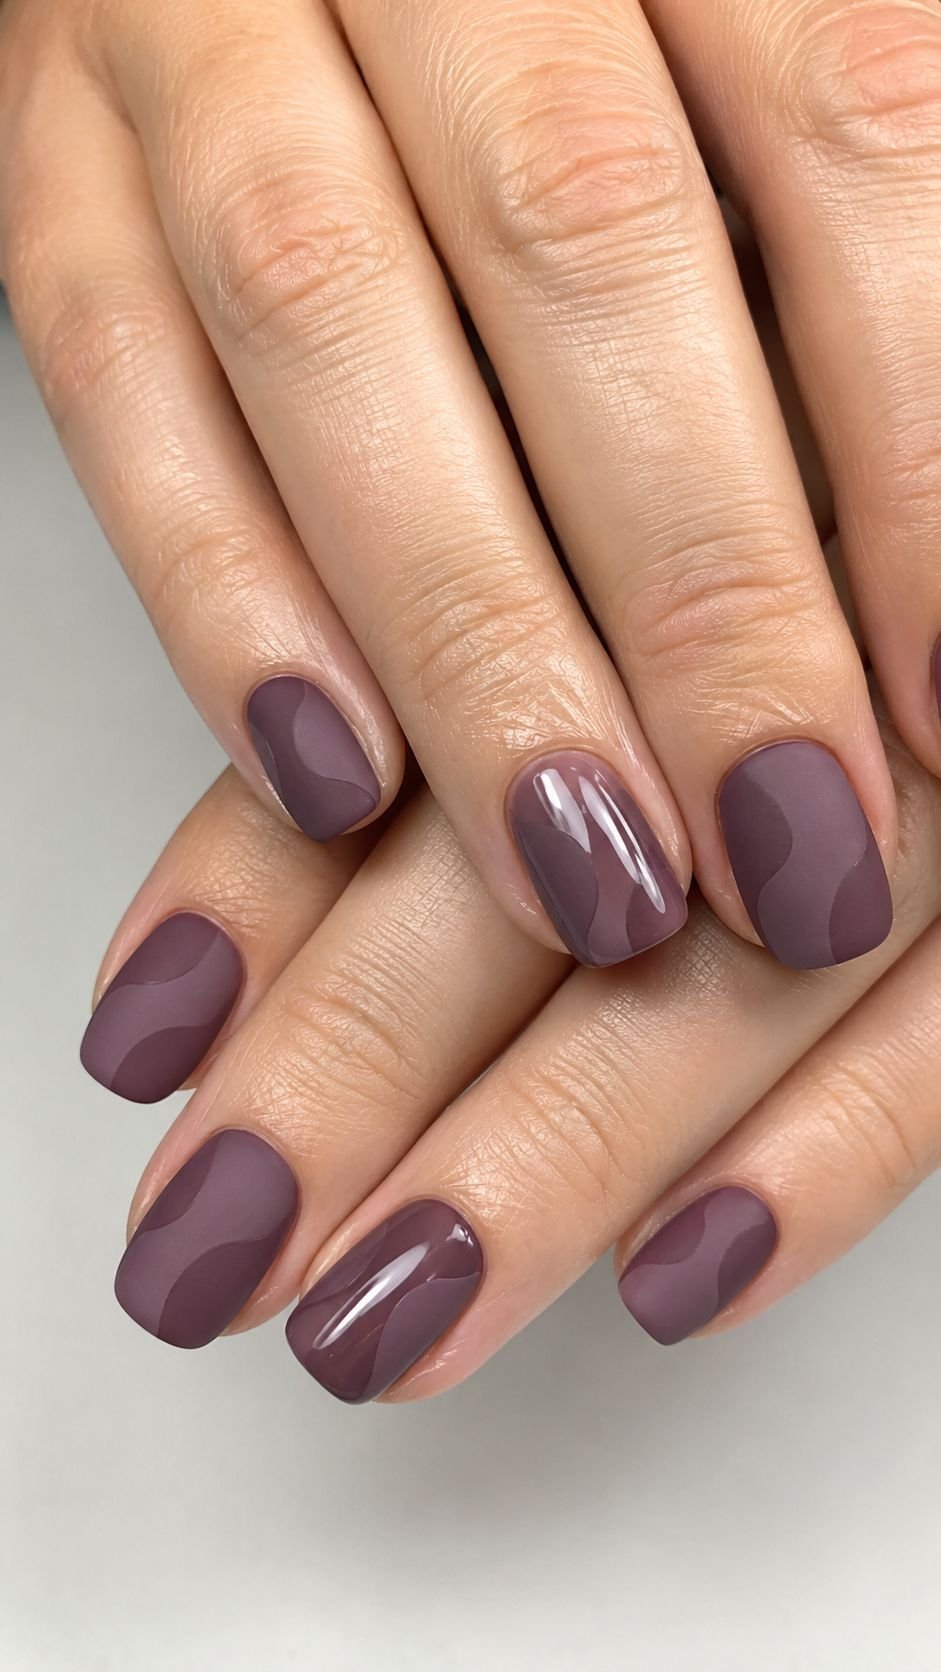
This reversal connects the set while introducing a noticeable visual pause. Keep the colors identical across both finishes so the change remains smooth. The technique makes a single shade feel more dimensional and gives the manicure a professionally planned appearance.
Ripped Poster Collage Nail Art
Ripped poster collage nail art takes inspiration from layered paper, faded printing, and overlapping fragments. The goal is not to paint a complete picture on every nail. Instead, blocks of color, partial lettering, tiny marks, and rough painted edges create the impression of several printed pieces placed together.
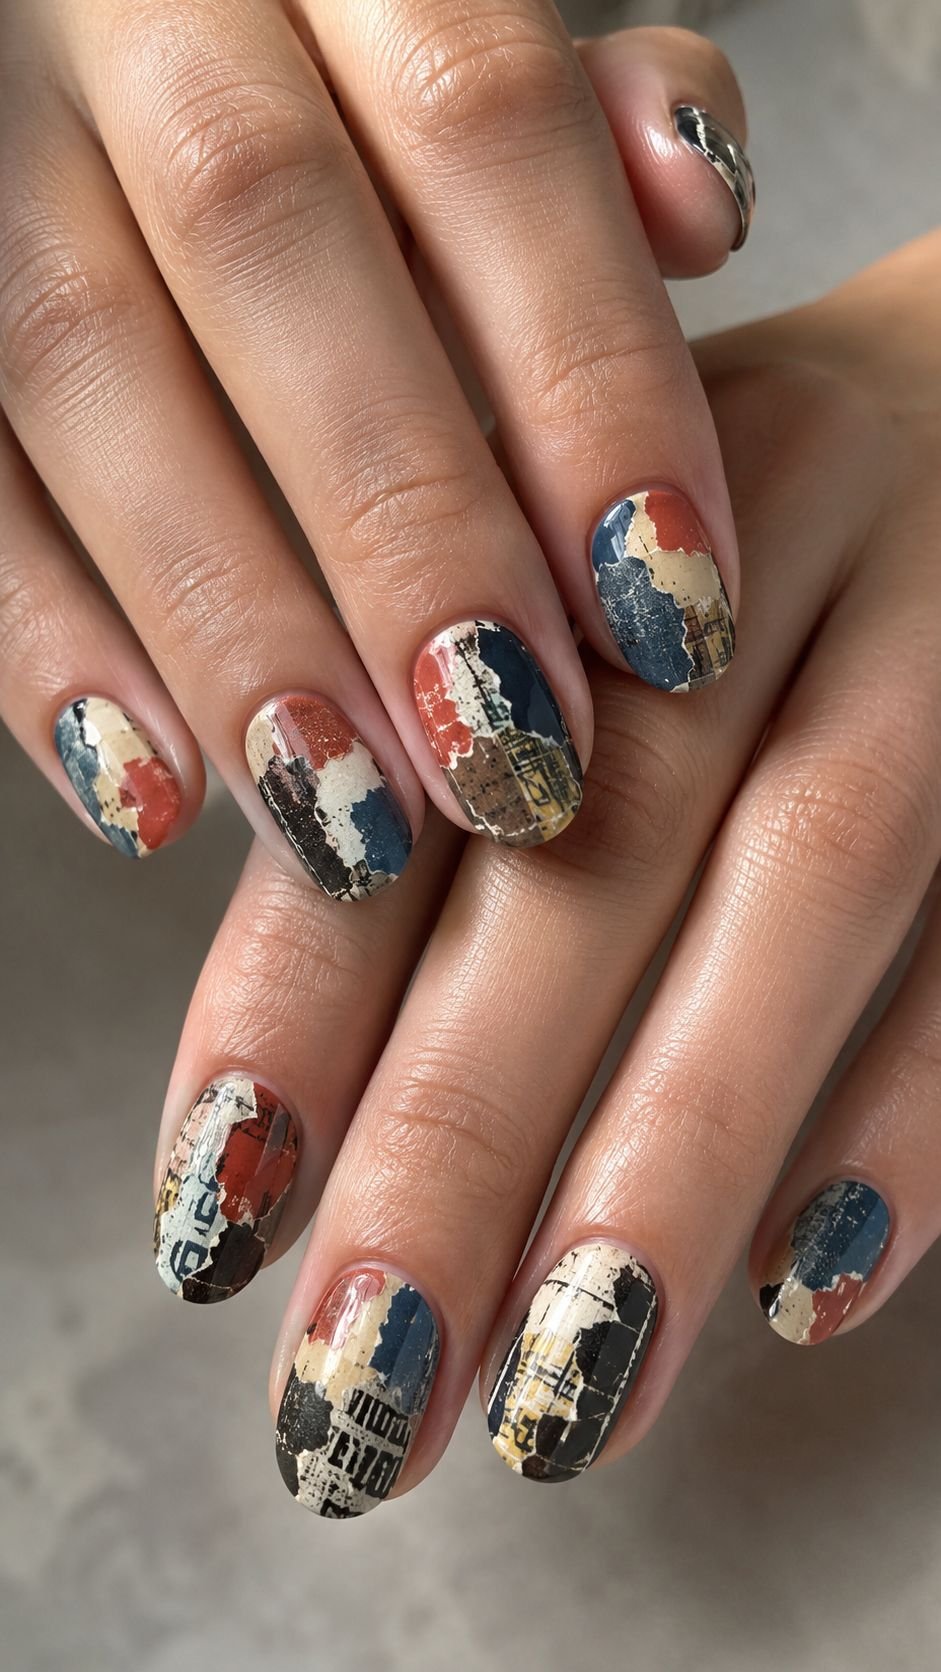
Restrict the palette to three or four shades so the finished manicure remains controlled. Brick red, faded cream, deep blue, charcoal, and muted yellow create a strong editorial mood. Each nail can carry a different arrangement as long as the same colors and fragment style continue throughout the set.
Layer Torn Color Fragments
Paint several uneven color fragments that overlap across the nail. Their edges should appear torn rather than perfectly straight, but the shapes still need to remain clean enough to read separately. Allow a small piece of one shade to sit beneath a larger section of another. Add a faint shadow along one edge to strengthen the layered appearance.
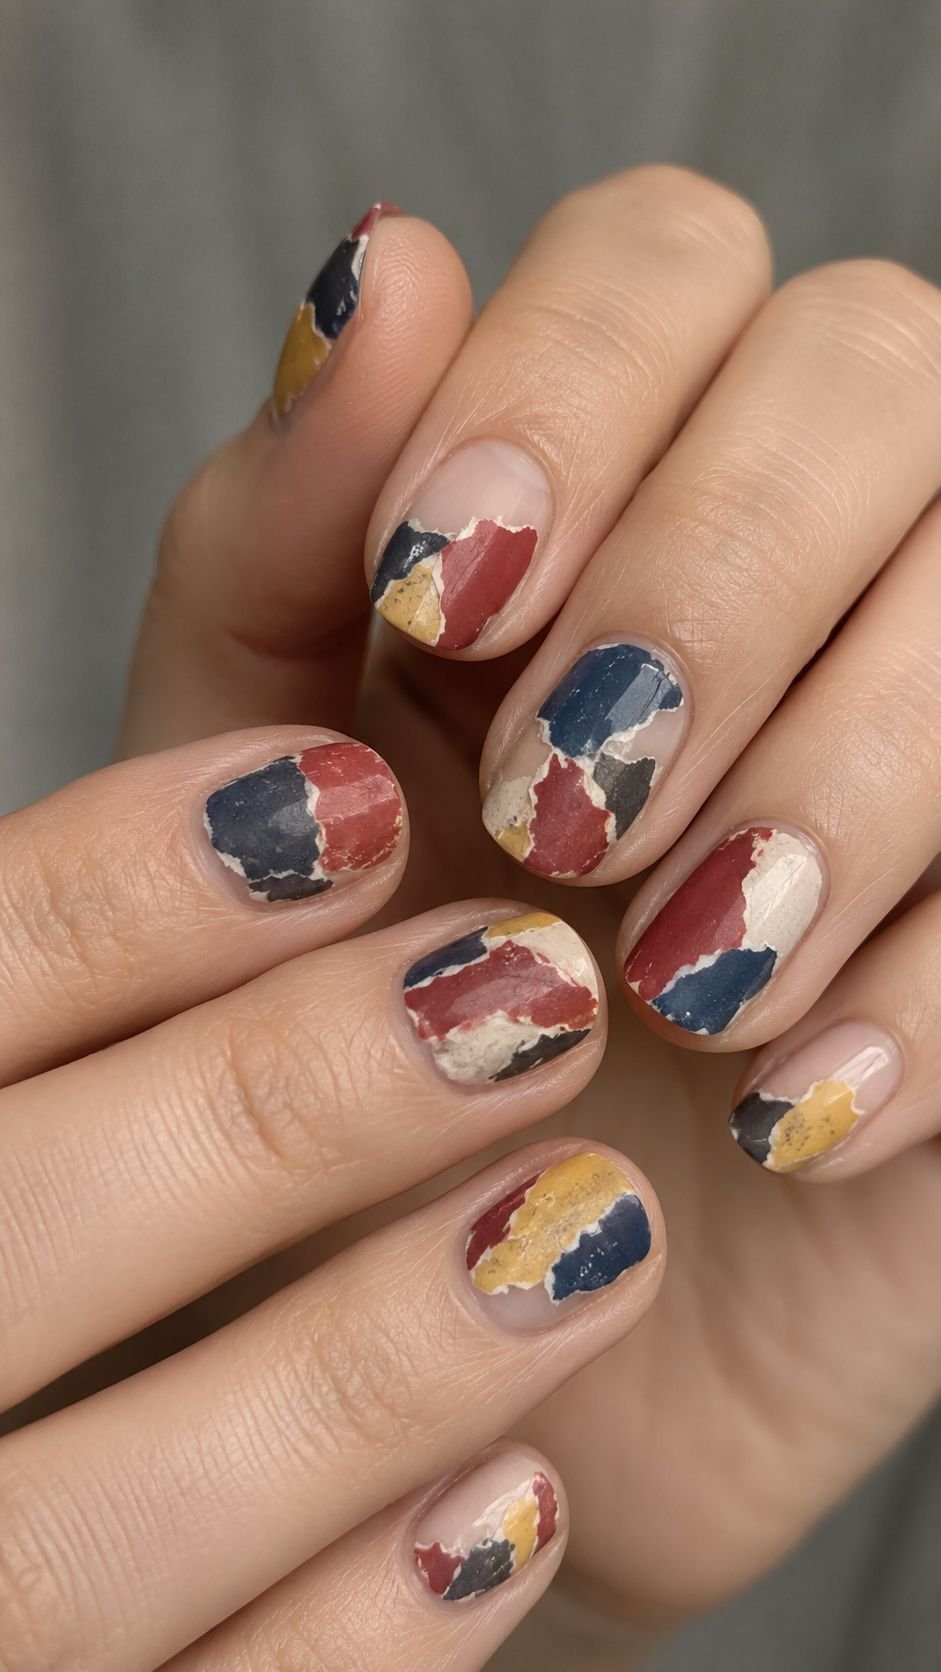
Vary the amount of coverage across the manicure so one nail feels full and expressive while another contains only two compact fragments.
Use Partial Letterforms as Artwork
Instead of writing complete words, paint selected portions of oversized letters. A curved section, bold vertical piece, or cropped rounded form can become a graphic element without creating readable text. Use one letter fragment per nail and allow part of it to disappear beyond the edge.
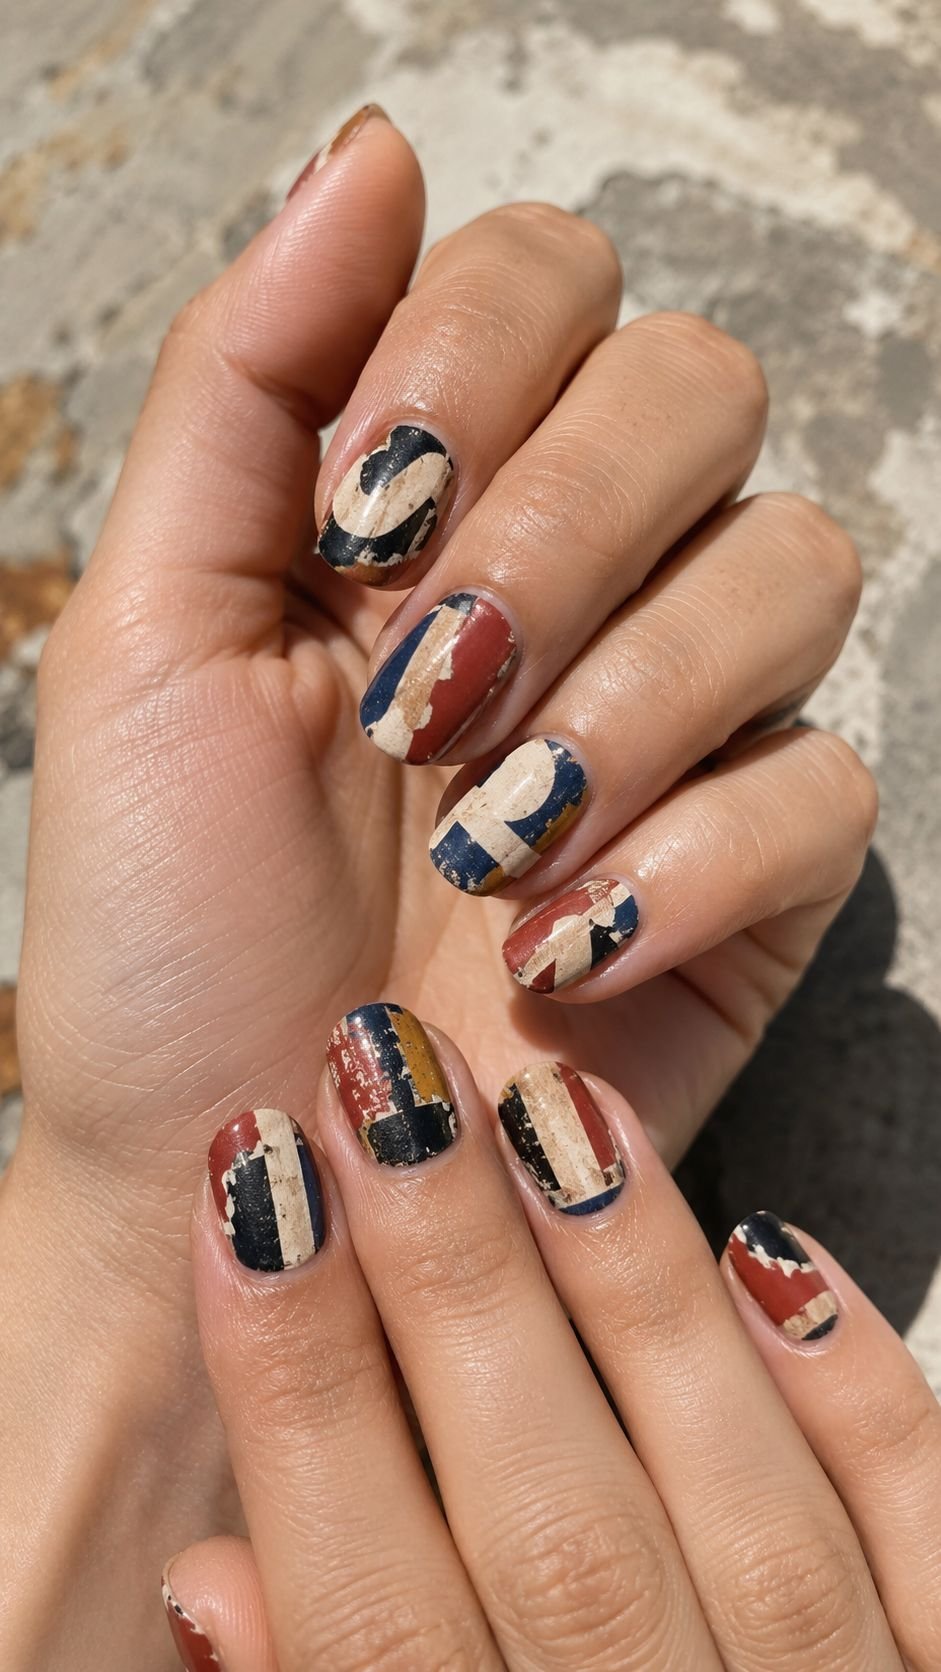
This creates the impression of a larger printed poster that has been divided across the manicure. Keep the letter color consistent so the fragments remain connected, even when their individual shapes differ.
Add Layered Ticket Shapes
Small ticket inspired blocks can introduce structure to the scattered collage. Paint narrow rectangles with clipped corners, uneven borders, or tiny abstract marks. Overlap one ticket shape with a torn color fragment so it appears attached to the surface.
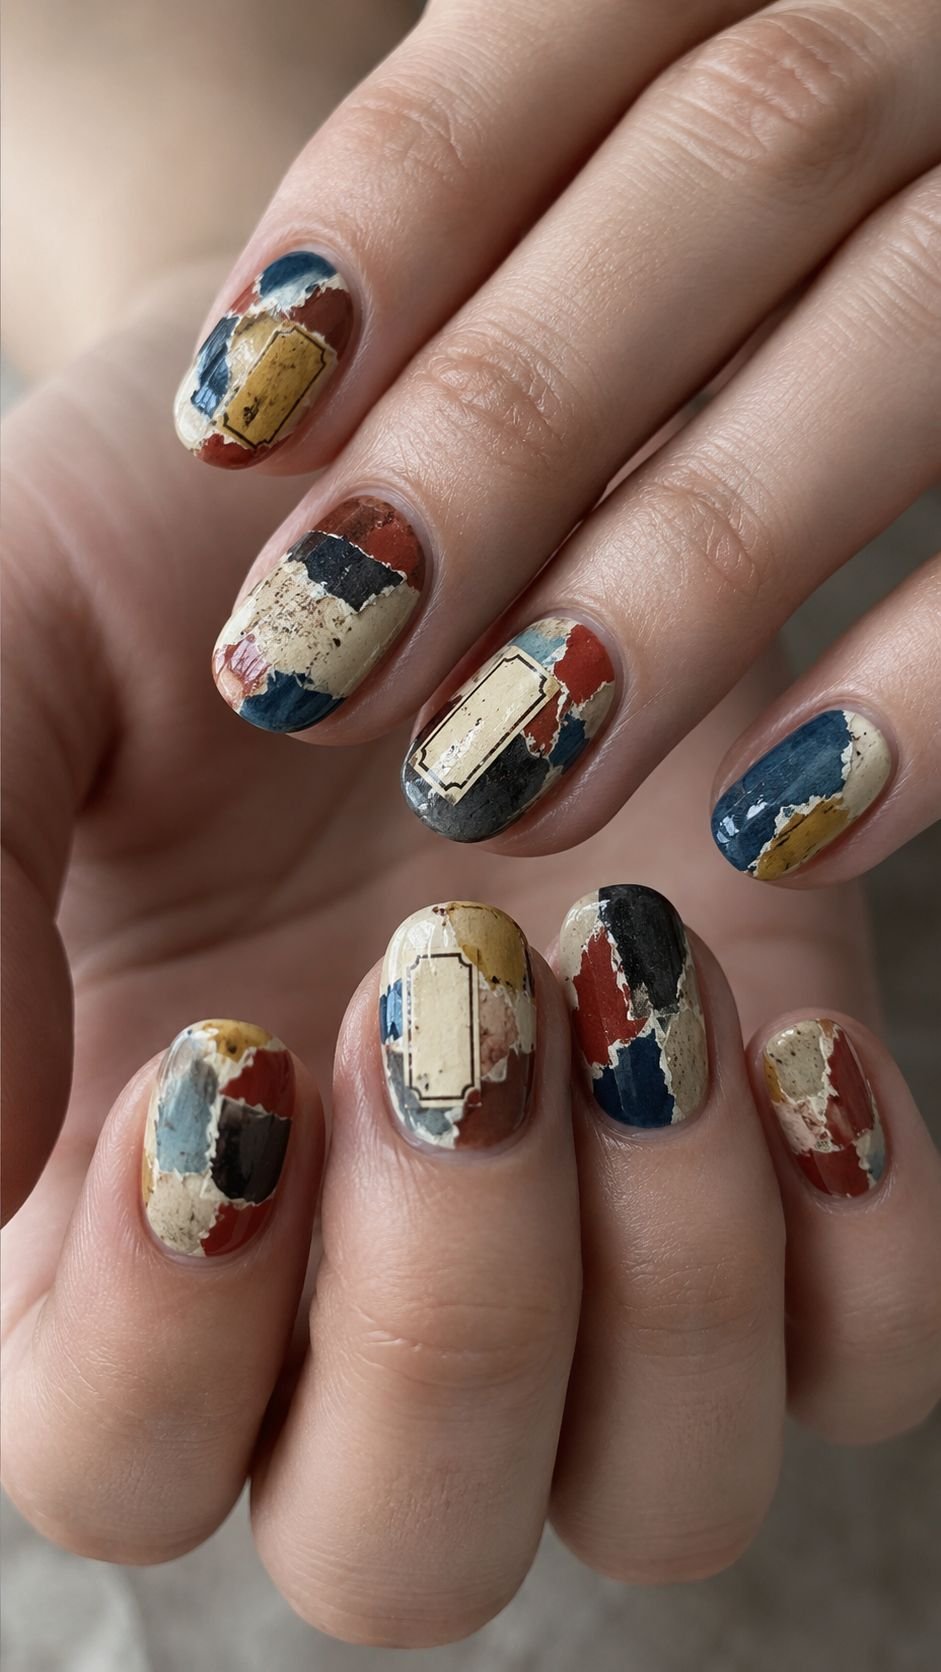
Avoid adding detailed numbers or realistic labels because simple graphic marks will keep the design original and visually clean. Use tickets on only a few nails, then carry their colors into the remaining designs to maintain balance.
Micro Hardware Nail Art
Micro hardware nail art introduces tiny industrial details through raised gel, miniature metallic beads, and carefully arranged structural shapes. The result can feel strong and modern without becoming heavy when the pieces remain small. Choose a restrained base palette such as taupe, deep red, slate, muted olive, or creamy beige.
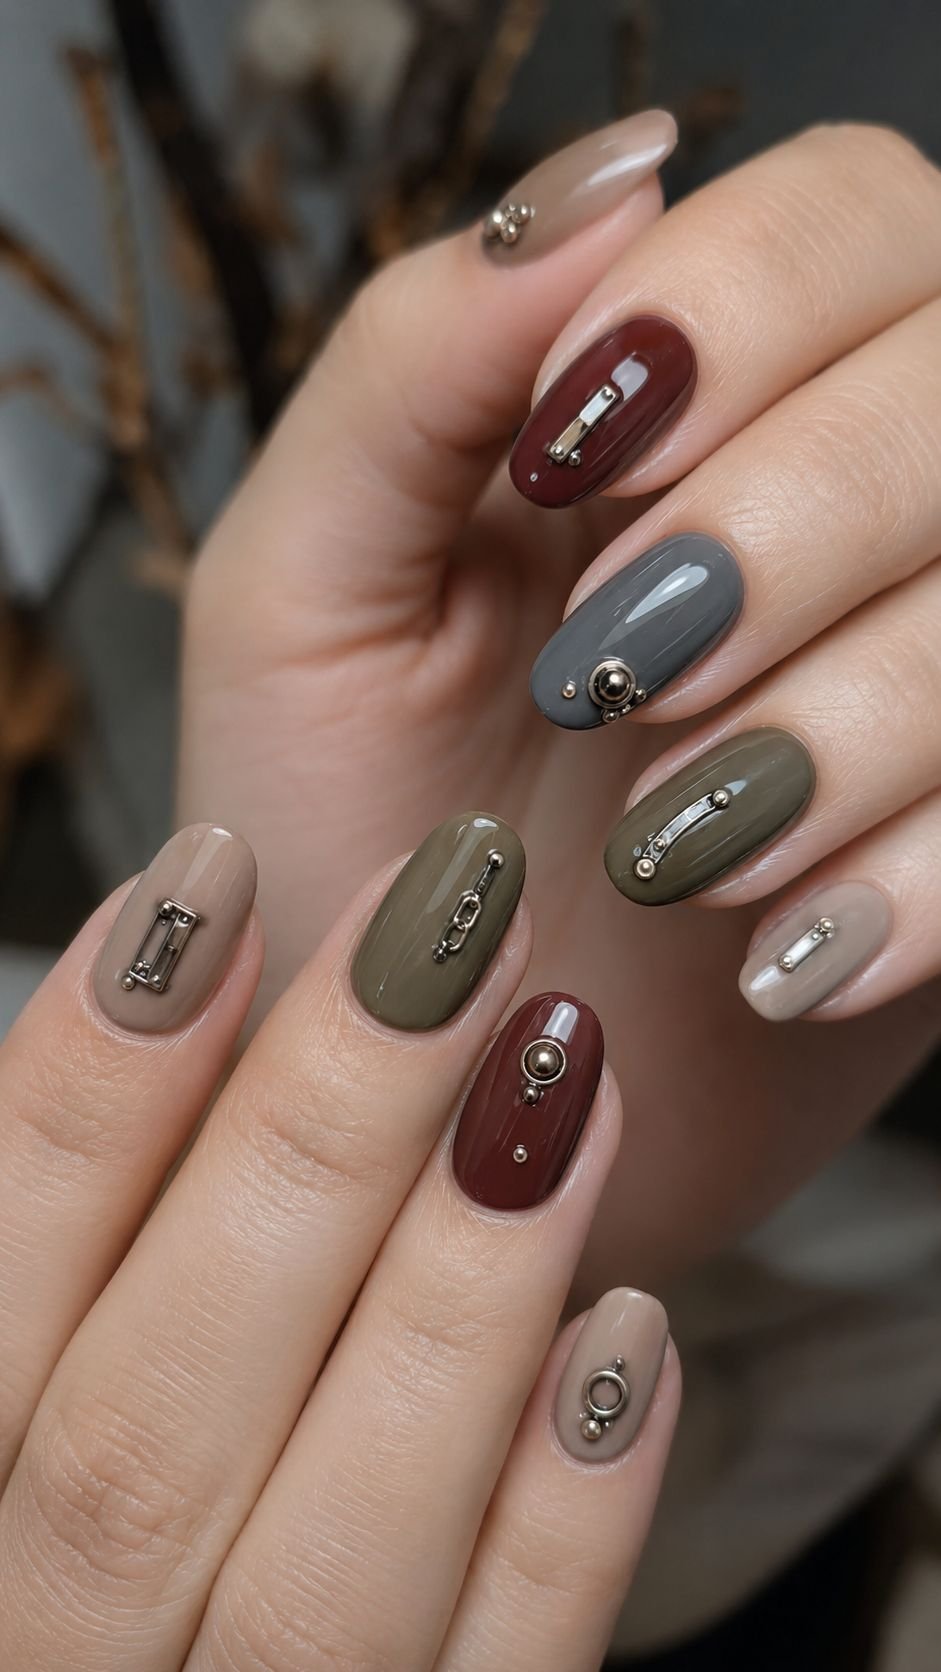
Hardware details should be treated like punctuation, adding interest to selected areas rather than covering the whole nail. Mixing different forms across the manicure keeps the concept engaging, but the scale and finish should remain consistent. A smooth top layer around the hardware helps every piece appear intentionally embedded.
Arrange a Tiny Rivet Sequence
Place a short sequence of miniature raised beads near one side of the nail. The rivets can follow a curve, surround a painted panel, or travel across a compact section. Keep enough space between them for every bead to remain distinct.
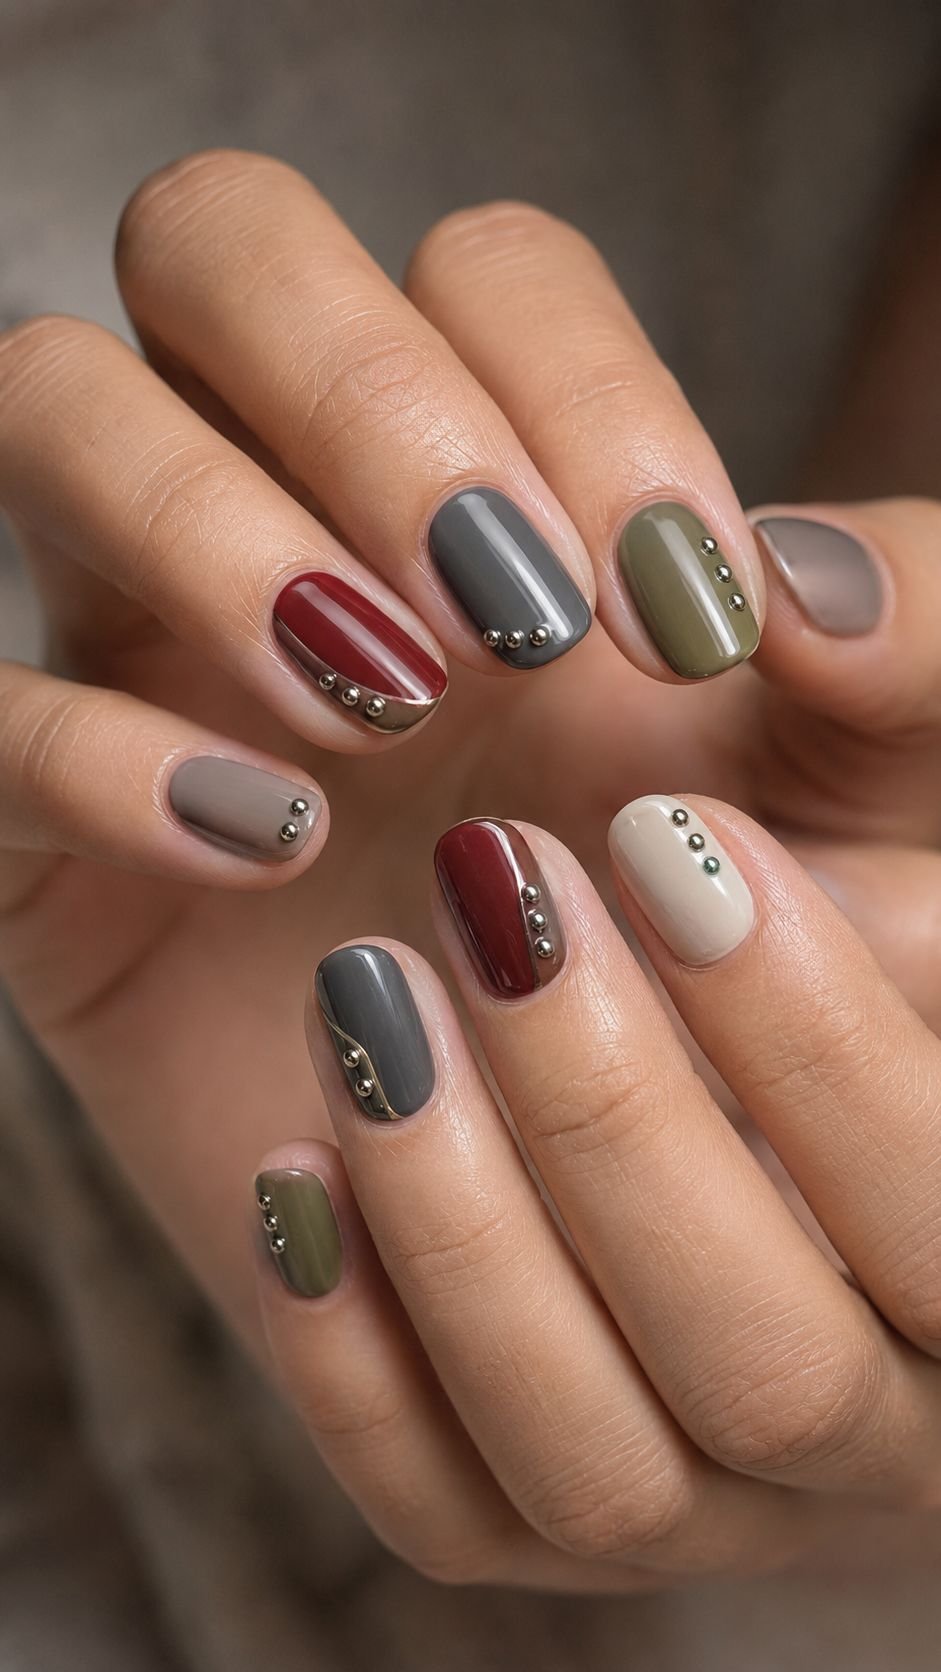
Use only three or four on most nails so the design does not become crowded. Repeat the same rivet size throughout the manicure, then change only the placement. This creates a clear visual system and gives the finished nails a refined mechanical character.
Form a Fine Chain Channel
Create a narrow painted pathway, then place tiny linked shapes along its center to suggest a delicate chain. The shapes can be formed with raised gel rather than attaching an actual chain, which keeps the surface controlled and comfortable.
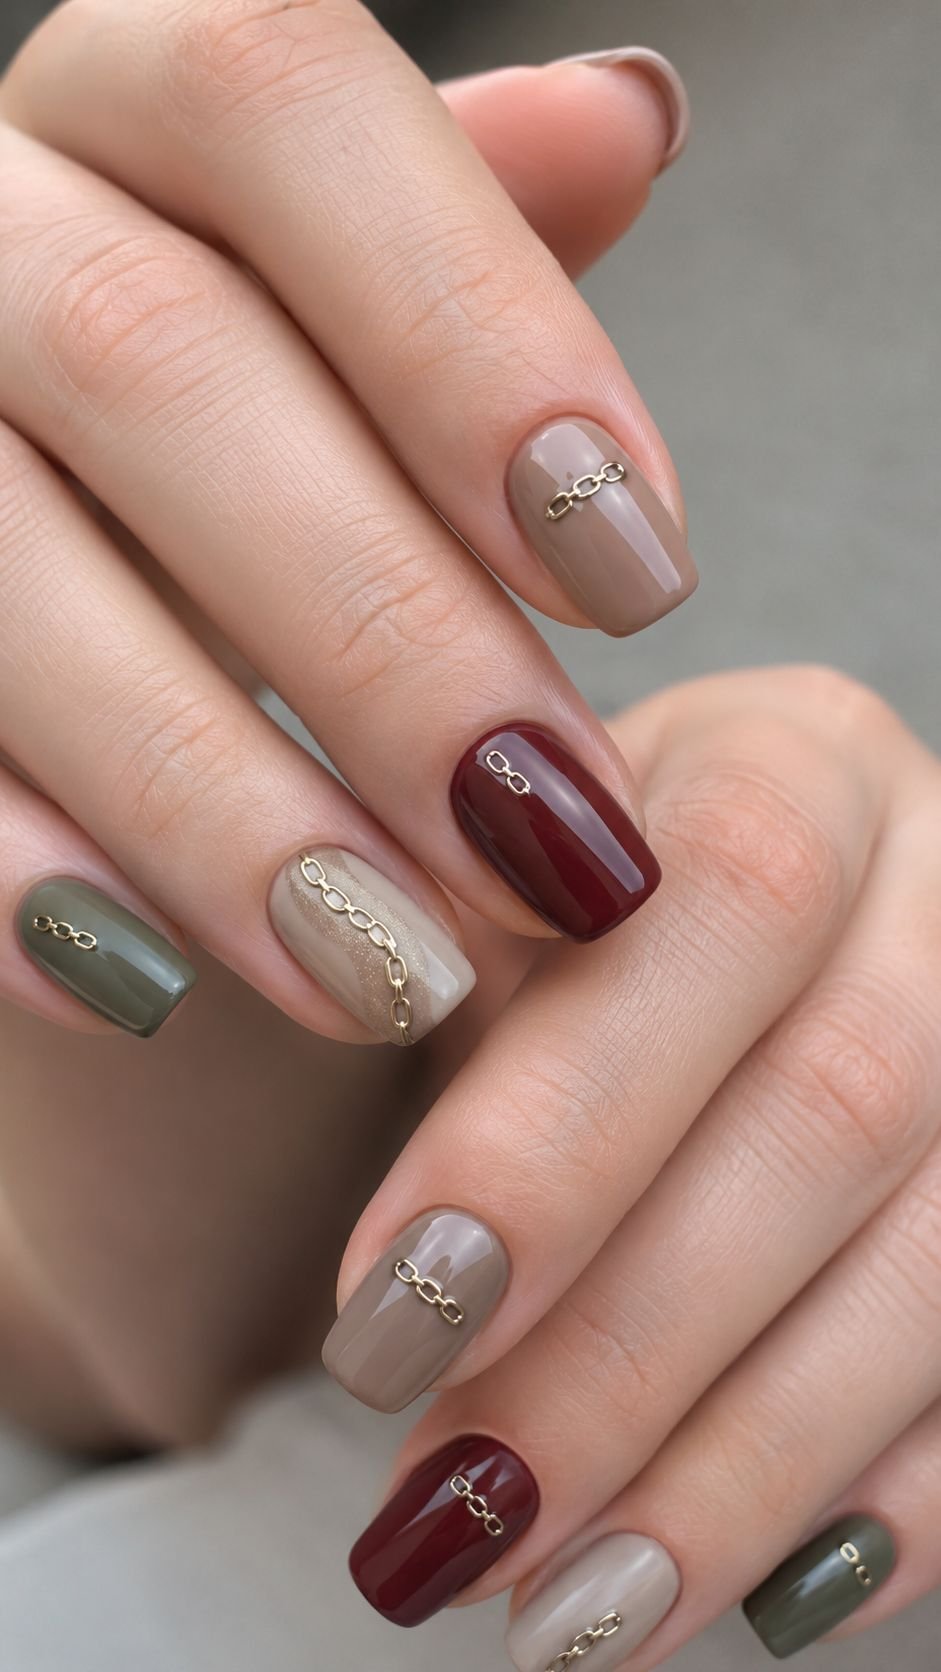
Guide the channel across the nail in a gentle curve and allow it to disappear near one edge. Use the full chain effect on one accent nail, then repeat only two or three linked shapes elsewhere for a quieter connection.
Add a Mini Clasp Accent
A miniature clasp shape can become a striking focal point when placed near the center or lower portion of the nail. Build it from a small raised bar and one rounded connector, keeping the construction simple enough to remain elegant.
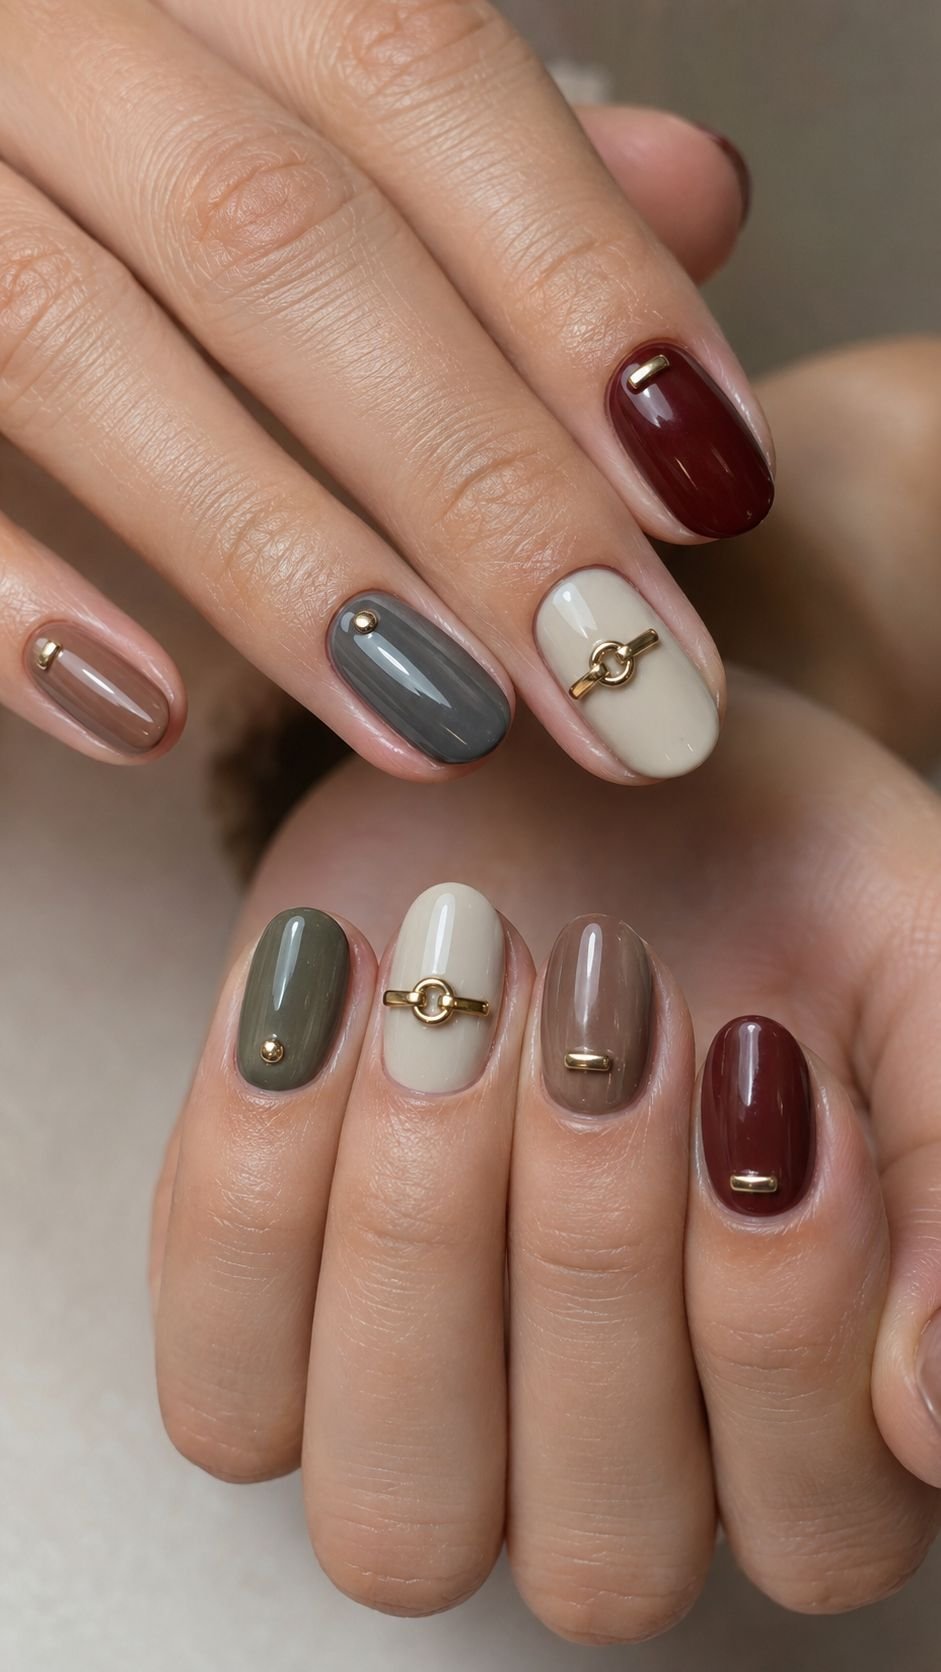
Paint a subtle shadow beneath the clasp to make it appear attached to the surface. Surrounding nails can carry tiny bars or single connectors from the same design language. This creates a complete hardware collection without repeating one identical object across every finger.
Let Your Nail Art Become Part of Your Personal Style
The most successful nail art does not need to follow one familiar formula. It can use transparent relief, sculpted ridges, surface contrast, folded illusions, layered prints, miniature hardware, or handcrafted charms to create a distinctive result. Choose one concept that connects naturally with your wardrobe and adjust its colors to reflect the mood you want to create. A softer palette can make dimensional details feel delicate, while deeper colors give the same designs a stronger editorial presence. Small changes in placement also ensure that every nail contributes something different without making the manicure feel disconnected. Continue exploring related nail color ideas, manicure care guides, nail shape inspiration, and styling articles to build a complete look that feels thoughtful from your fingertips to your outfit.
