
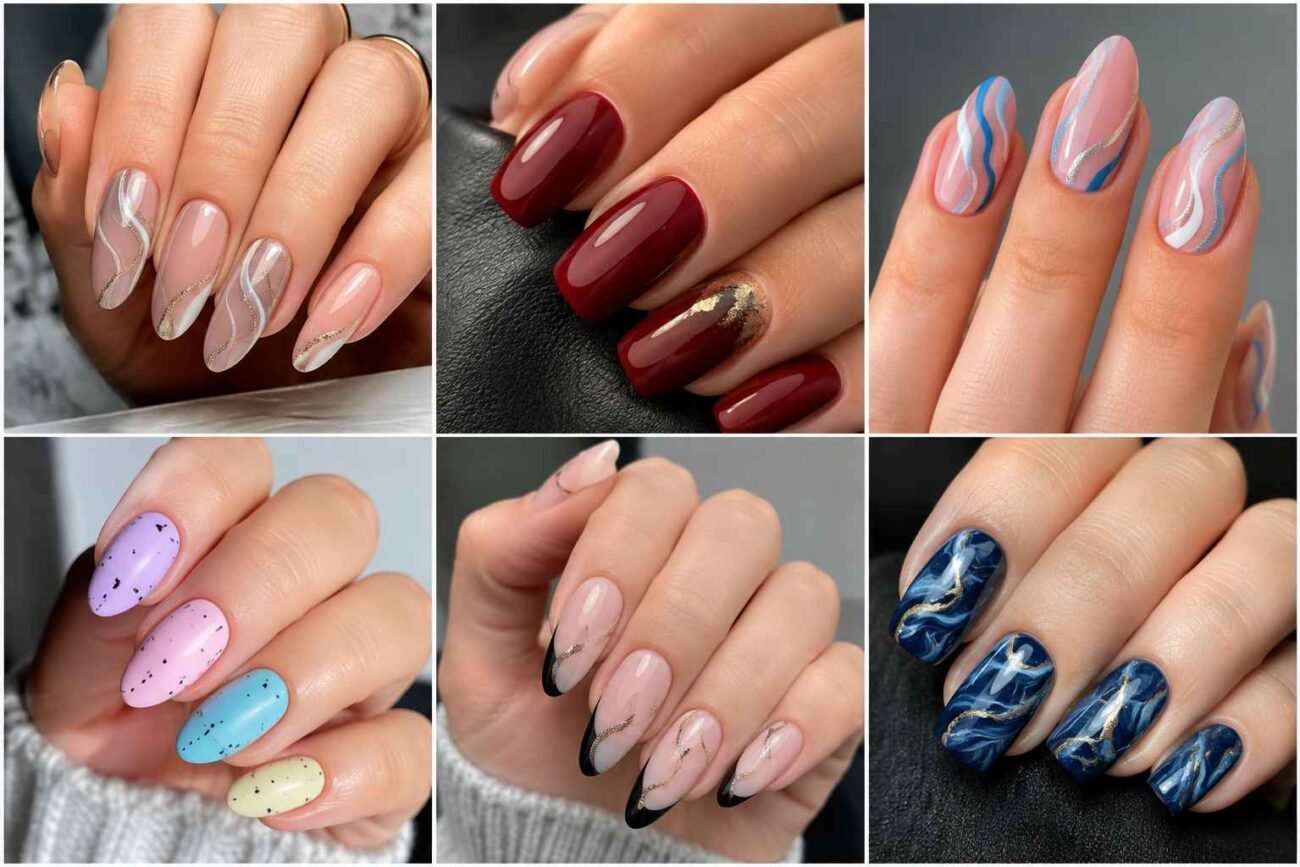
Nail polish designs feel most exciting when color, finish, and placement work together instead of competing for attention. The freshest manicure direction combines transparent polish, precise linework, playful dots, fluid patterns, and fabric inspired details that look artistic while remaining wearable.
These ideas can be adapted for short round nails, neat squares, soft almonds, or longer tapered shapes. Some create a clean and polished result, while others bring brighter color and stronger movement. The secret is choosing one visual focus and allowing controlled layers, negative space, and carefully placed details to create depth. The following designs offer distinctive inspiration without repeating the familiar manicure concepts seen everywhere.
Glass Veil French Nail Polish Designs
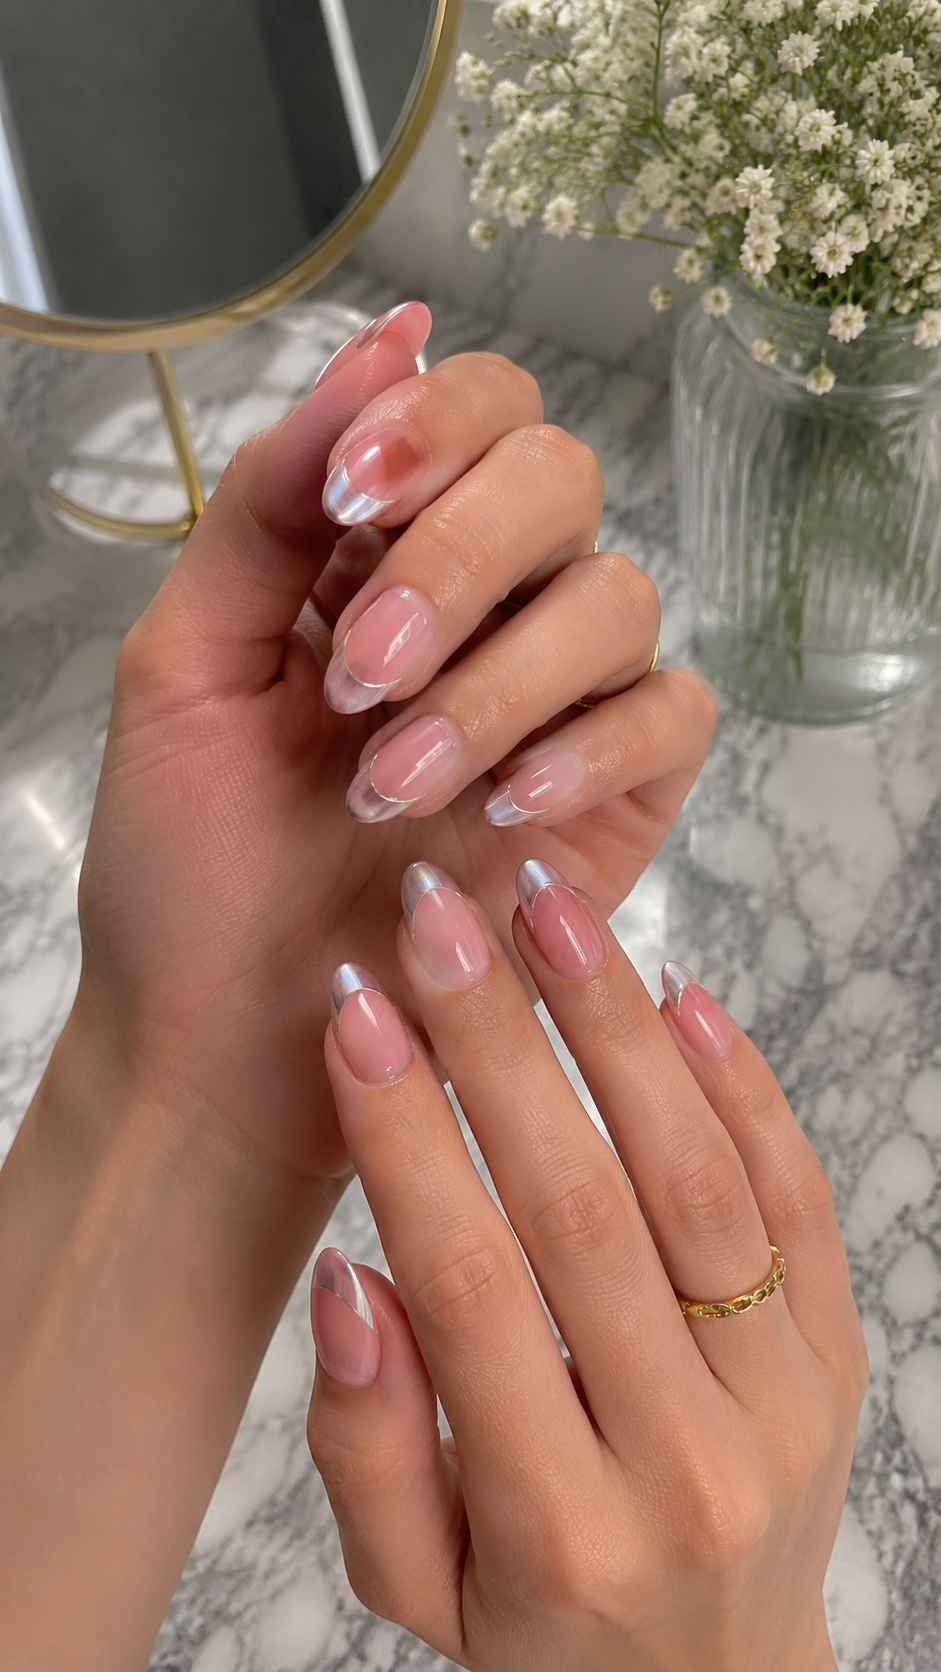
Glass veil French nails replace the usual solid tip with transparent color, delicate outlines, and open space. The natural nail remains visible, giving the manicure a light, dimensional appearance. Watery lavender, pale aqua, blush, and peach create a stained glass feeling without becoming heavy. This idea can stay minimal with one tinted tip or become more decorative through tiny flowers and geometric windows.
Crystal Curtain Tips
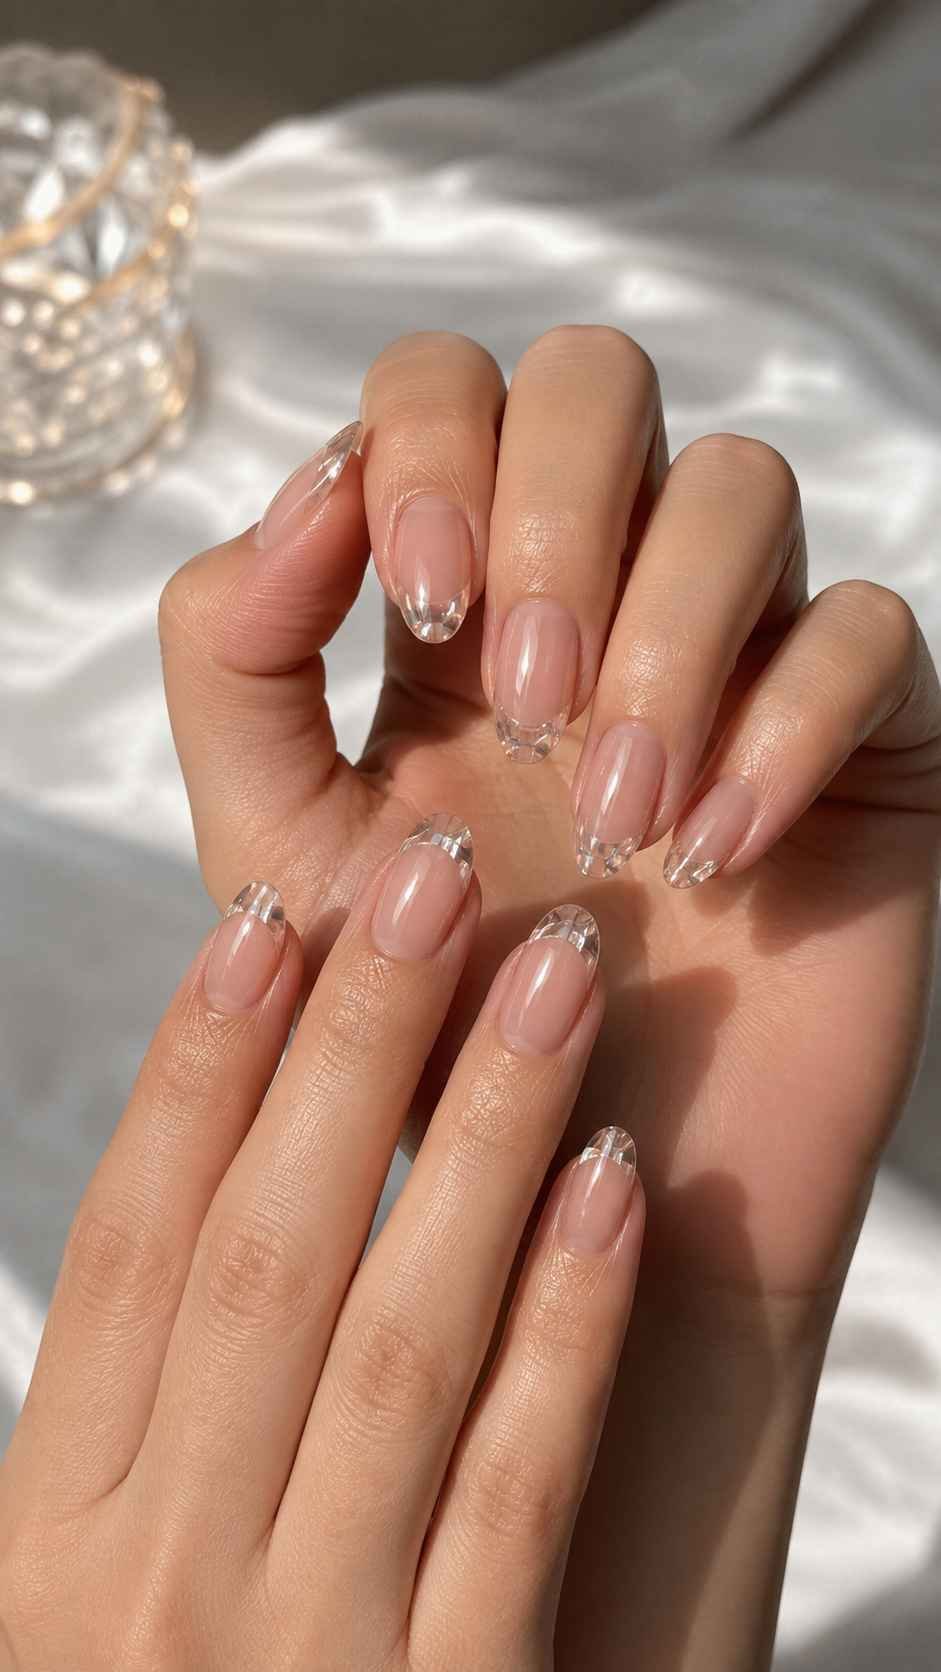
Brush a sheer polish across the free edge and fade it softly toward the center. Add a narrow curved border in a deeper shade to define the tip. On short nails, keep the transparent area slim. On almond nails, extend it slightly down the sides to strengthen the elongated shape. Finish with a glossy top coat for a smooth glasslike surface.
Floating Micro Florals
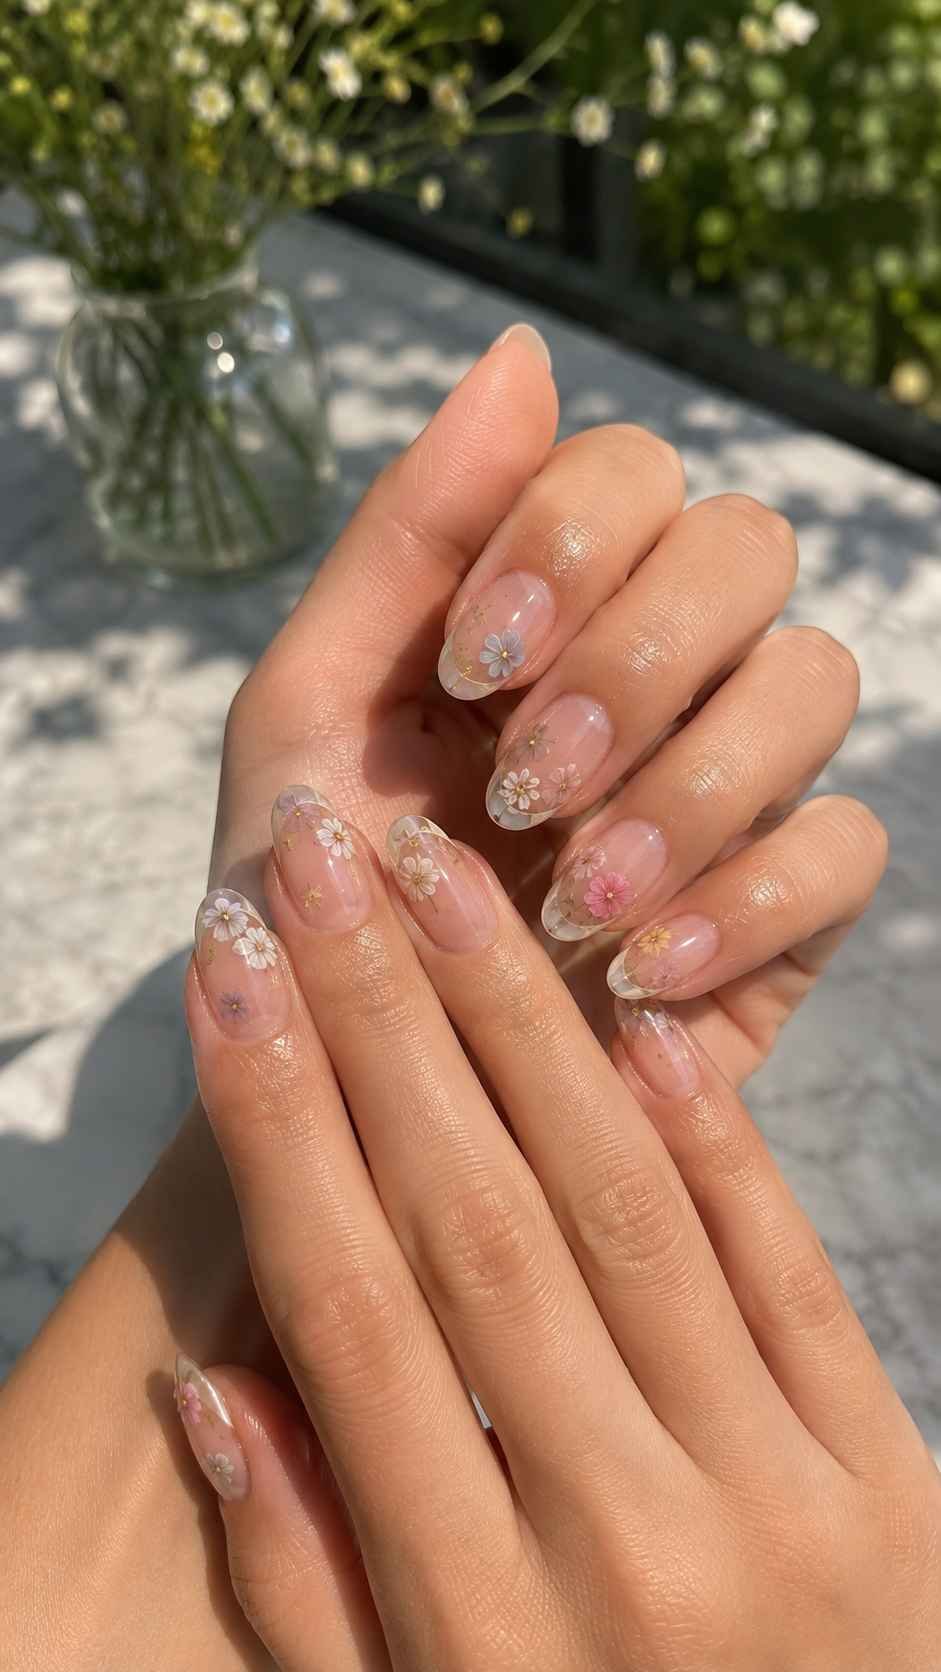
Paint two or three tiny flowers inside a transparent tip rather than covering the whole nail. Use white, coral, lilac, or blue petals with a small contrasting center. Generous clear space around each flower keeps the look polished. Decorate only a few nails and use simple tinted tips on the others so the manicure feels detailed but never crowded.
Clear Checker Windows
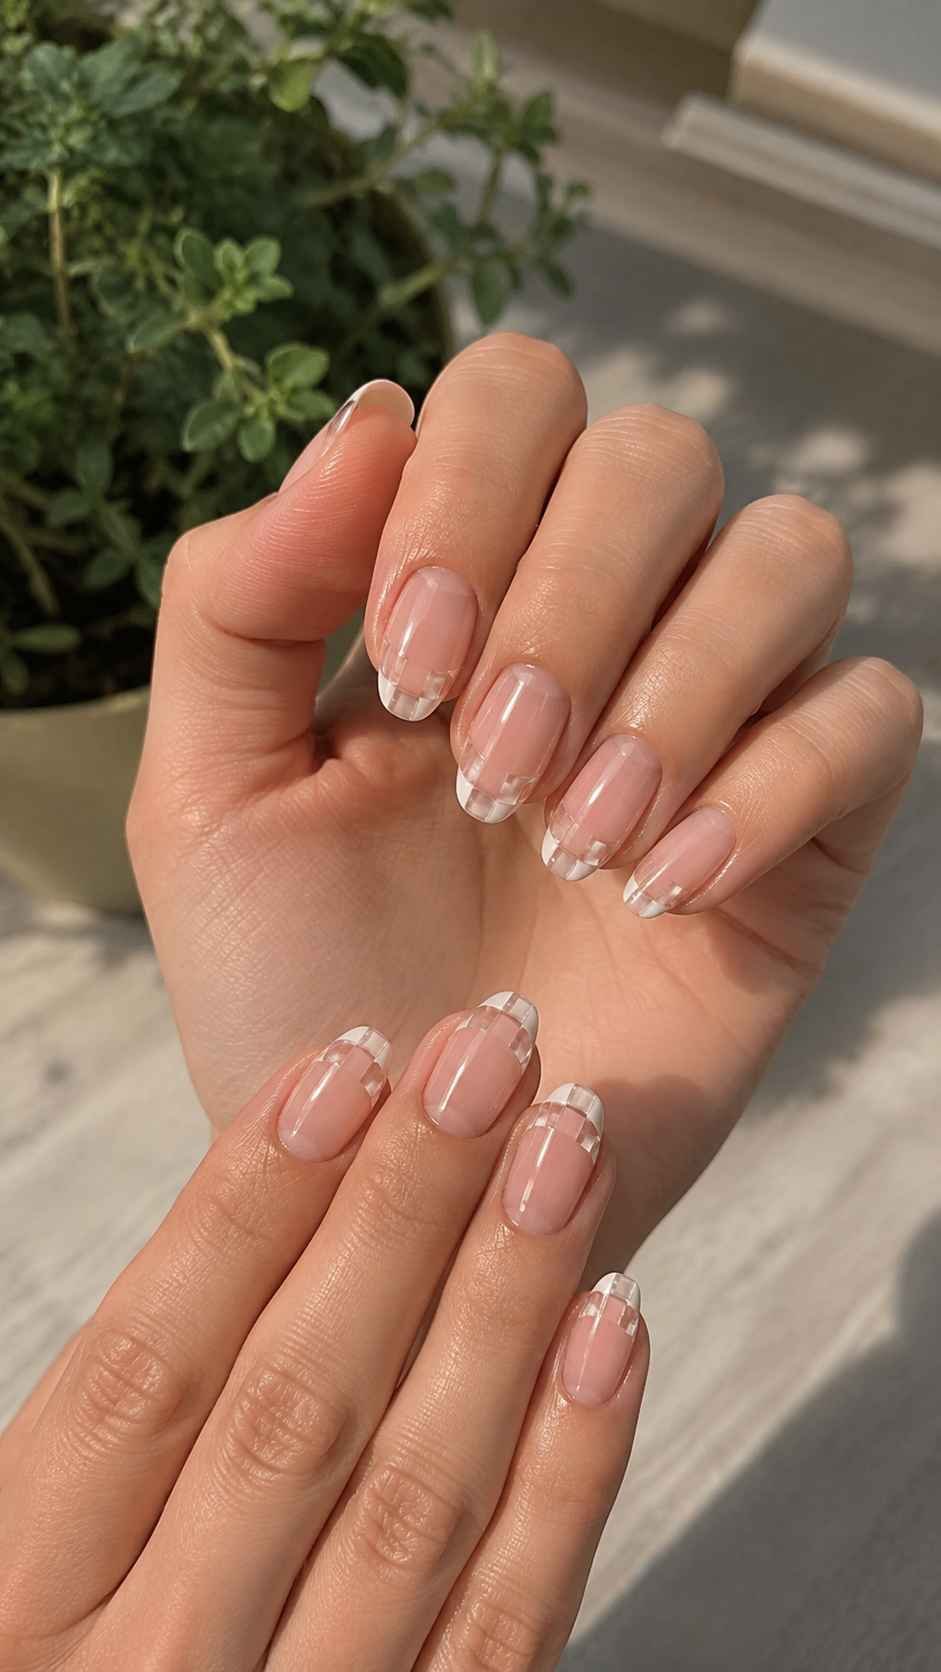
Divide the tip into small sections with thin lines, then fill alternating spaces with translucent color. The contrast between tinted and clear squares creates an airy checker pattern. Try blush with cherry, mint with teal, or peach with raspberry. Keep each block evenly sized and the lines fine. Square and squoval nails support this structured design particularly well.
Vertical Ribbon Nail Polish Designs
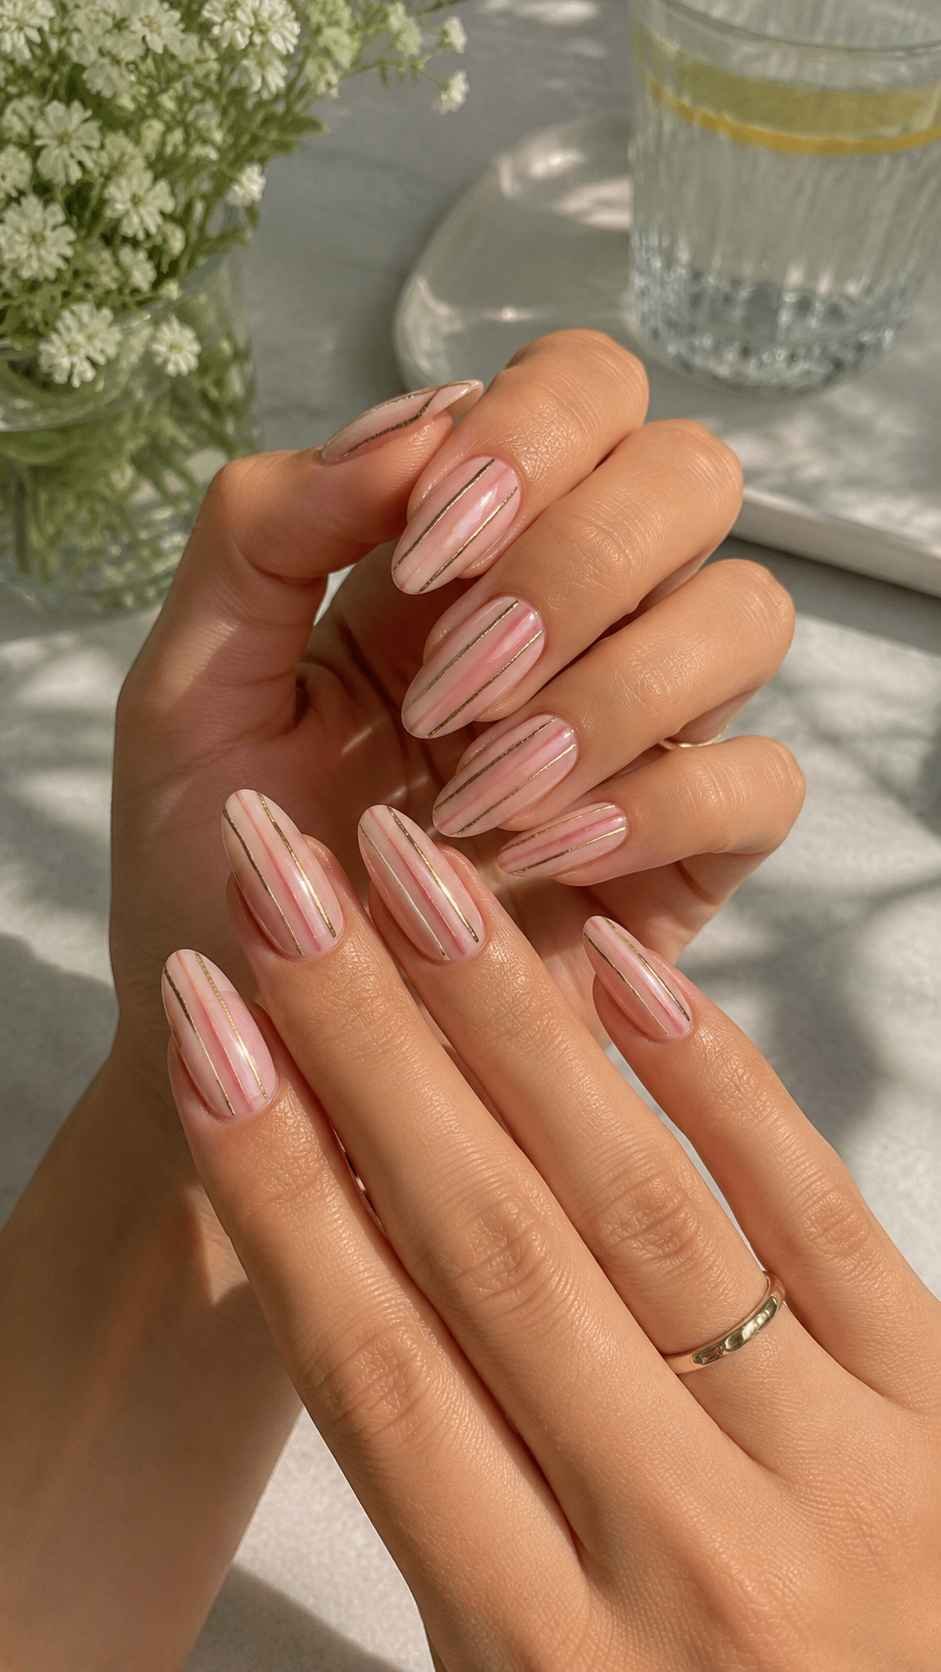
Vertical ribbon designs guide the eye from cuticle to tip, helping nails appear longer and more balanced. Instead of busy striping, the style uses one or two controlled bands with clean space around them. The ribbons may be straight, gently curved, or placed off center. Contrasting colors look graphic, while related tones produce a quieter and more sophisticated finish.
Centered Pinstripe Polish
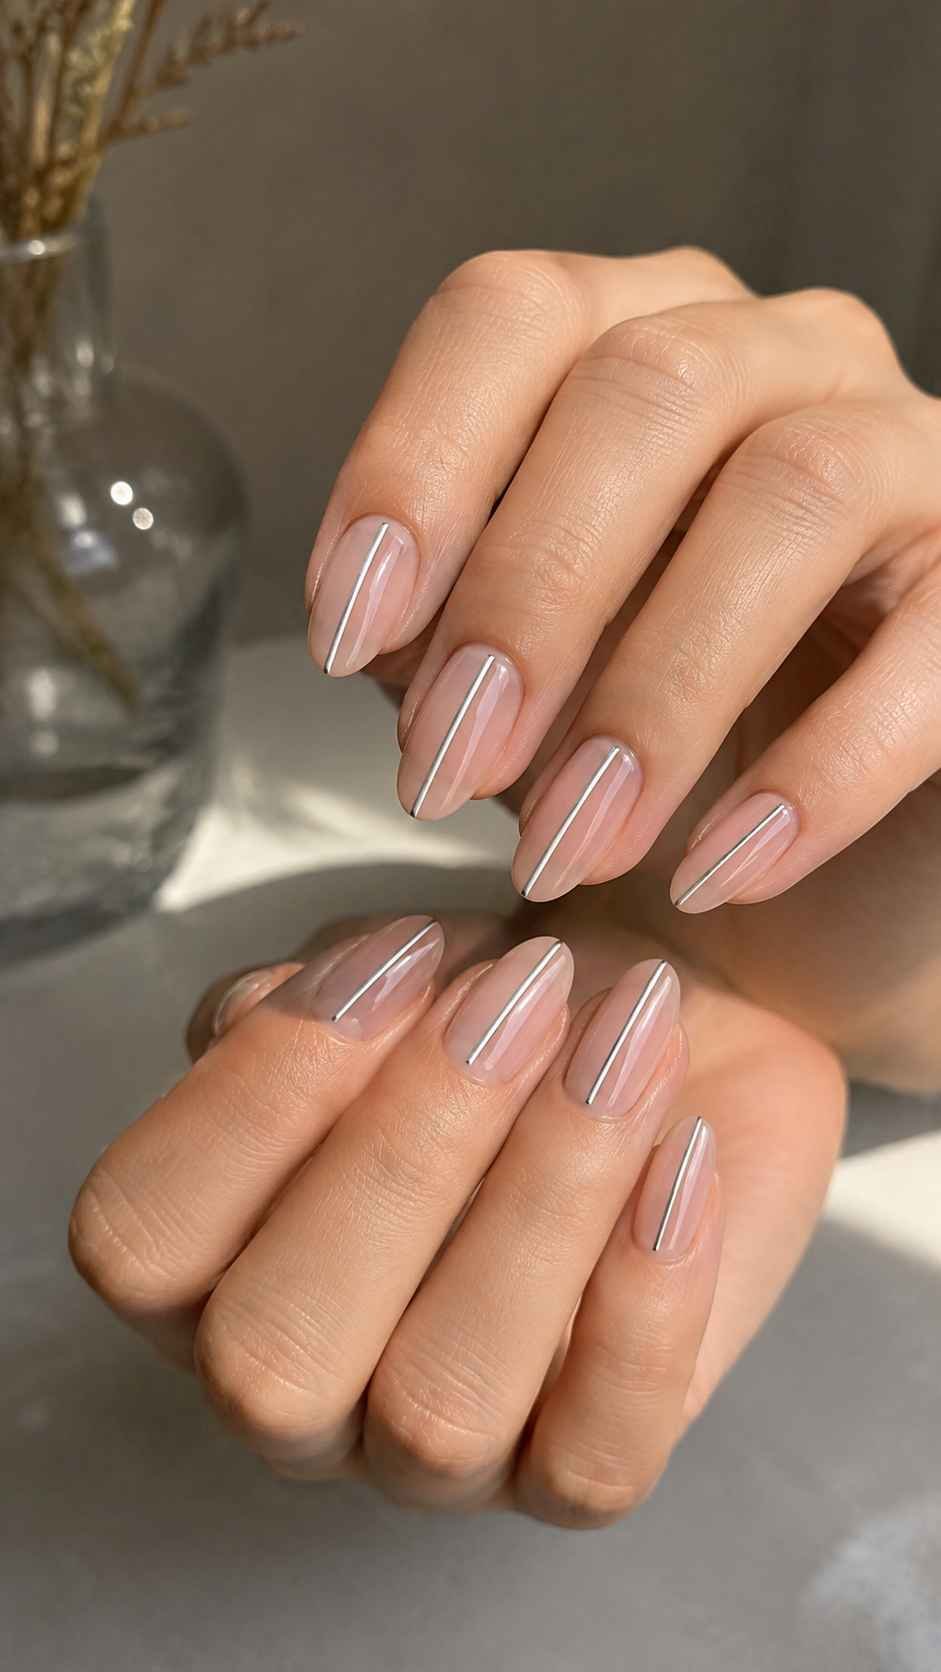
Paint one narrow stripe through the center of every nail over a smooth base. Deep blue on fog gray, tomato red on pale pink, or espresso on beige creates clear contrast. Keep the width consistent and stop just before the cuticle for a neat result. The centered placement adds symmetry and gives shorter nails a more elongated appearance.
Twin Ribbon Borders
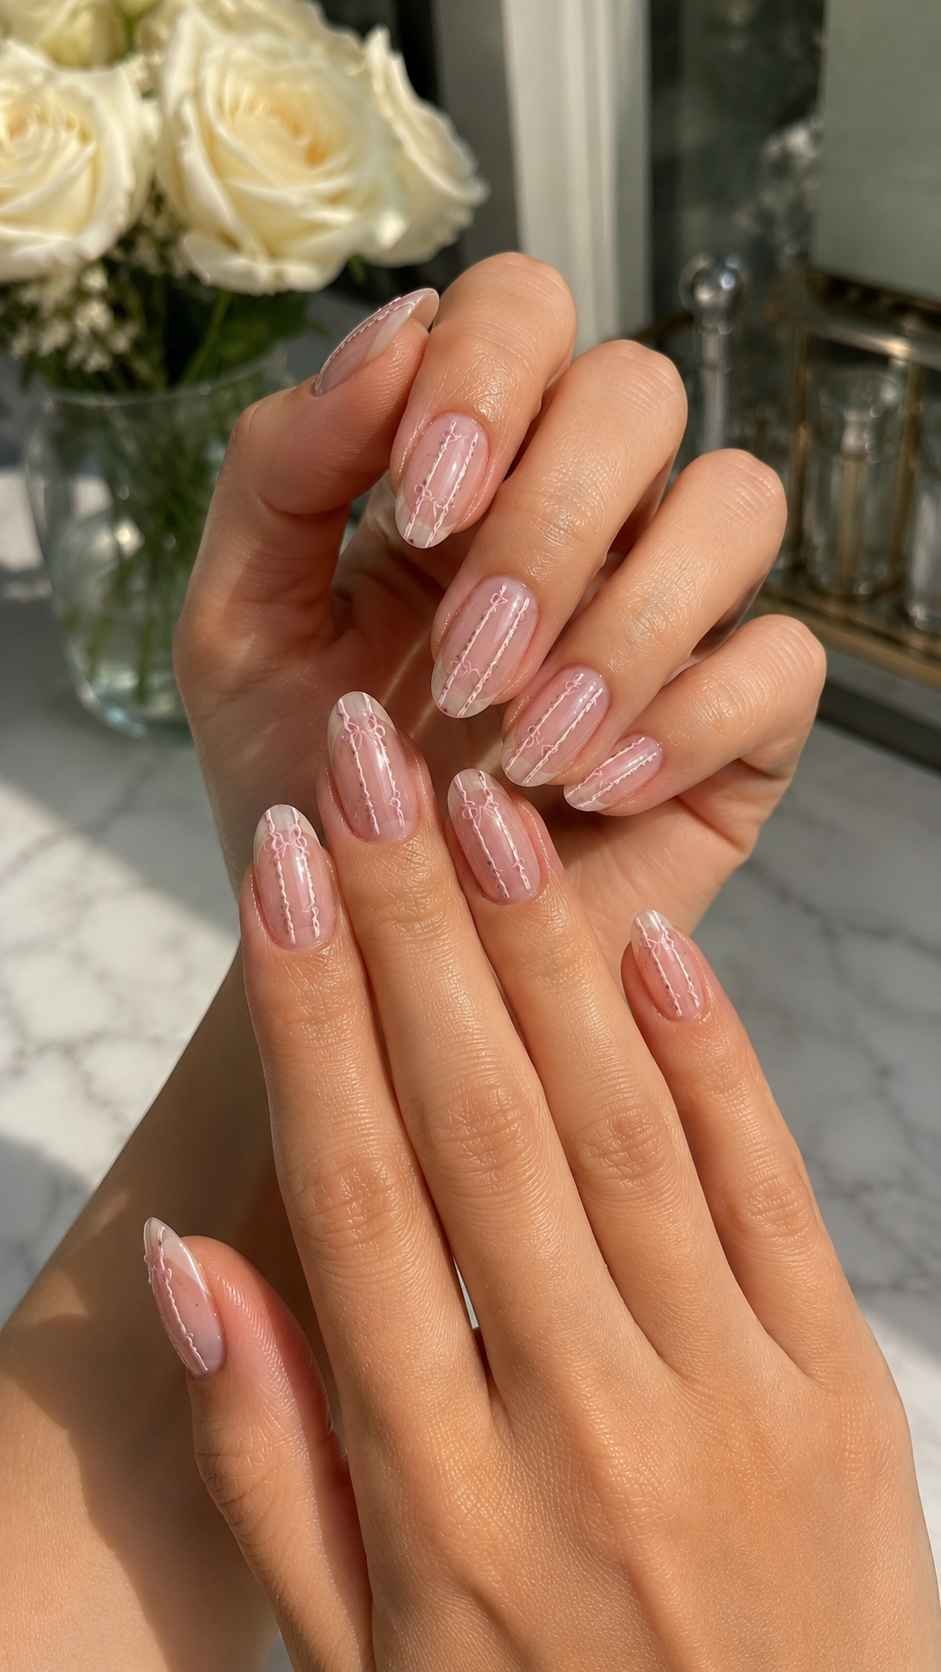
Create two slim vertical lines with a small open gap between them. The negative space becomes part of the design and adds an architectural quality. Try cream and berry over a translucent base or turquoise and navy over pale aqua. Keep the ribbons parallel or move them slightly closer together near the tip to echo a tapered nail shape.
Off Center Color Stream
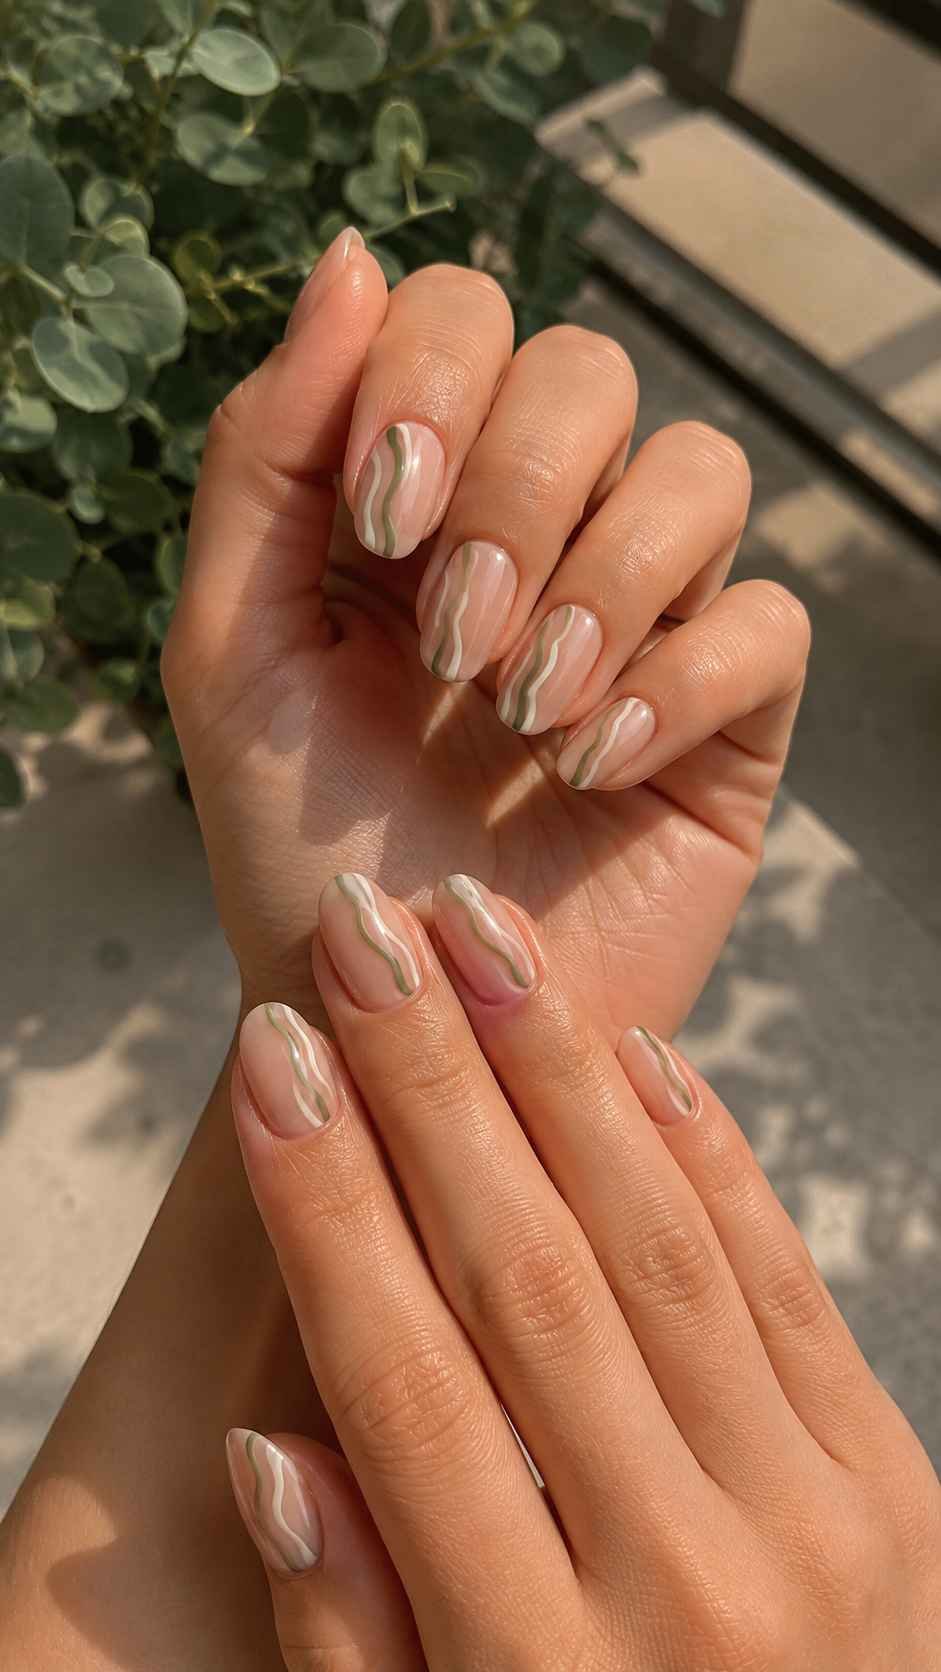
Place a flowing stripe slightly to one side instead of directly in the middle. Give it a gentle bend so it resembles a stream of polish moving across the nail. Pair melon with coral or lilac with grape for visible depth. Alternate the stripe from left to right across the hand to create movement without losing visual balance.
Sorbet Wash Nail Polish Designs
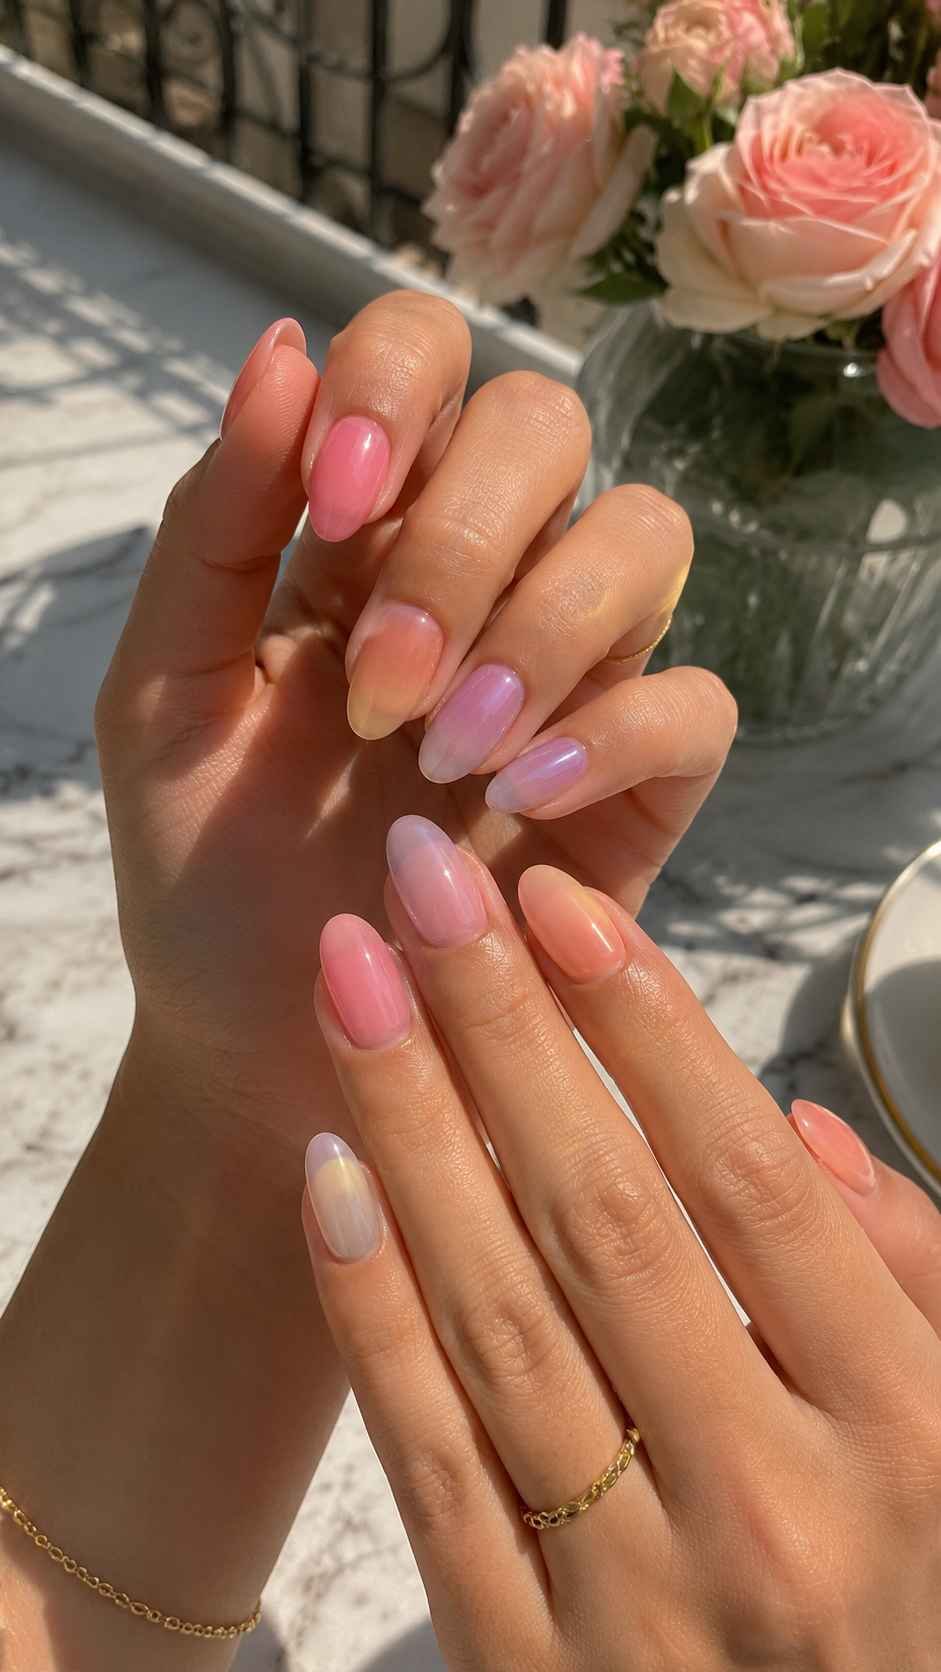
Sorbet wash nails use juicy, translucent color that allows the natural nail to show beneath the polish. They feel brighter than a nude manicure but softer than fully opaque color. The effect depends on thin layers and a glossy finish that resembles chilled fruit glaze. One shade can cover the full set, or several related colors can create a coordinated tonal manicure.
Raspberry Water Tint
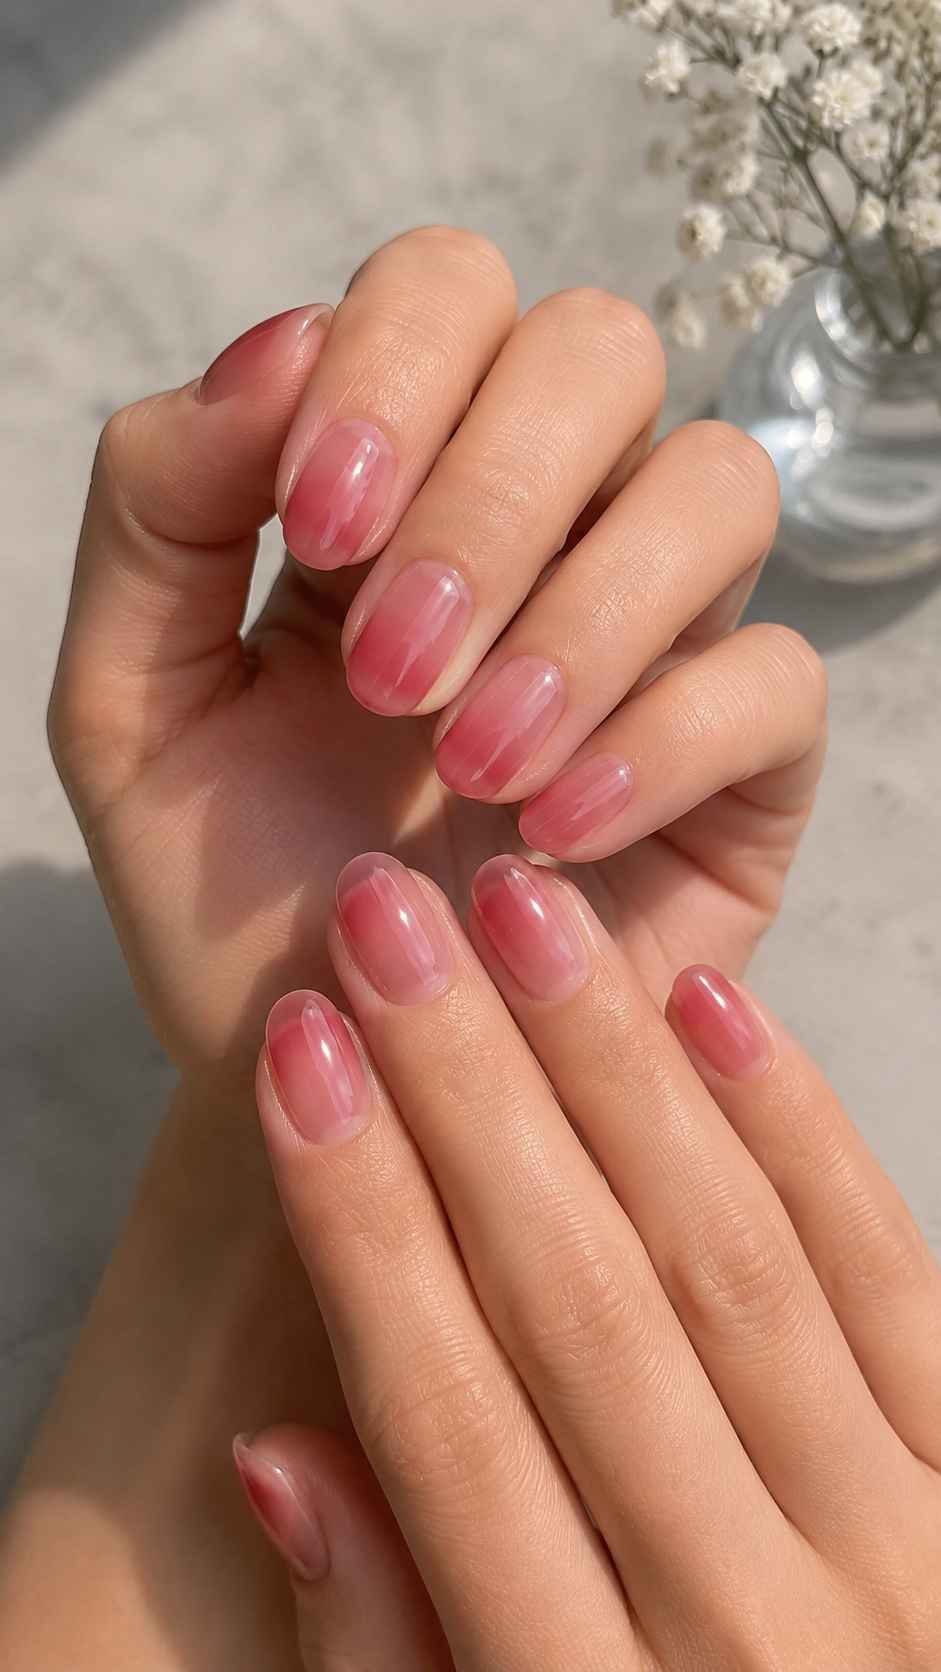
Apply a cool raspberry polish in one thin layer, then place a second layer only near the tip. This creates a simple gradient without complicated blending. The deeper edge gives definition while the transparent base keeps the color wearable. A small clear crescent near the cuticle adds dimension. The rich pink suits short rounded nails especially well.
Citrus Melon Layers
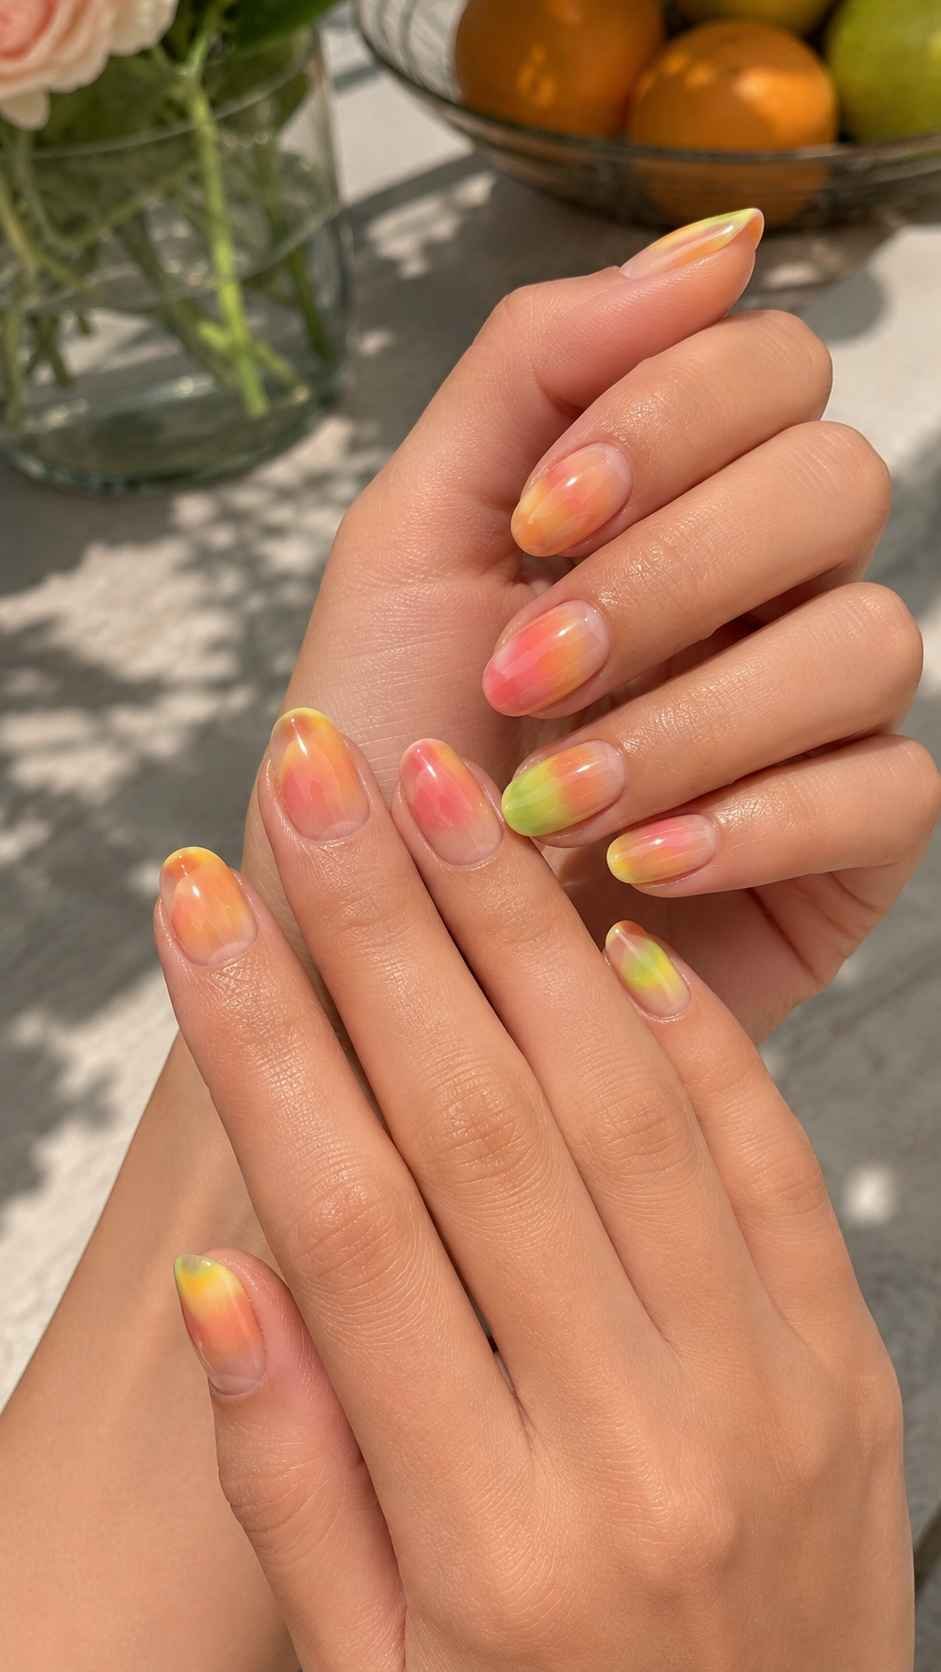
Layer pale orange, pink grapefruit, and melon polish in overlapping translucent sections. Begin with the lightest shade, then add stronger colors diagonally so new tones appear where they meet. Keep the borders soft rather than sharply outlined. Use a different arrangement on each nail while repeating the same palette to make the set varied but connected.
Grape Ice Gradient
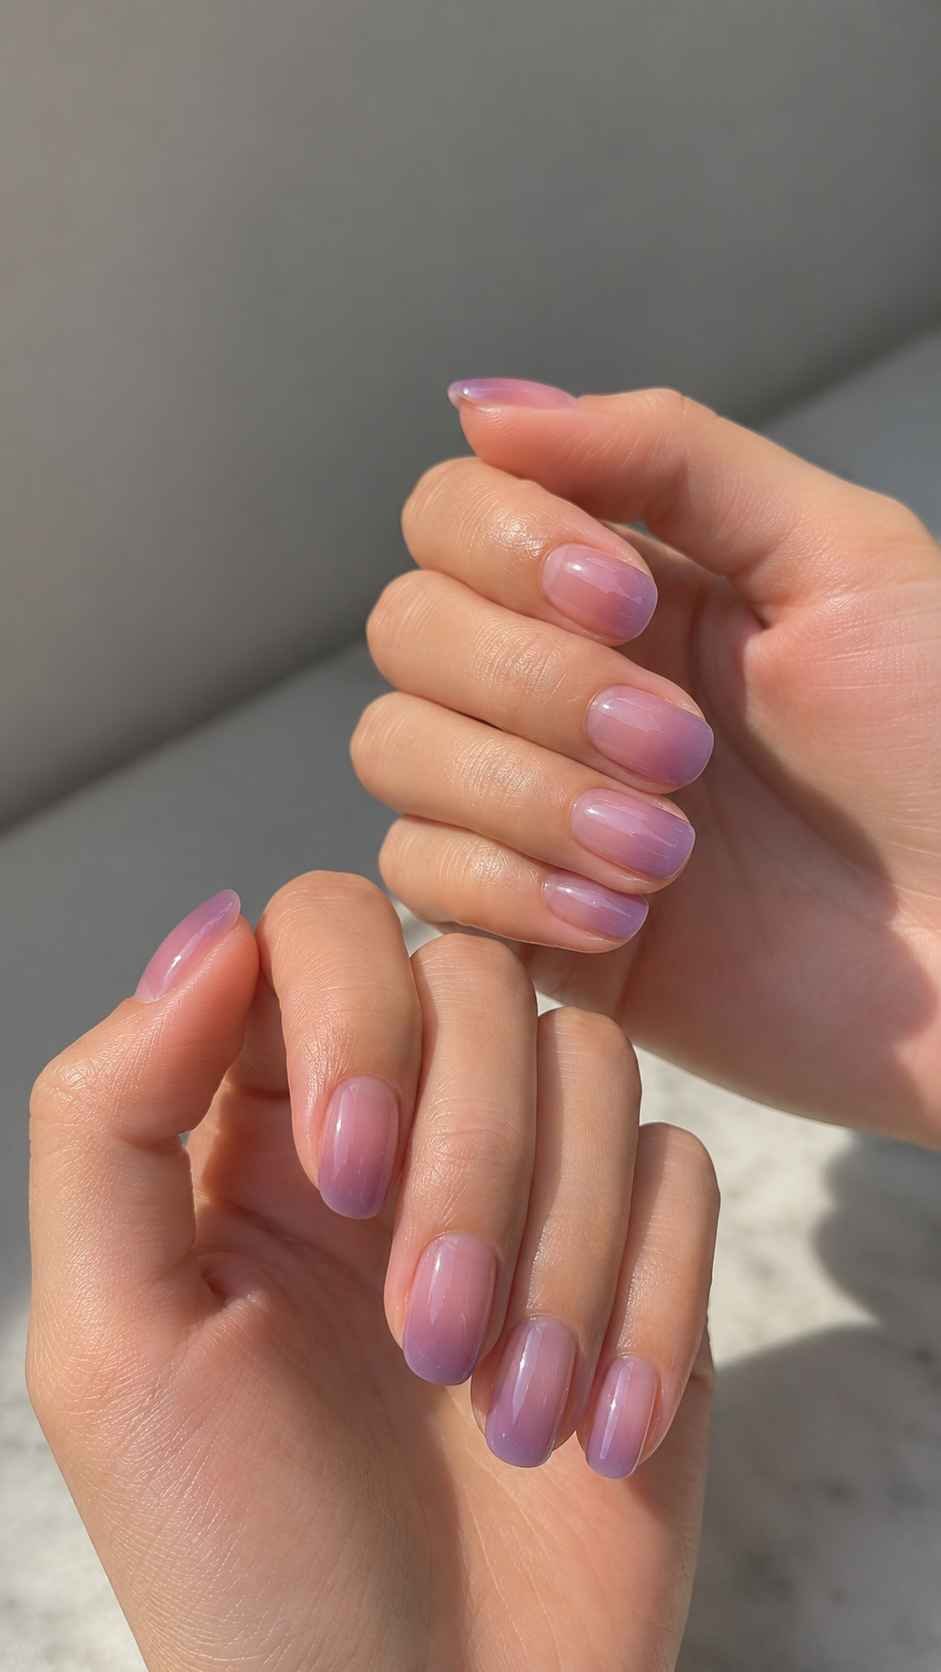
Build a cool gradient with a clear lilac base, a medium grape center, and a deeper violet tip. Apply every shade lightly and soften the meeting points. The polish should look suspended inside the nail rather than painted in thick bands. A very shiny finish enhances the icy depth and makes the purple tones appear luminous.
Polka Dot Frame Nail Polish Designs
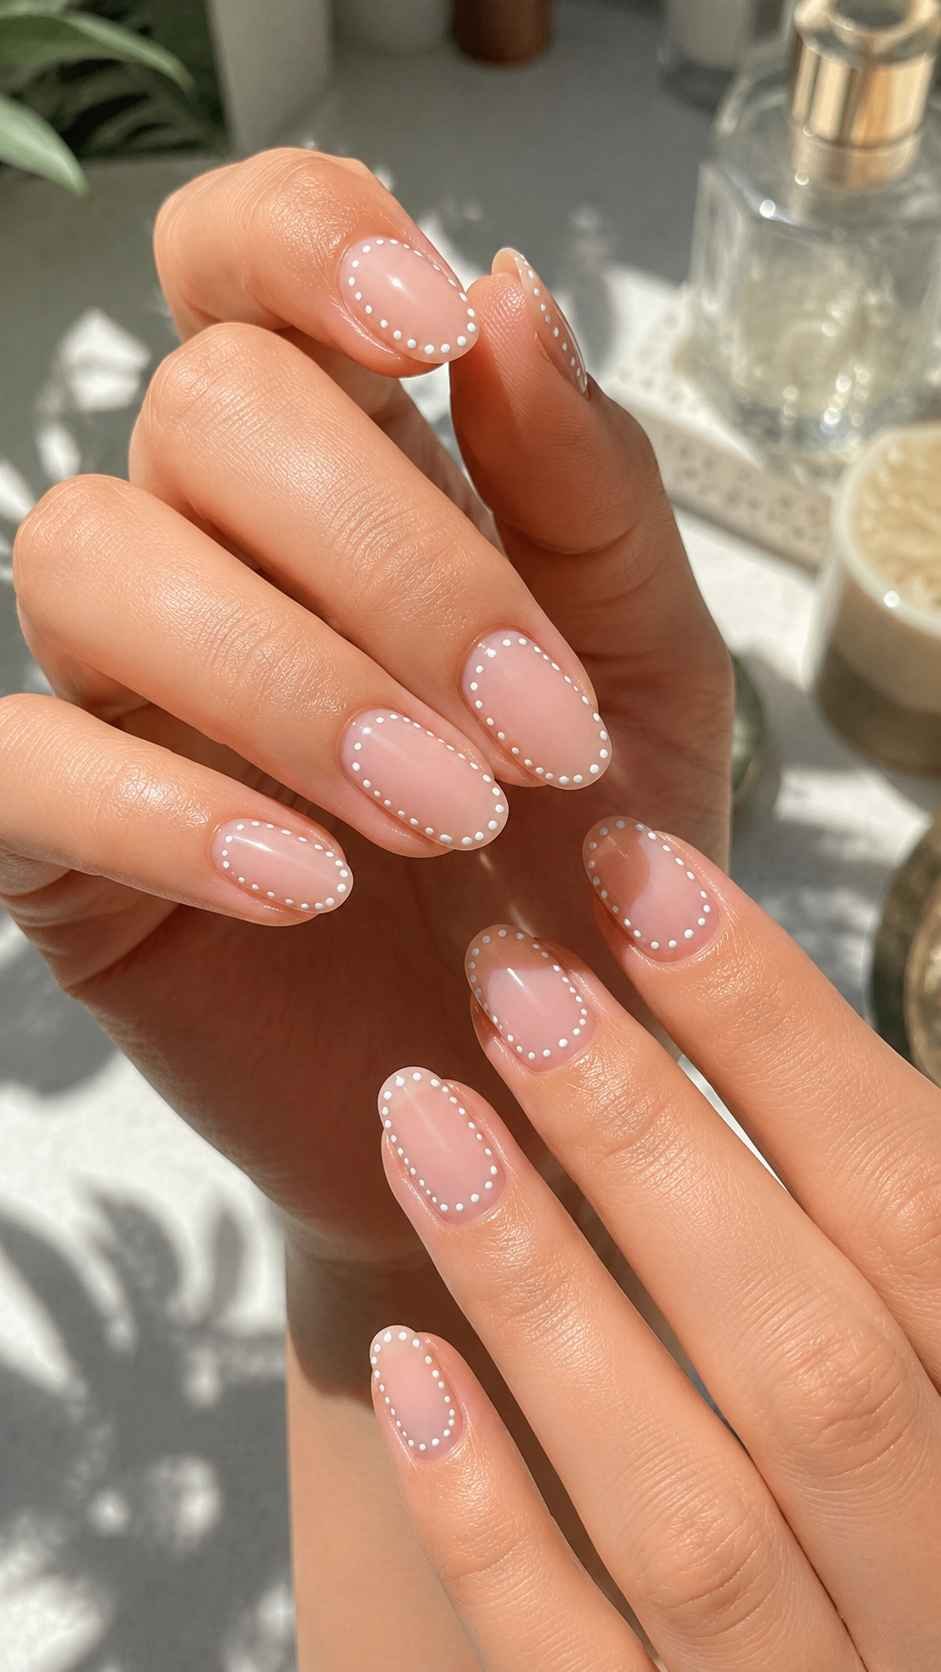
Polka dot frames place playful detail around the edges while leaving the center calm and open. Instead of scattering dots randomly, each design follows the tip, cuticle, or sidewall to emphasize nail shape. Tiny dots feel delicate, while mixed sizes look more expressive. A neutral base highlights bright colors, although tonal shades create a subtler result.
Confetti Crescent Tips
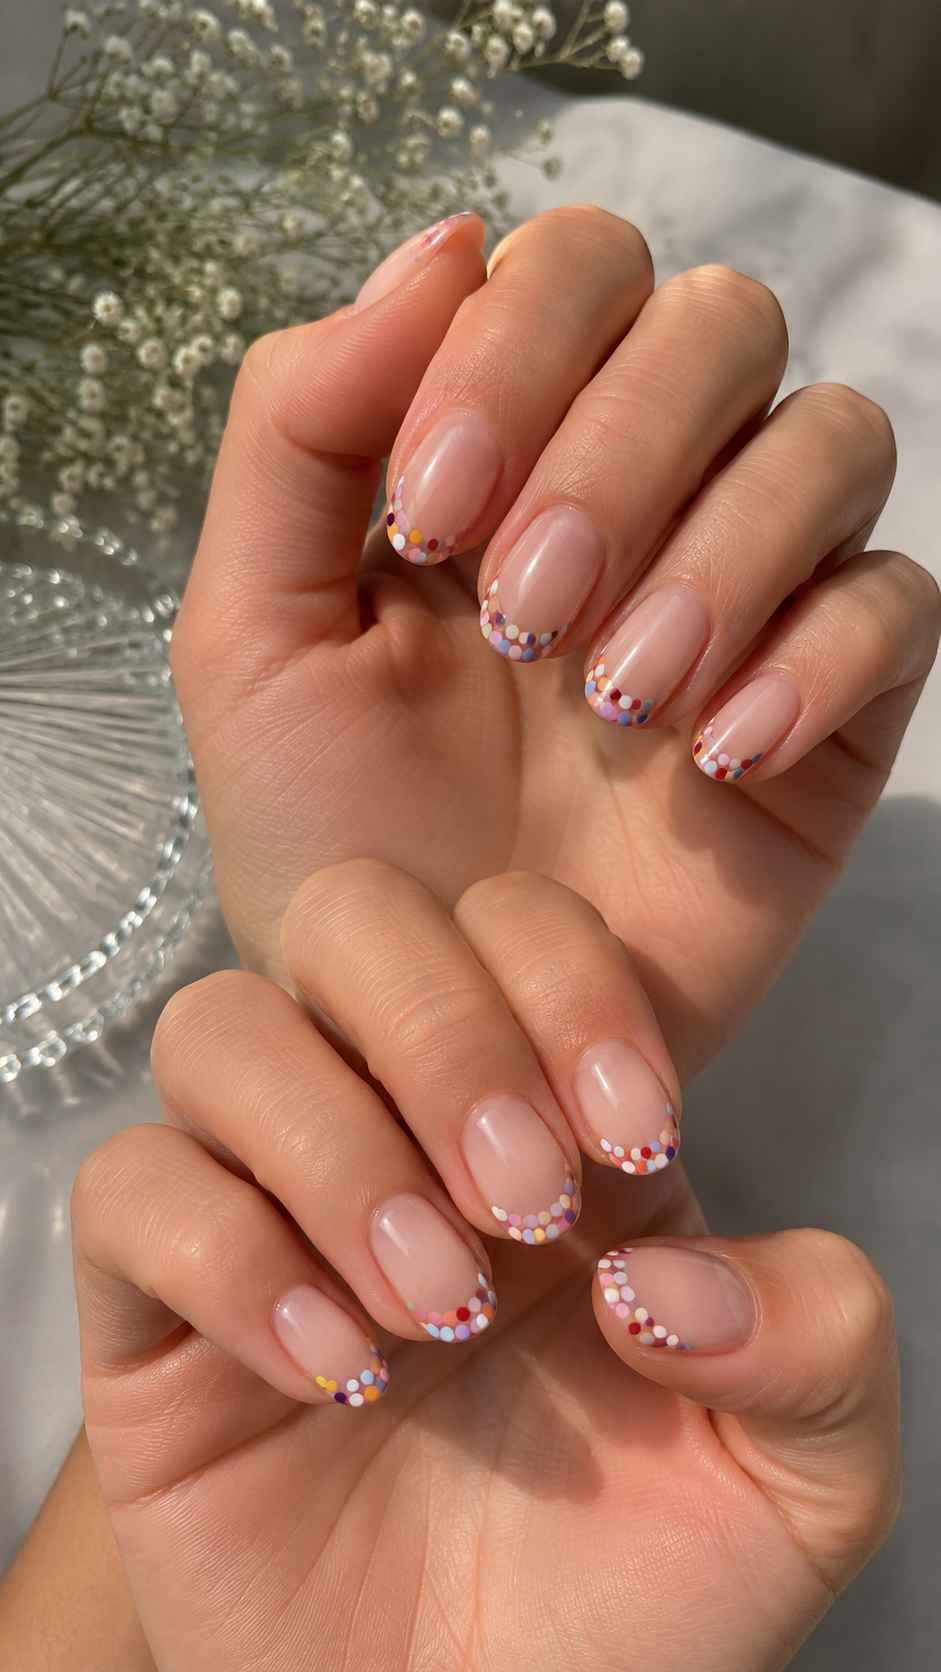
Arrange small dots along the curved tip to form a cheerful crescent. Choose three balanced colors, such as coral, raspberry, and tangerine, or lilac, aqua, and mint. Leave space between the dots so the edge stays clean. Repeat the color order for consistency or change it slightly on each nail for a livelier finish.
Reverse Cuticle Dots
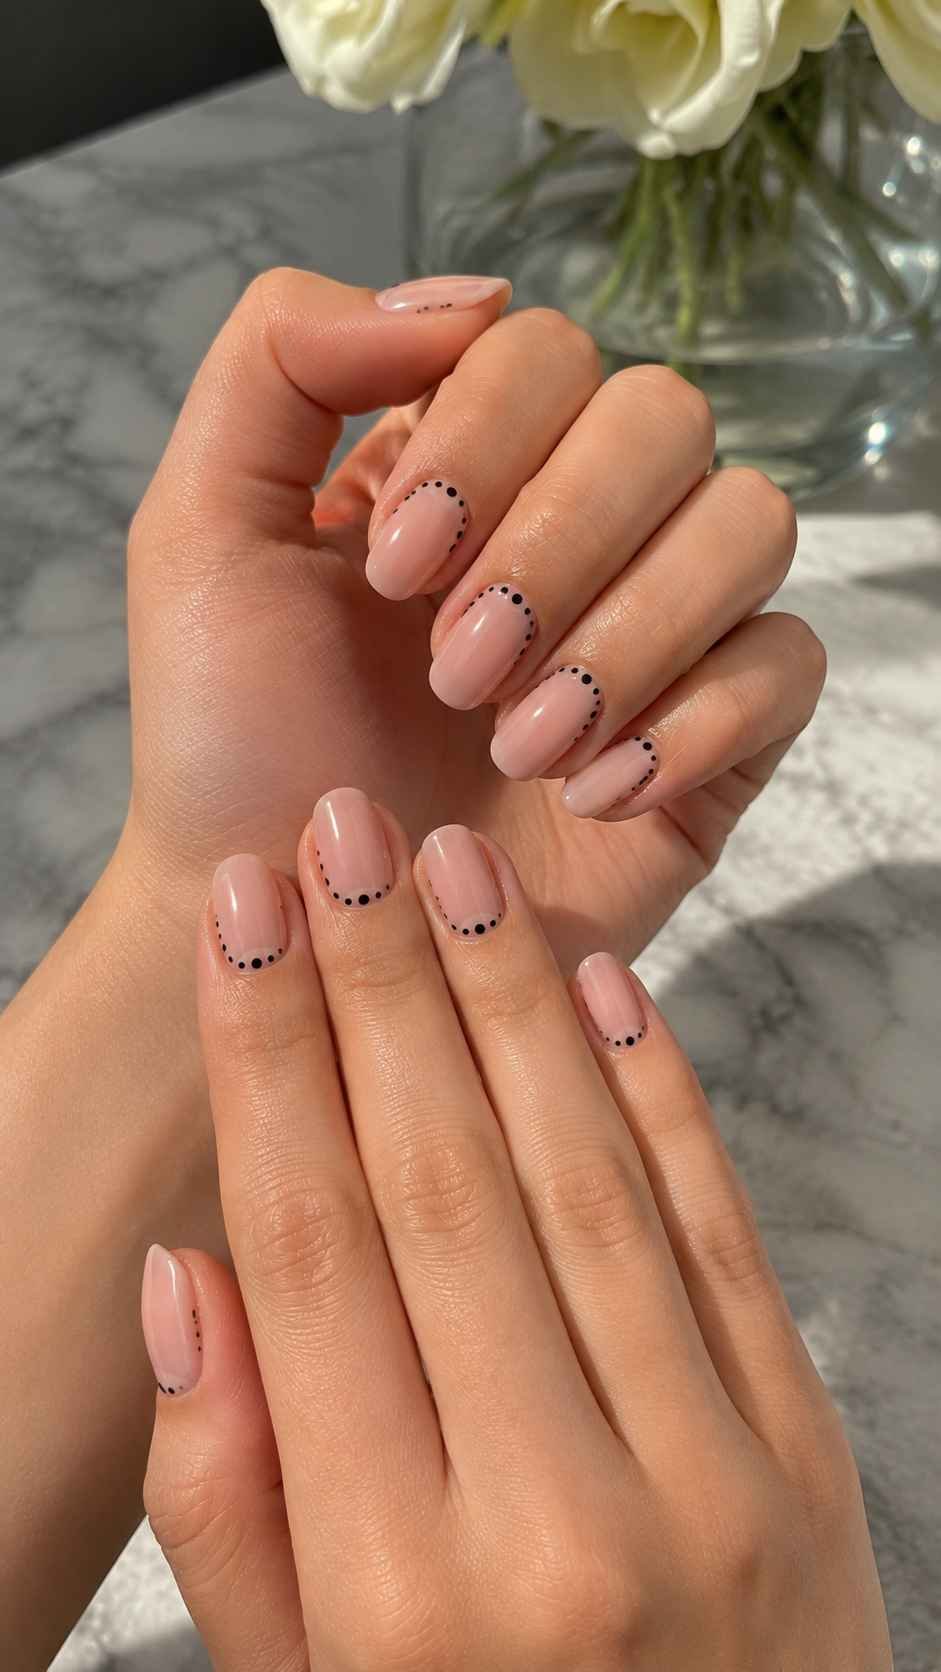
Create a dotted half moon near the cuticle instead of decorating the tip. Place evenly sized circles along the natural curve while leaving a small gap from the skin. Deep red over blush feels classic, while blue over pale peach looks fresher. This low placement adds detail without reducing the visible length of short nails.
Tonal Bubble Clusters
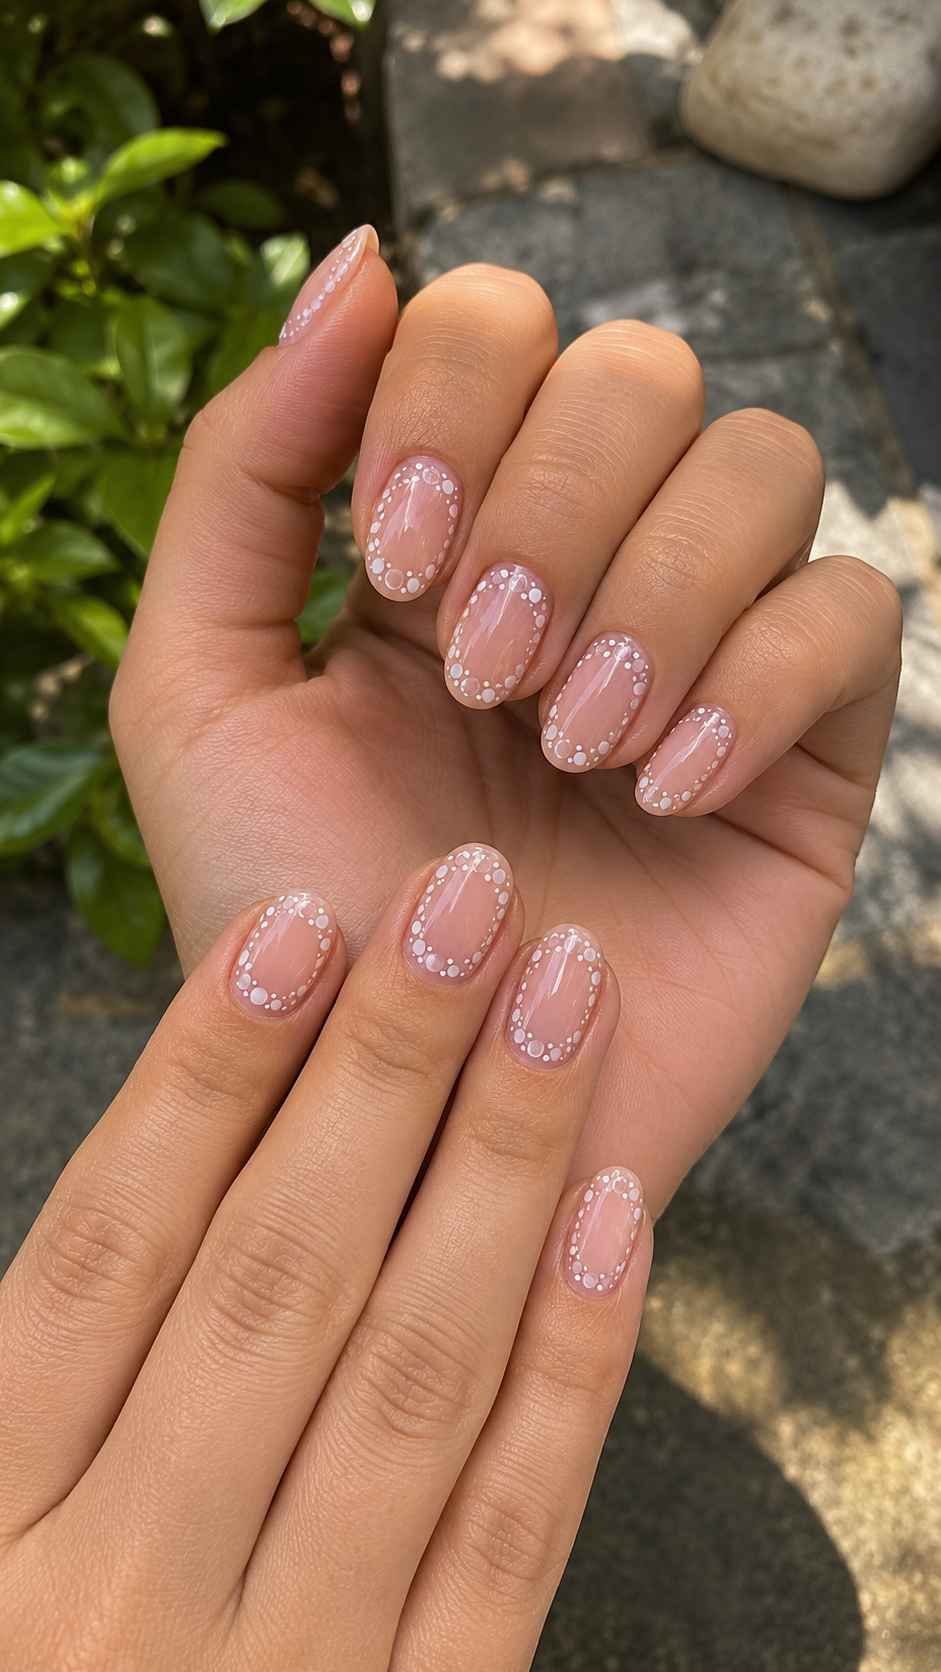
Choose three shades from one color family and form a small cluster near one corner. Combine powder blue, denim, and navy, or rose, berry, and burgundy. Place the largest dot in the center and surround it with smaller circles. Move the cluster to a different corner on each finger while repeating the same colors.
Marbled Scarf Swirl Nail Polish Designs
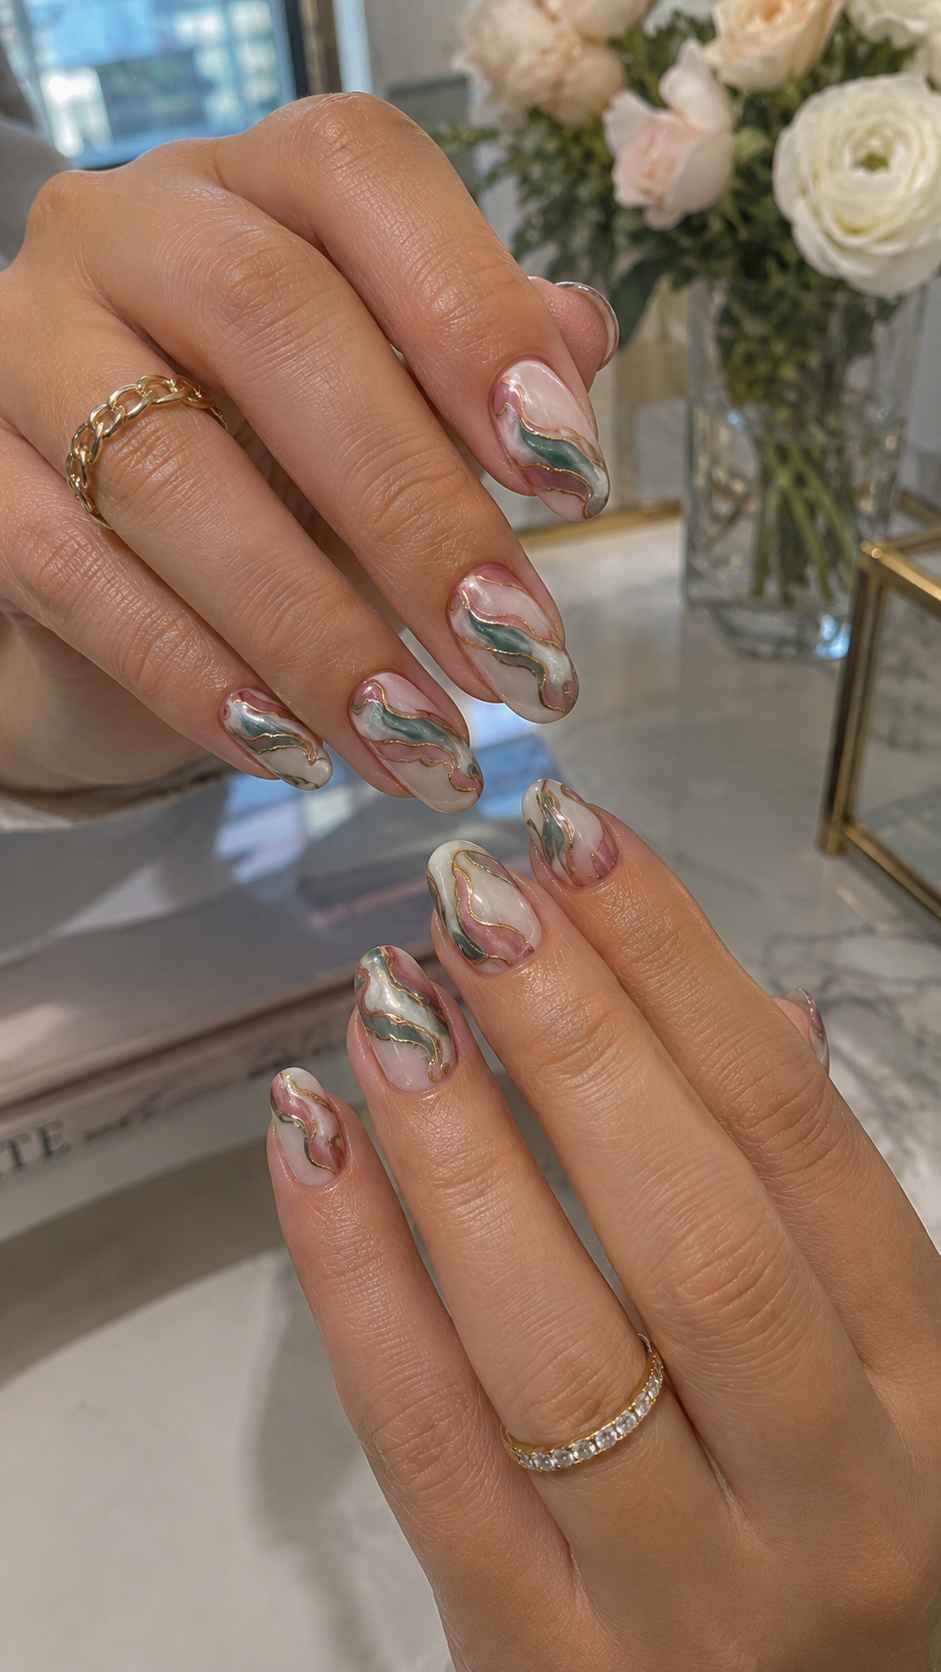
Marbled scarf swirls bring sweeping curves, rounded loops, and unexpected color combinations to the manicure. Unlike traditional marble, each band remains visible so the pattern has direction. A fine brush helps pull polish into long waves without blending everything together. Limiting the palette to three or four shades keeps the artwork expressive while allowing each color to remain clear.
Citrus Wave Ribbons
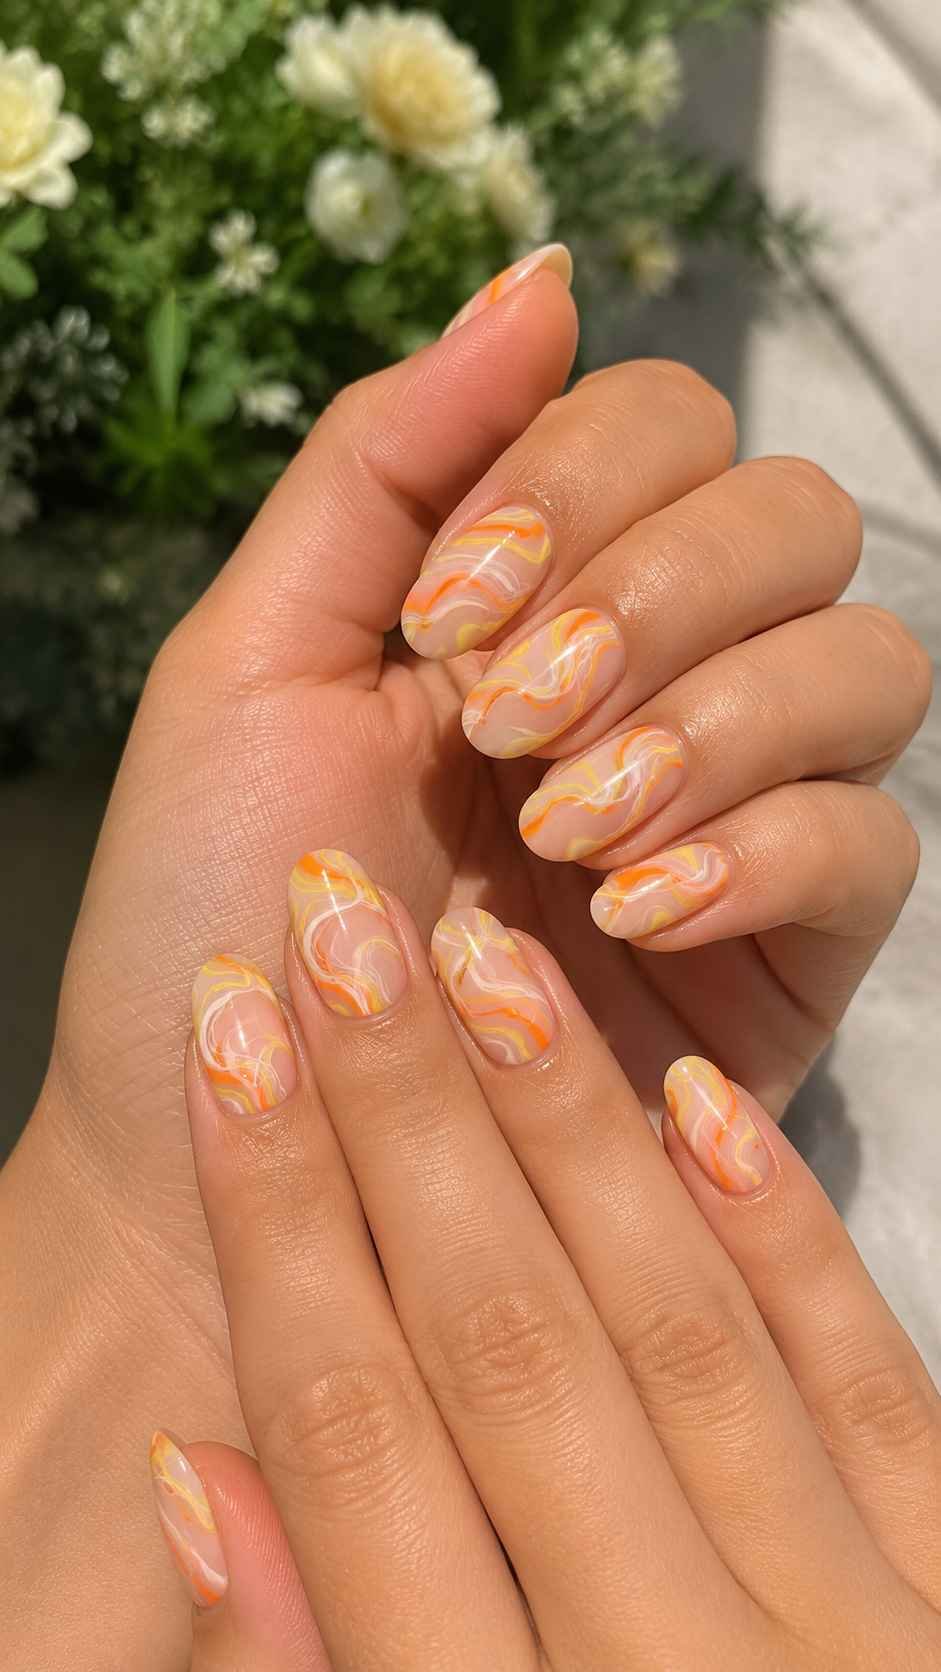
Paint curved ribbons in lemon, orange, coral, and creamy white over a pale peach base. Let some bands widen while others narrow near the edge. The warm shades create energy, and the cream provides visual rest. Use the pattern on a few accent nails and finish the remaining nails in solid coral or soft orange.
Berry Paisley Currents
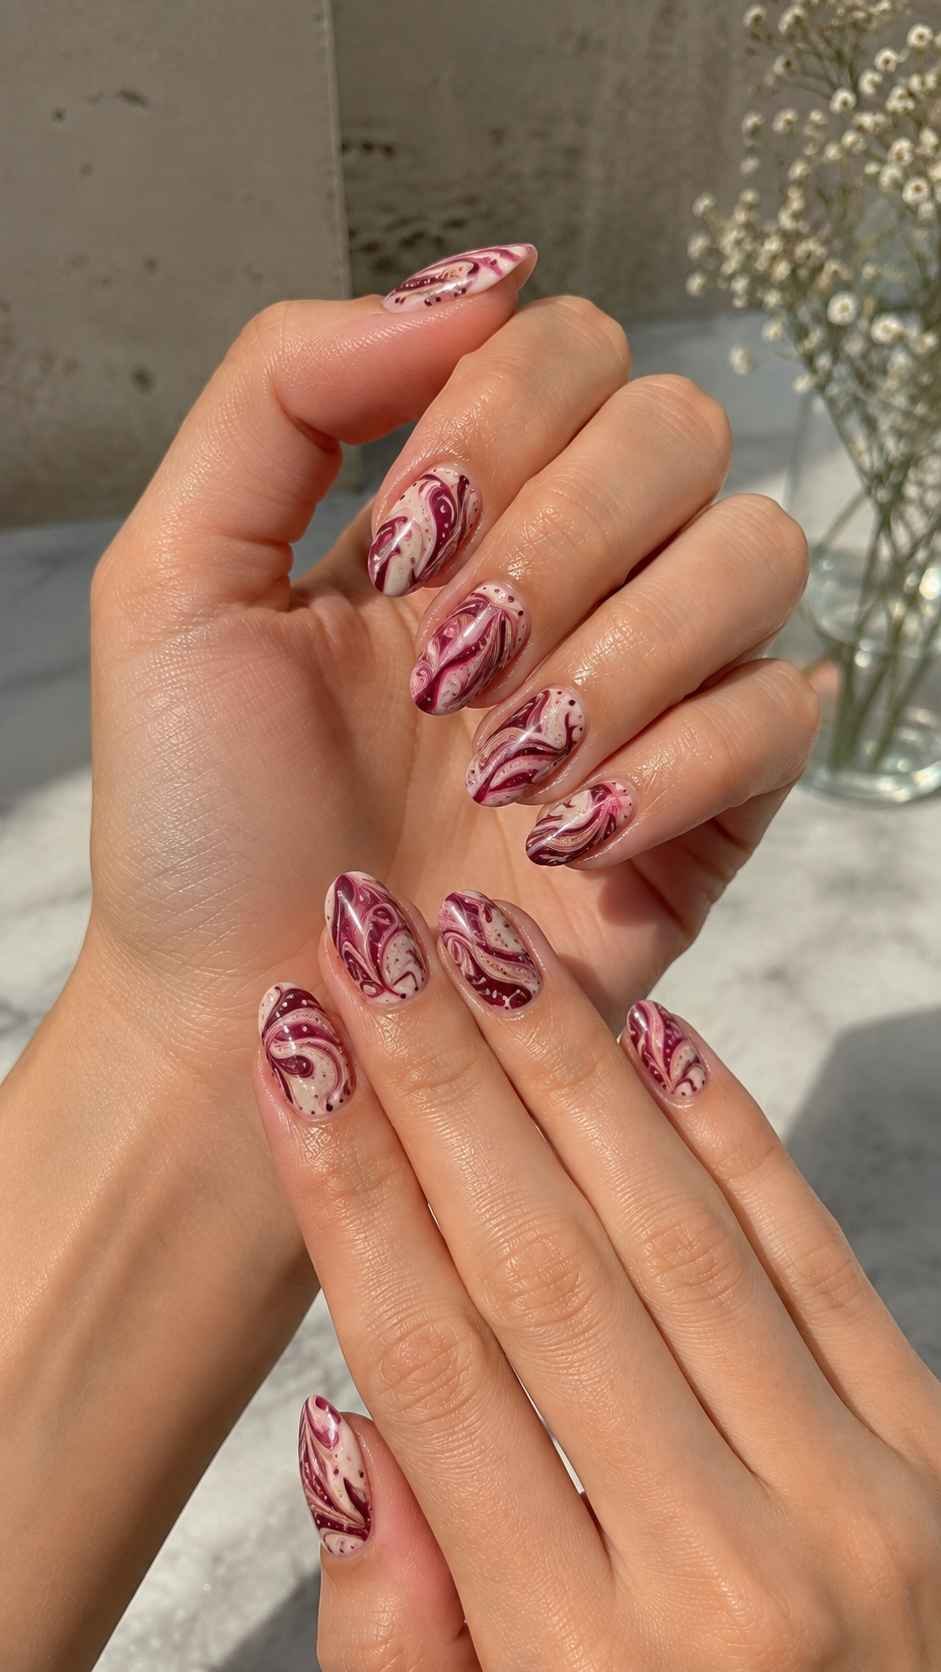
Combine raspberry, plum, blush, and deep wine in rounded flowing forms. Begin with one curved teardrop, then add slim bands that echo its outline. A few tiny dots inside selected curves create rhythm. Keep a translucent pink base visible between the shapes so the darker shades feel rich and elegant rather than dense.
Cocoa Cream Loops
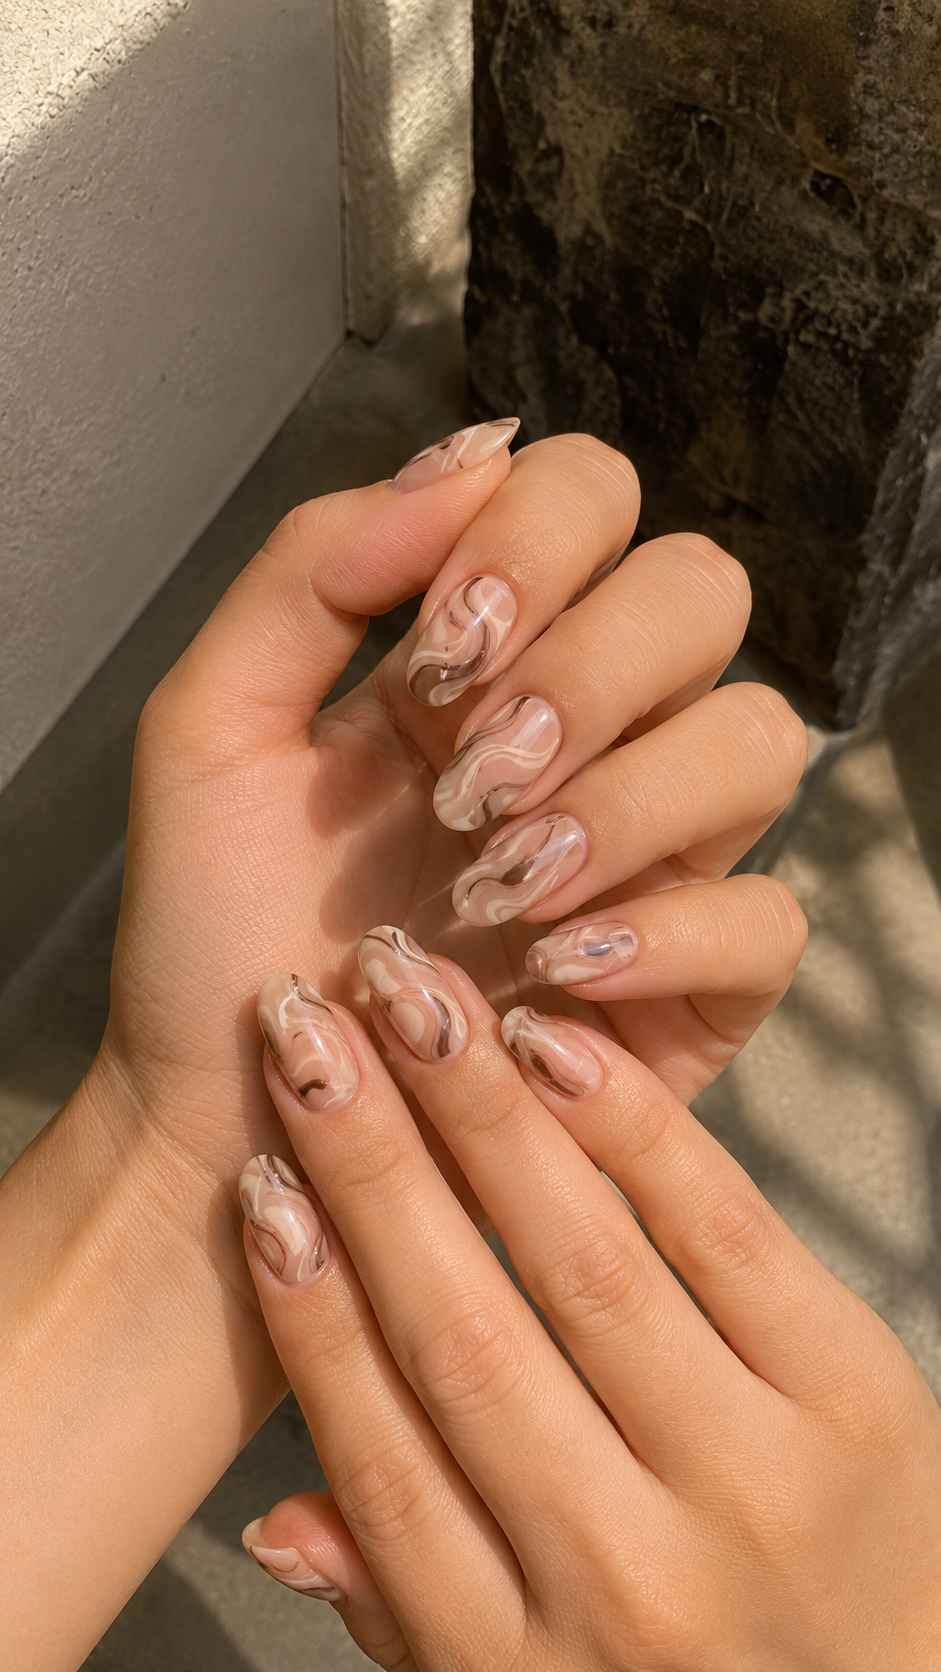
Use espresso, caramel, oat, and soft white for a neutral swirl with noticeable movement. Paint broad caramel curves first, then add thin espresso lines and small white spaces. Leave portions of the base visible so the pattern stays balanced. This warm design pairs naturally with denim, tailored neutrals, simple dresses, and soft knitwear.
Textile Detail Nail Polish Designs
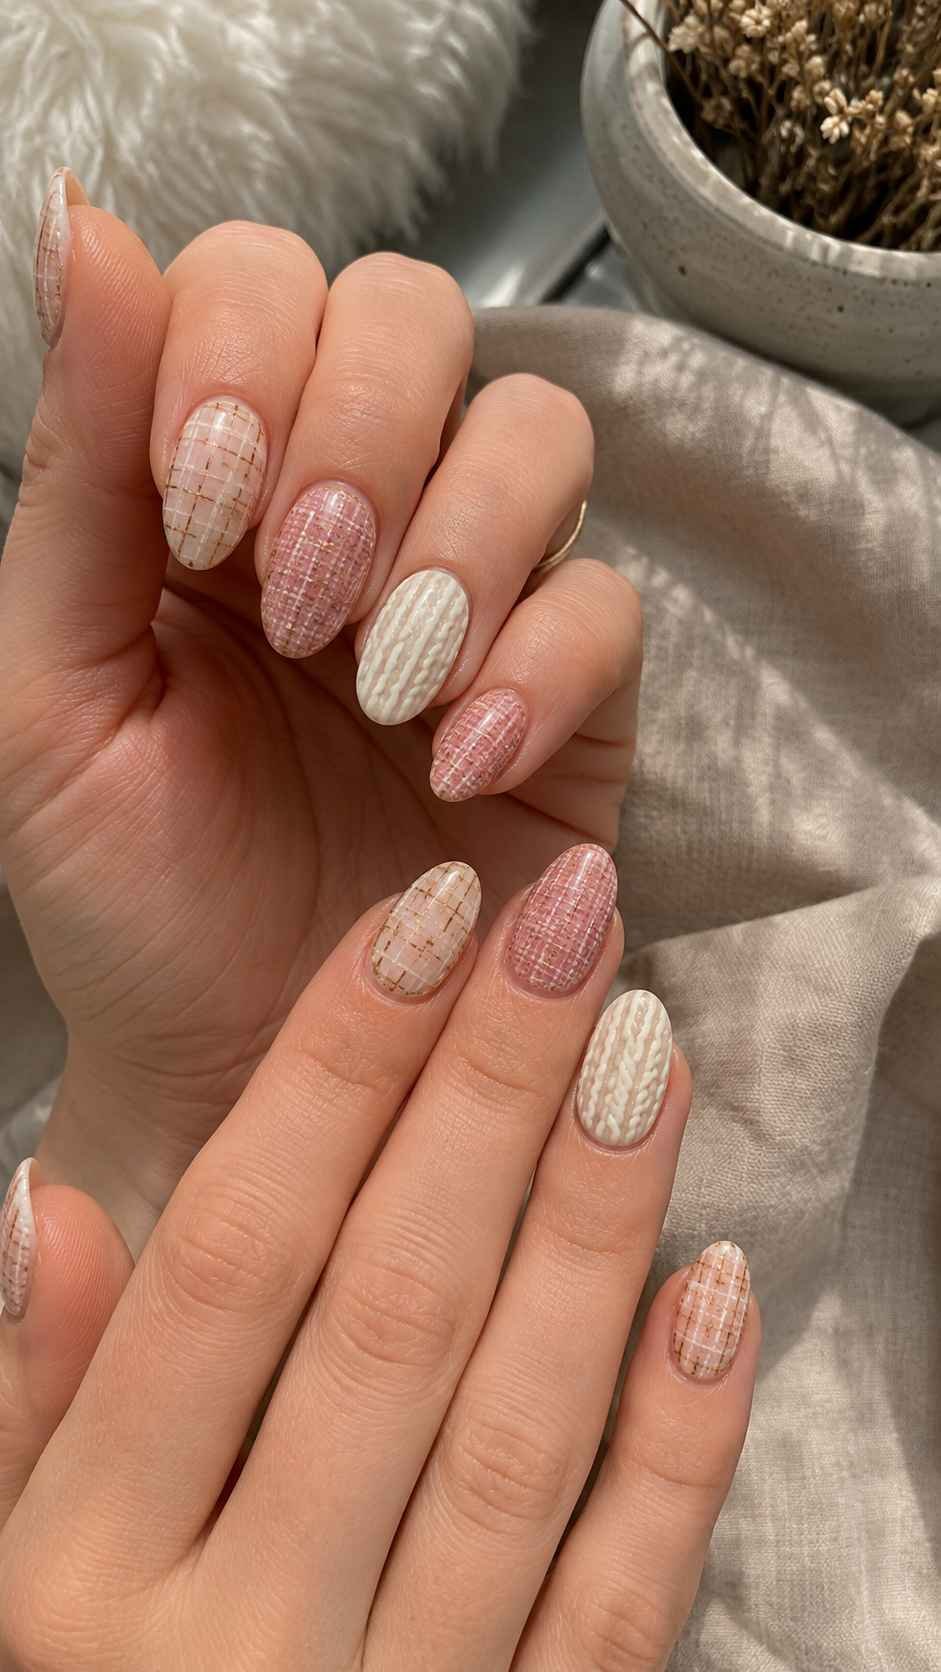
Textile detail nails translate woven lines, tiny checks, and stitched borders into manicure art. They offer a structured alternative to florals and flowing patterns. Fine brushwork matters because the charm comes from small repeated marks rather than thick blocks. A creamy base makes the detail easier to see, while selective accent nails keep the manicure polished and comfortable.
Woven Crosshatch Panels
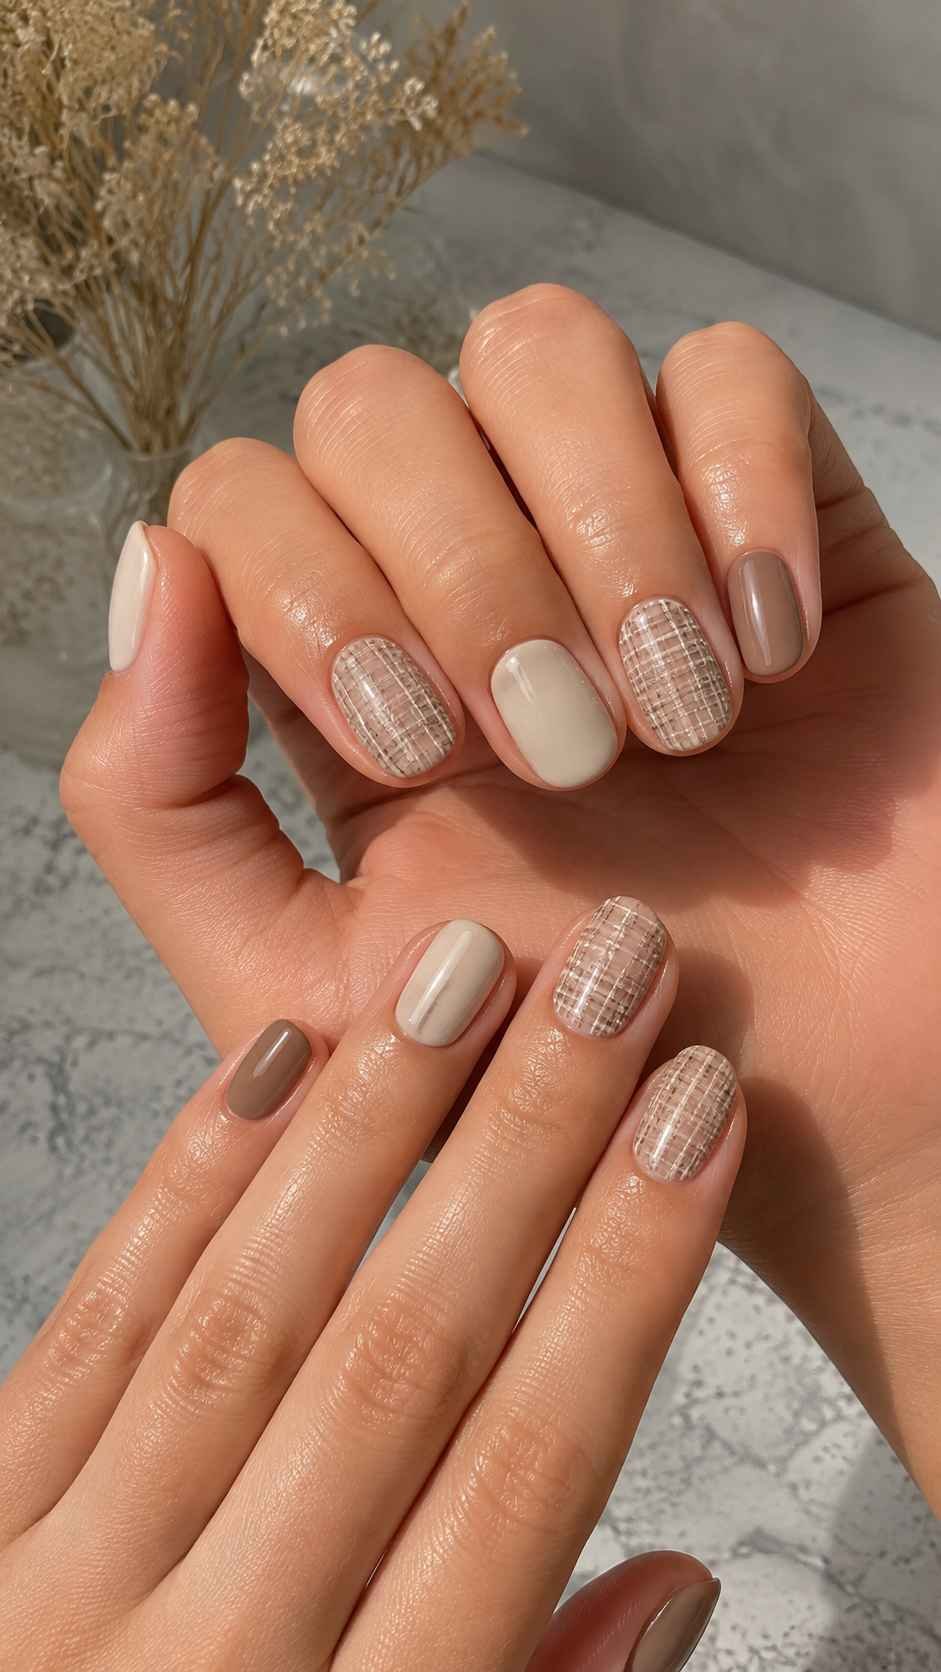
Paint a narrow rectangular panel on one side of the nail, then fill it with intersecting vertical and horizontal lines. Burgundy with rose or forest green with sage creates depth without crowding the pattern. Leave the rest of the nail in a soft solid shade. Change the panel position across the set for controlled variety.
Micro Plaid Corners
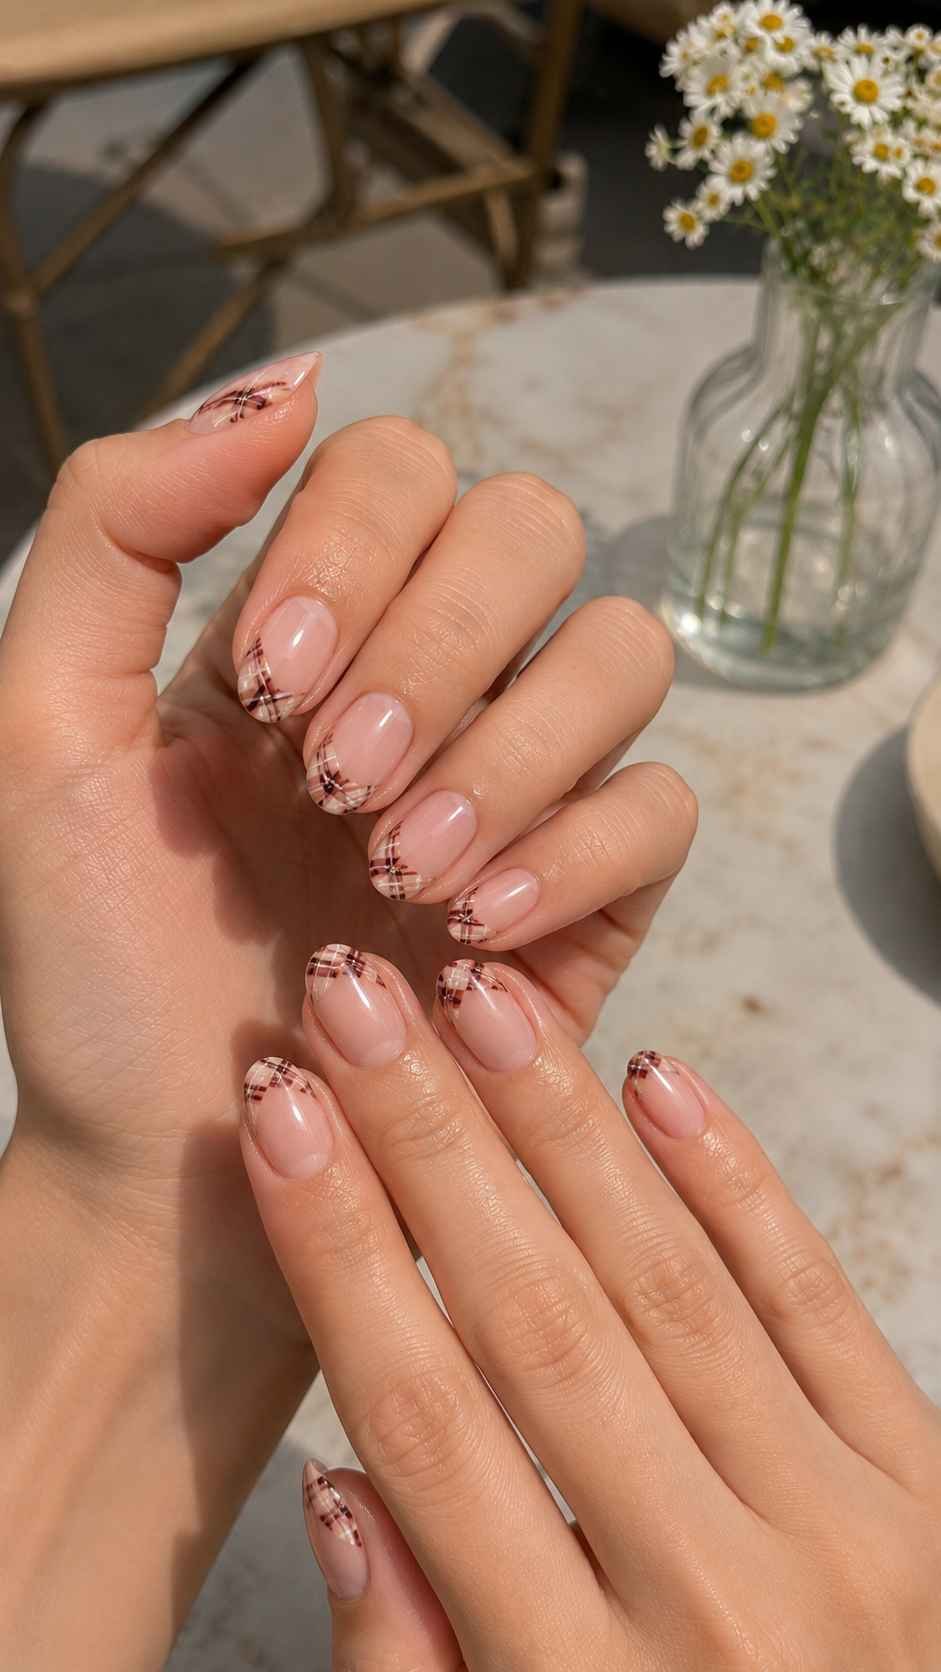
Build a small plaid detail in one corner using thin crossing lines and one slightly wider band. Keep the pattern compact so it resembles a neat fabric patch. Navy, cream, and tomato red look crisp, while lavender, gray, and plum feel softer. Rotate the decorated corner across the manicure to avoid a repetitive arrangement.
Satin Stitch Borders
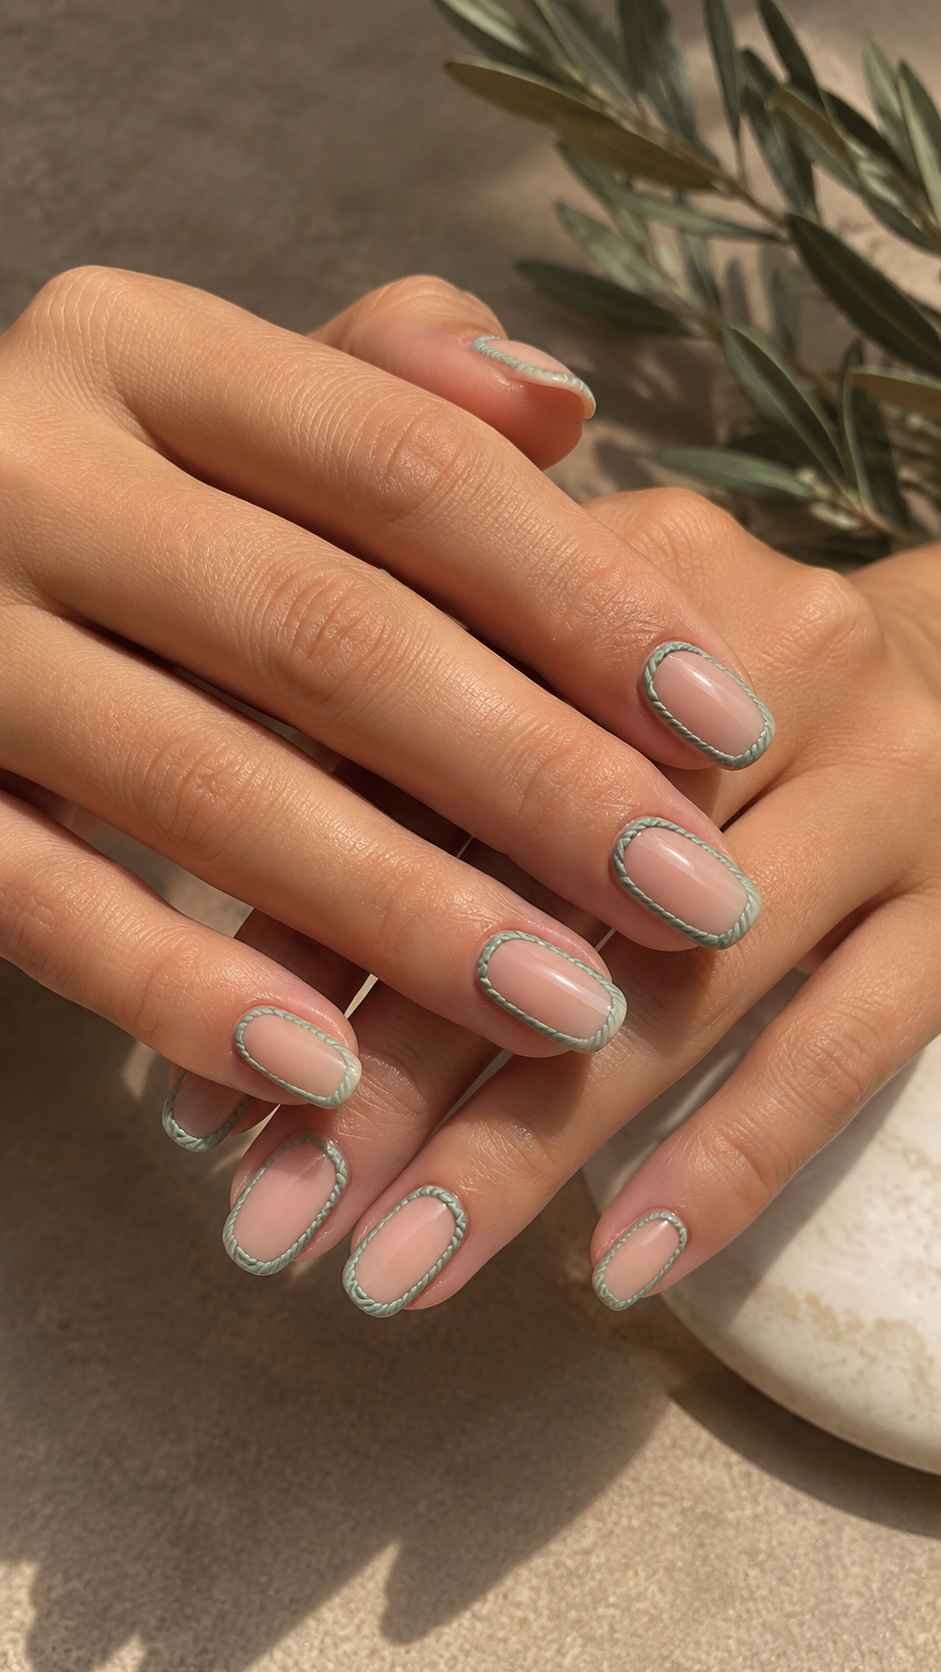
Paint a fine border around part of the nail and add tiny perpendicular marks to imitate stitching. Follow one sidewall, curve around the tip, or outline a diagonal color section. Use contrasting shades such as white over cobalt or pale pink over berry. Even spacing and similar line lengths make the crafted detail look intentional.
Find Your Next Nail Polish Design Obsession
Memorable nail polish designs do not require endless decoration. A transparent tip, one vertical ribbon, a juicy sorbet layer, a dotted frame, a sweeping scarf curve, or a stitched border can completely change a manicure. Choose the idea that suits your preferred nail length, begin with a limited color palette, and adjust the placement until the result feels personal. These concepts can also lead naturally into related articles about nail colors, short nail ideas, manicure shapes, seasonal palettes, and simple nail art. Every polished detail offers another way to make your next manicure feel fresh, creative, and unmistakably your own.
